
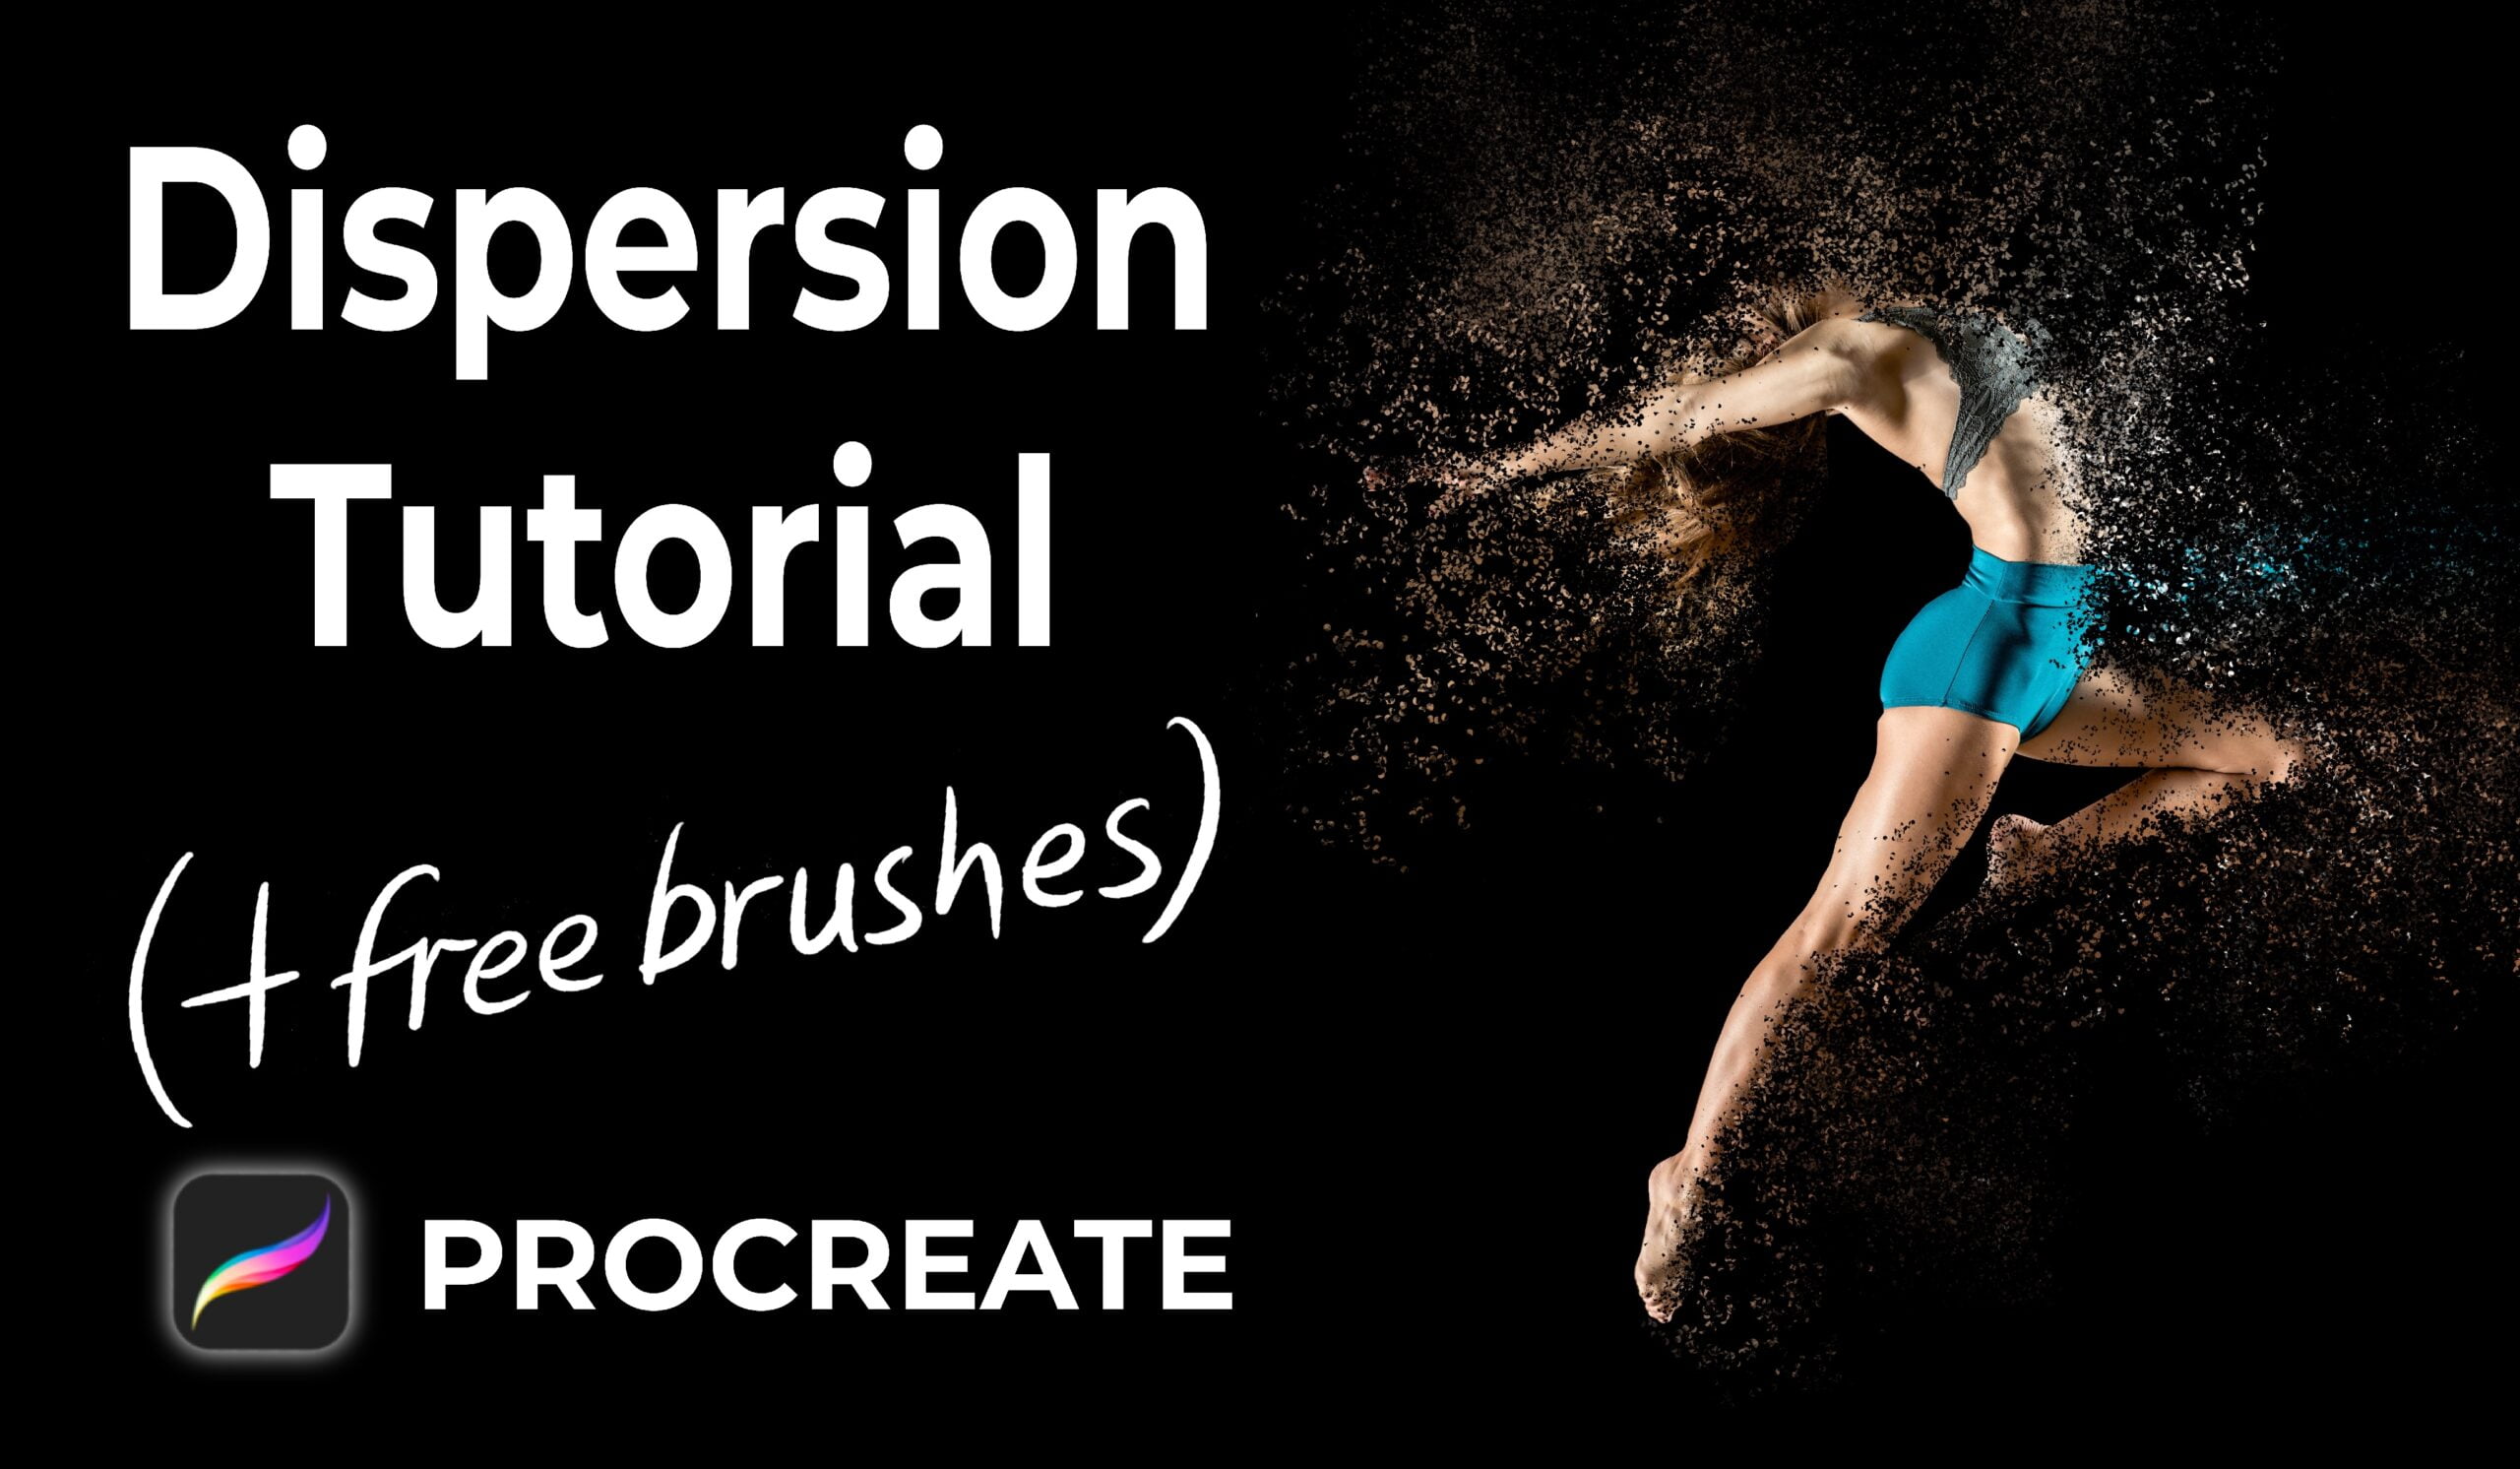
Creating a dispersion effect is a super easy, fun (and rather impressive I might add!) way to make an impact with your artwork. The technique is very common in photoshop. In today’s tutorial I will be explaining how you can create a dispersion effect in procreate, using custom brushes.
Links to the free assets used:
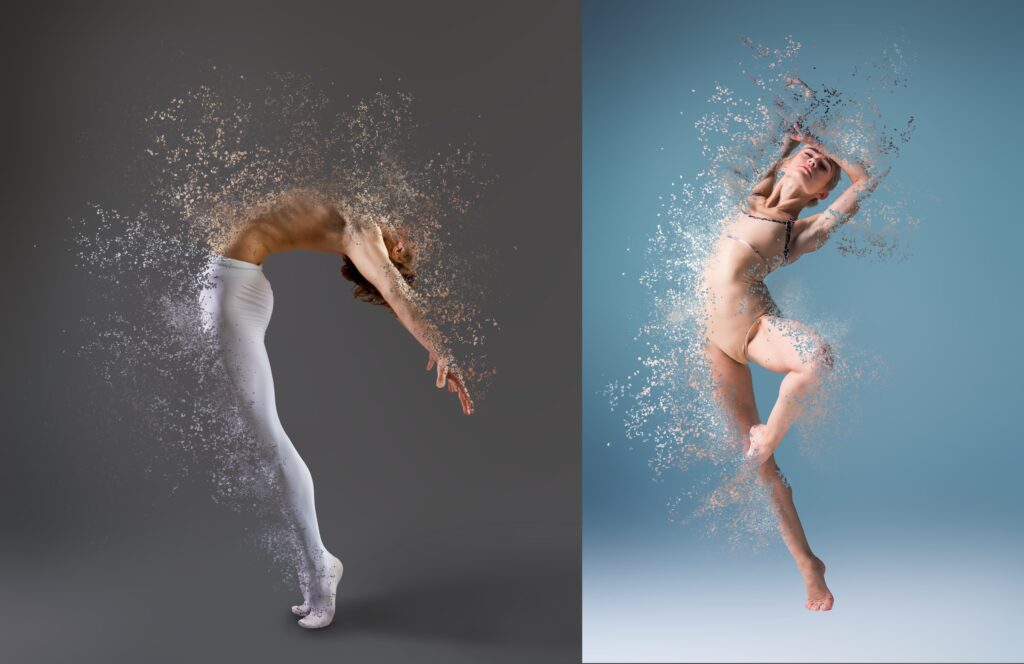
Model: https://unsplash.com/photos/90v3asMhhL0
Brushes: https://gum.co/xShxv
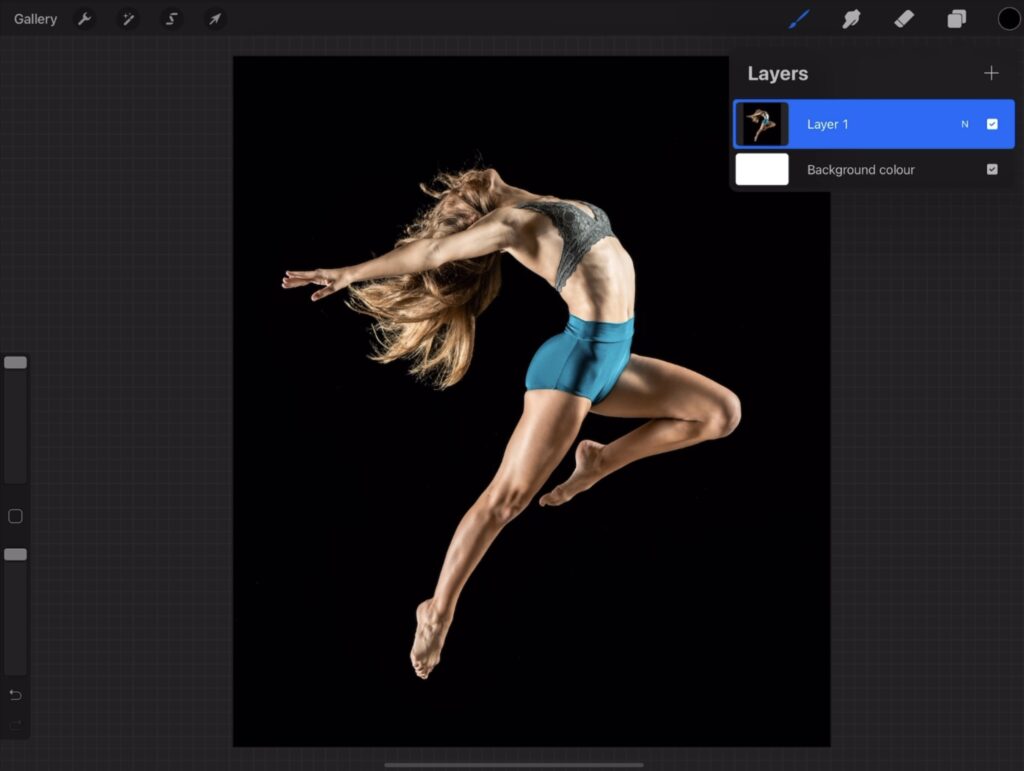
So, this is our initial image, which I already loaded to procreate.
First step is to isolate the model from the background. (Actually, this step is not necessary here, because the background is plain and monochromatic, and we can skip it altogether. However, the step is mandatory when the background is complicated, so I am showing the whole process.)
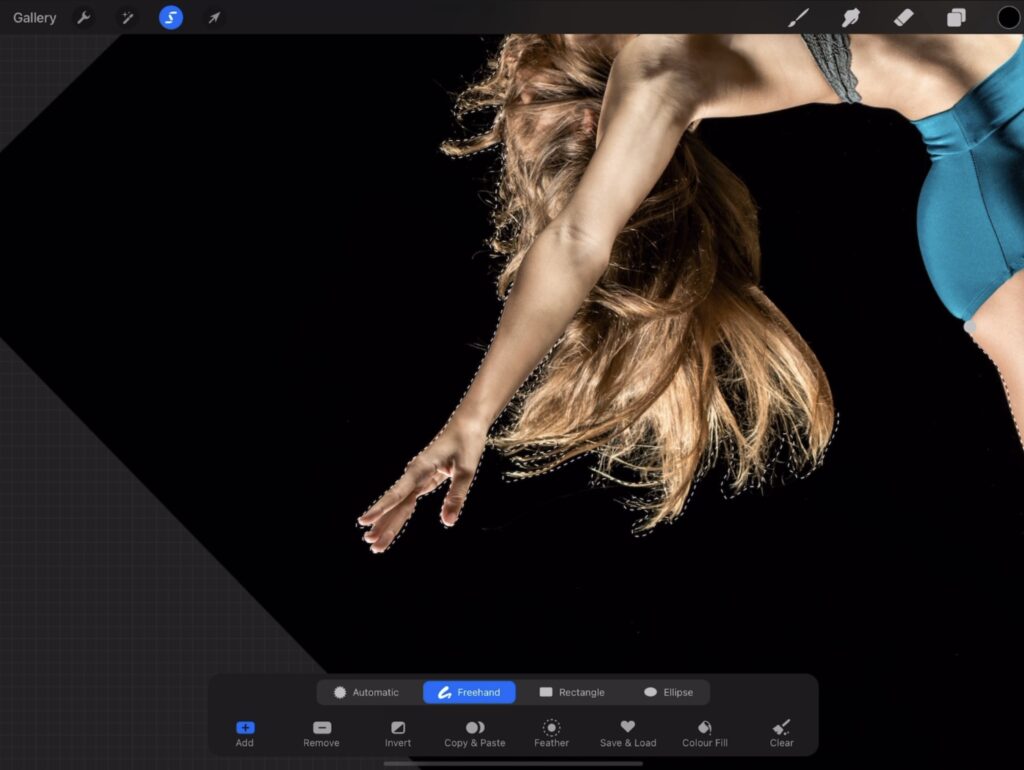
I take the freehand select tool as shown above, and trace the outline as closely as I can. When I finish, I tap “copy and paste”. This copies the selection (=the model) on a different layer, as you can see below.
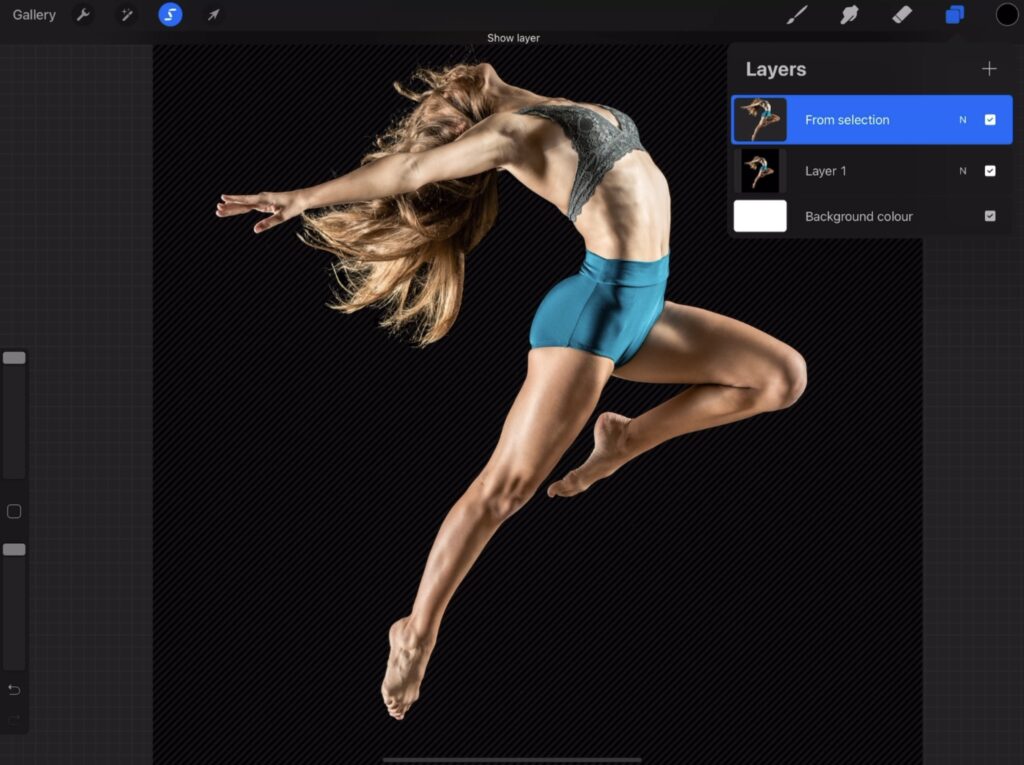
Then I go back to the bottom layer (the layer with both model and background) and erase the model. (Here it is quite easy, I just paint on top with a black color. However, it generally requires more effort with a more complicated background but … I hope you get the point!)
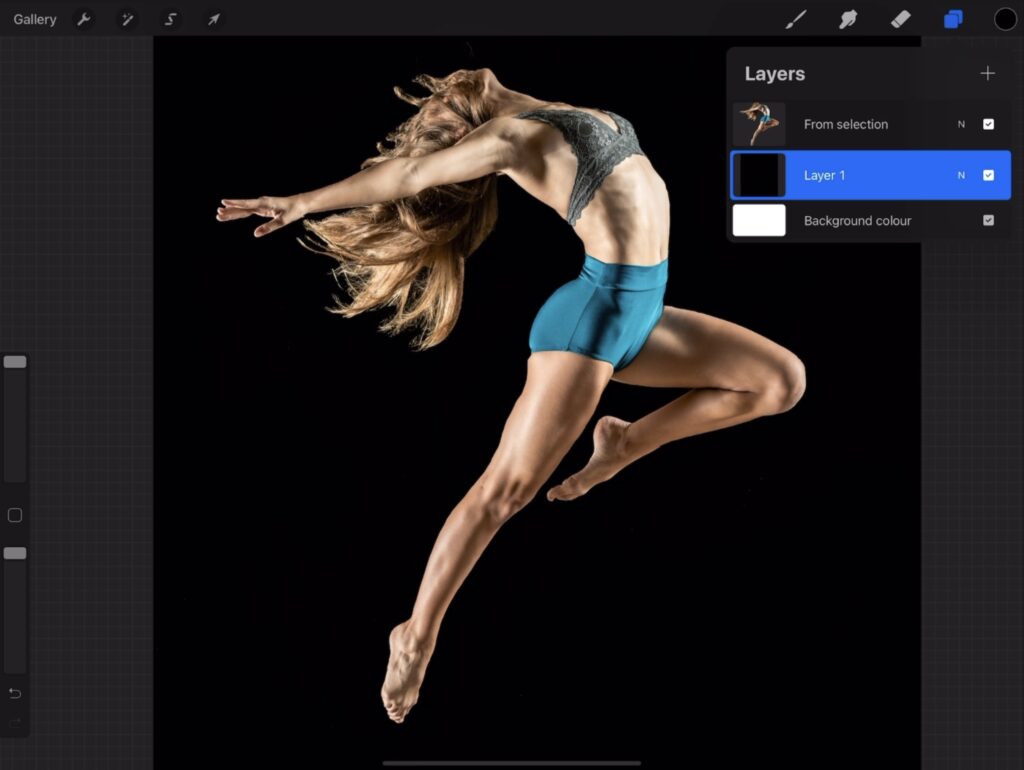
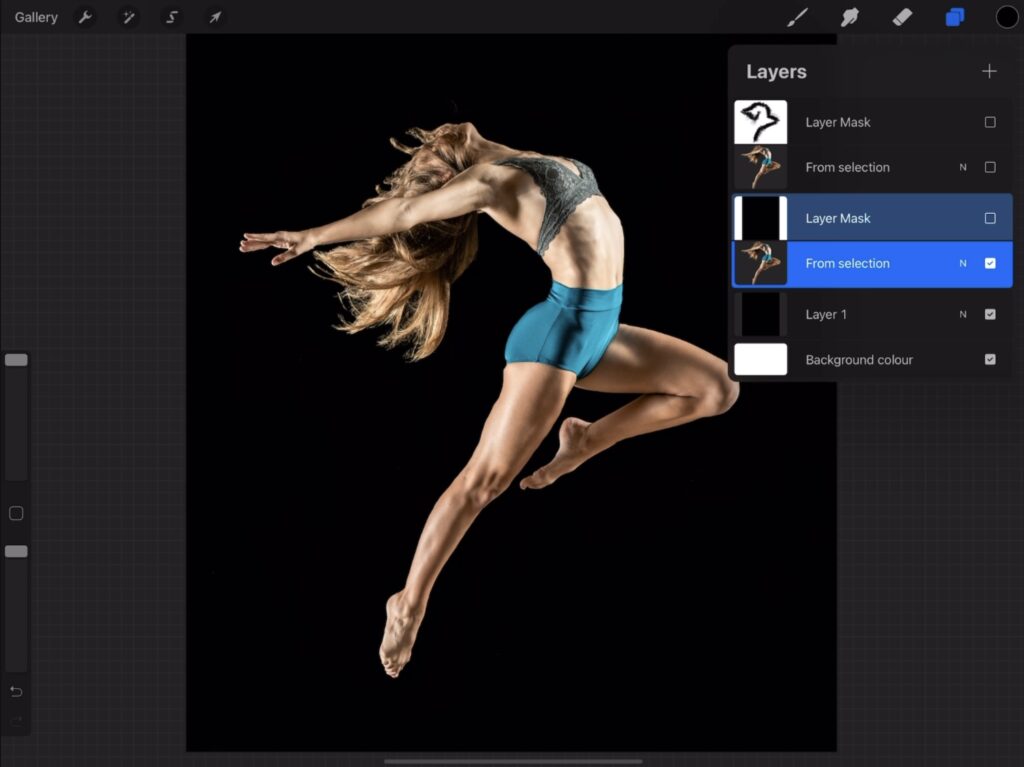
Anyways, now I’ve got two individual layers, one just with the model and one just with the background. I duplicate the model layer and I add a mask on the top layer.
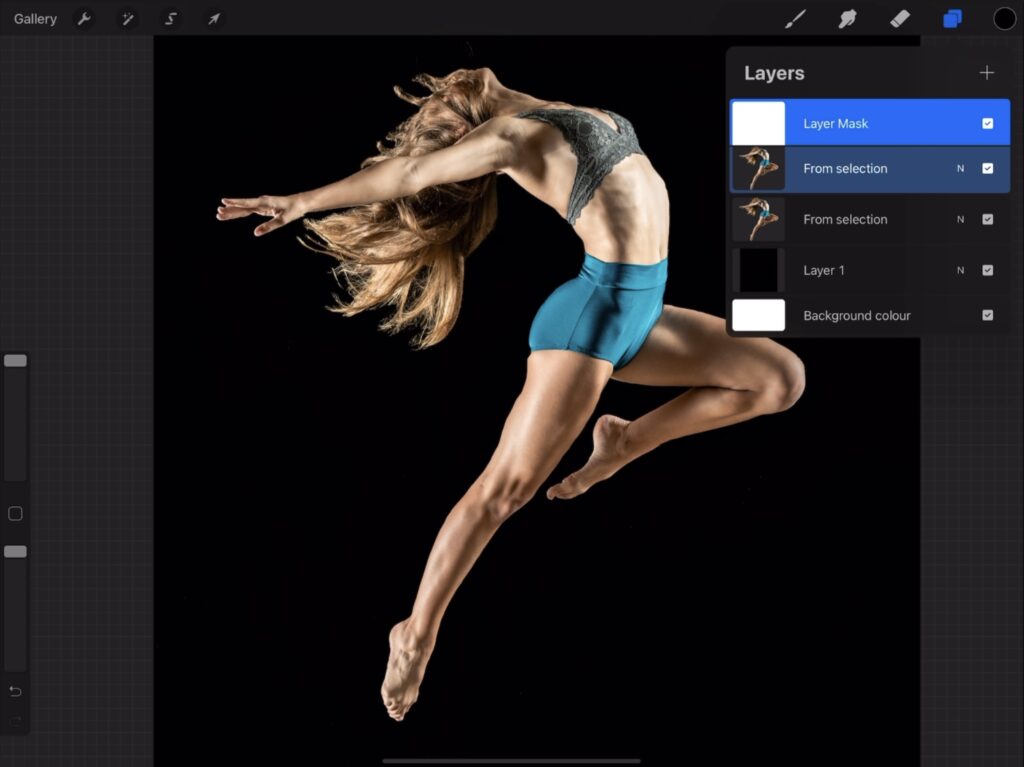
As you can see, the mask is white by default. What I wanna do is take a dispersion brush, and with a black color paint the edges of my model on the mask layer.
I stop when my image looks something like this:
A quick note about layer masks here. Using a mask has the advantage that all work you do (on the mask) is not destructive to the image below. You can paint on the mask (I won’t go on details here, suffice to say that white on a layer mask makes the layer visible, whereas black on a layer mask essentially “erases” the layer) and the photo below stays as is, making it easier to correct things if something goes wrong etc.
I then go back to the first model layer, and add a layer mask here as well. This time I fill the mask with black.
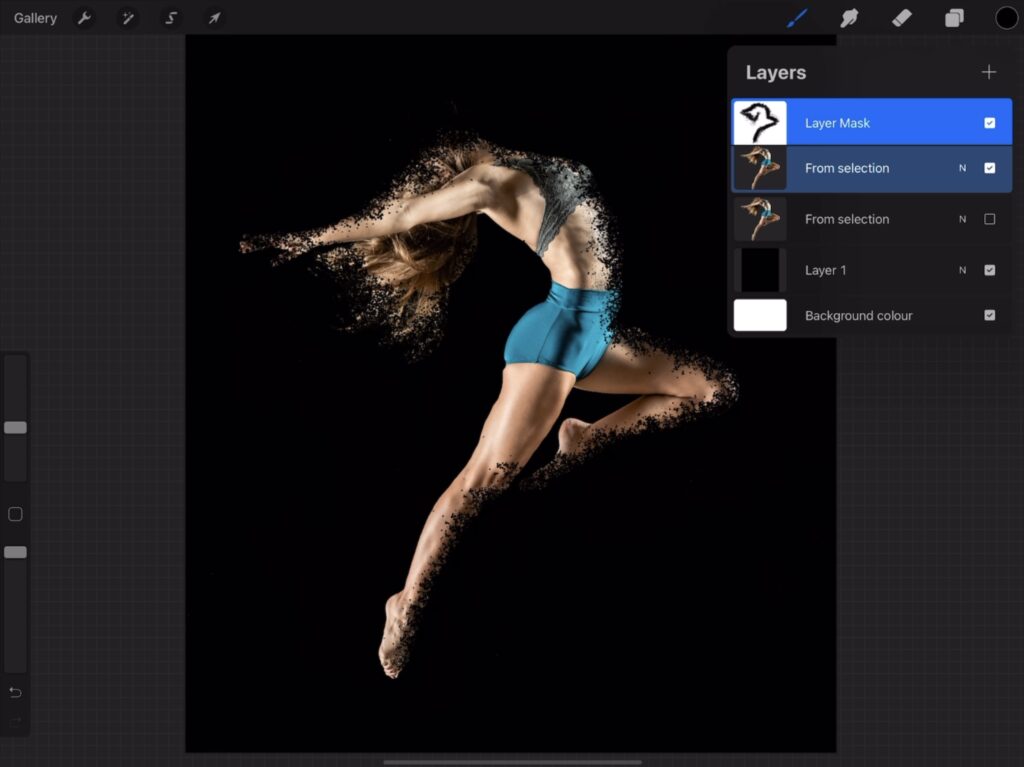
I un-click all layers to make them invisible, all except the bottom model layer. I will work on the model, essentially “smudging” the whole image towards the direction of the dispersion. In our case, this is outwards. So, I am firstly using the “liquify” tool, to pull the model outwards.
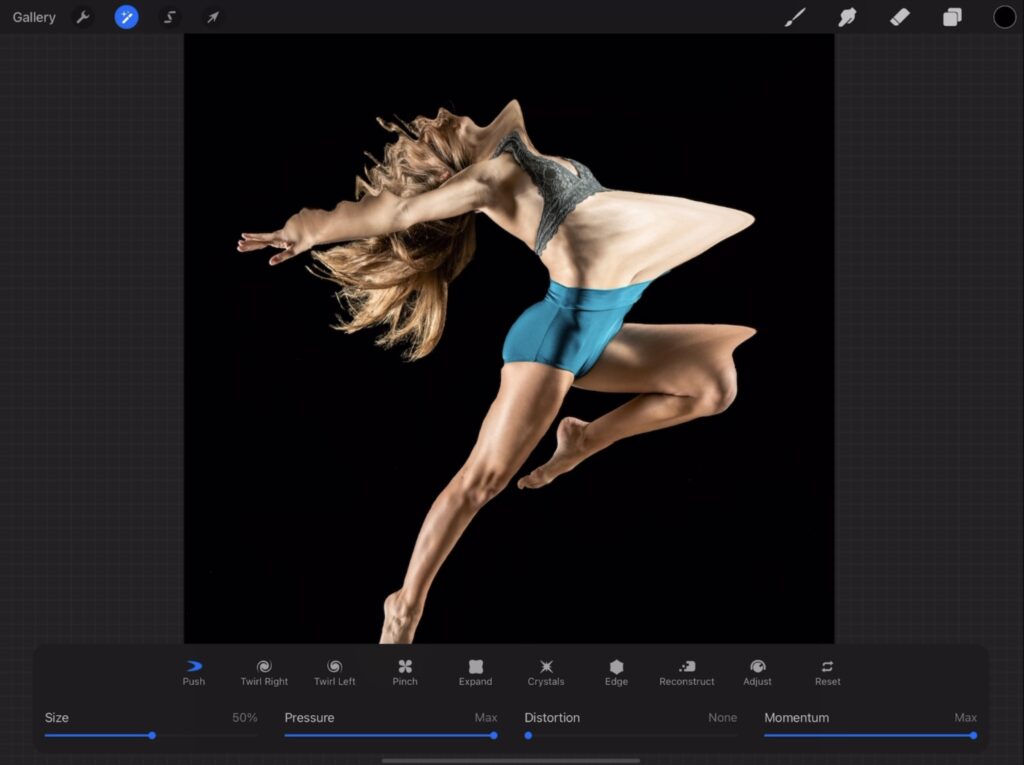
To exaggerate even further, and to polish some inconsistencies, I continue pulling my image outwards using the smudge tool. I stop when it looks something like this:
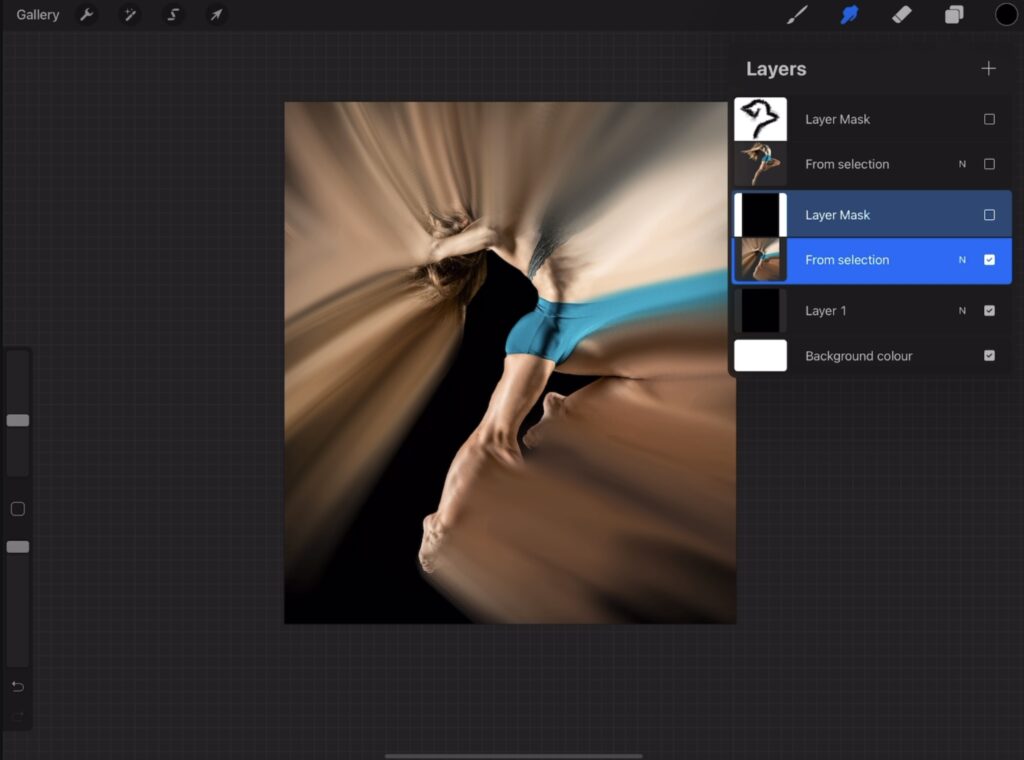
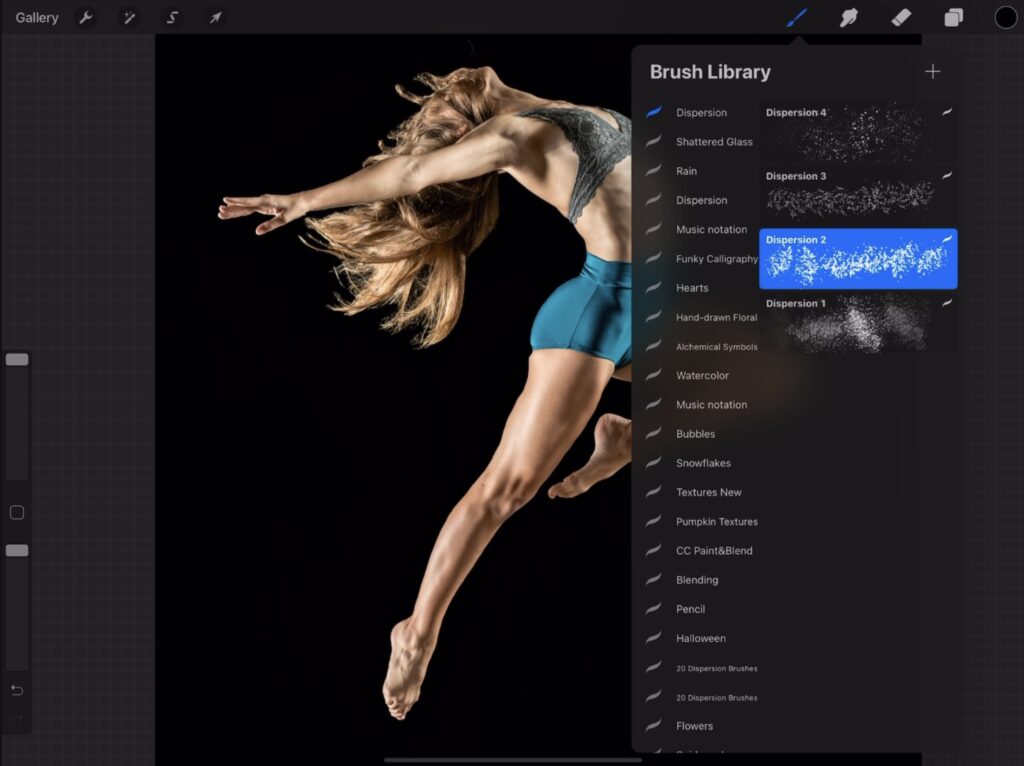
I am making all layers visible again and go to the black layer mask. With a dispersion brush and a white color, I paint on the layer mask, creating particles towards the direction of the supposed dispersion. I eventually have something like this:
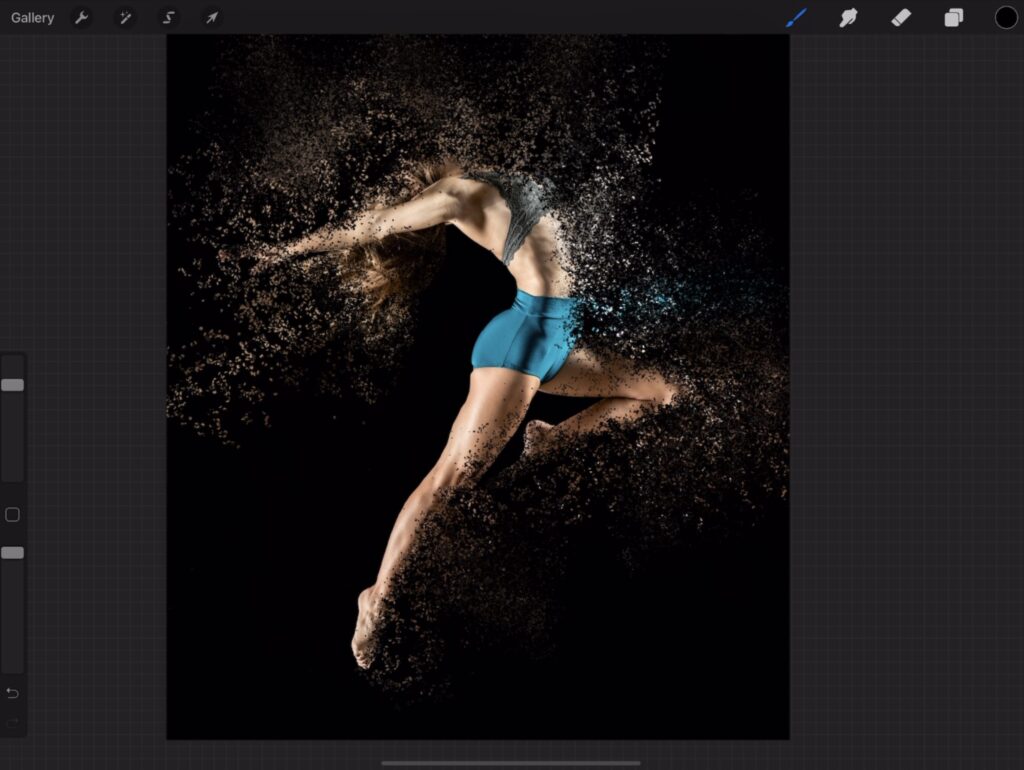
And that’s all! I love this technique, it instantly creates a dramatic effect and adds a “wow” factor. Hope you enjoyed this tutorial, stay tuned for the next one!
 Art discussion
 The future of Art (or why AI won’t take over)
 Colored Pencils
 My 5 top High End Artist Grade Colored Pencils
 Acrylic Markers
 Ohuhu Acrylic Markers Review
 Colored Pencils
 Woomer Art Colored Pencils Review
 Graphite
 Staedtler Mars Lumograph Black Review
 Arrtx
Arrtx