
Happy New Year everyone! Time flies! We just survived the second COVID-19 lockdown here, and now that kids are back to school it’s time for me to start writing again.
We have a saying in Greece: “Shoemaker’s kids have no shoes”. And my talented web-developer husband, after having created websites for everyone else, found some time for my own! So, I have a new website now! And yeah, 2021 is officially rebranded!
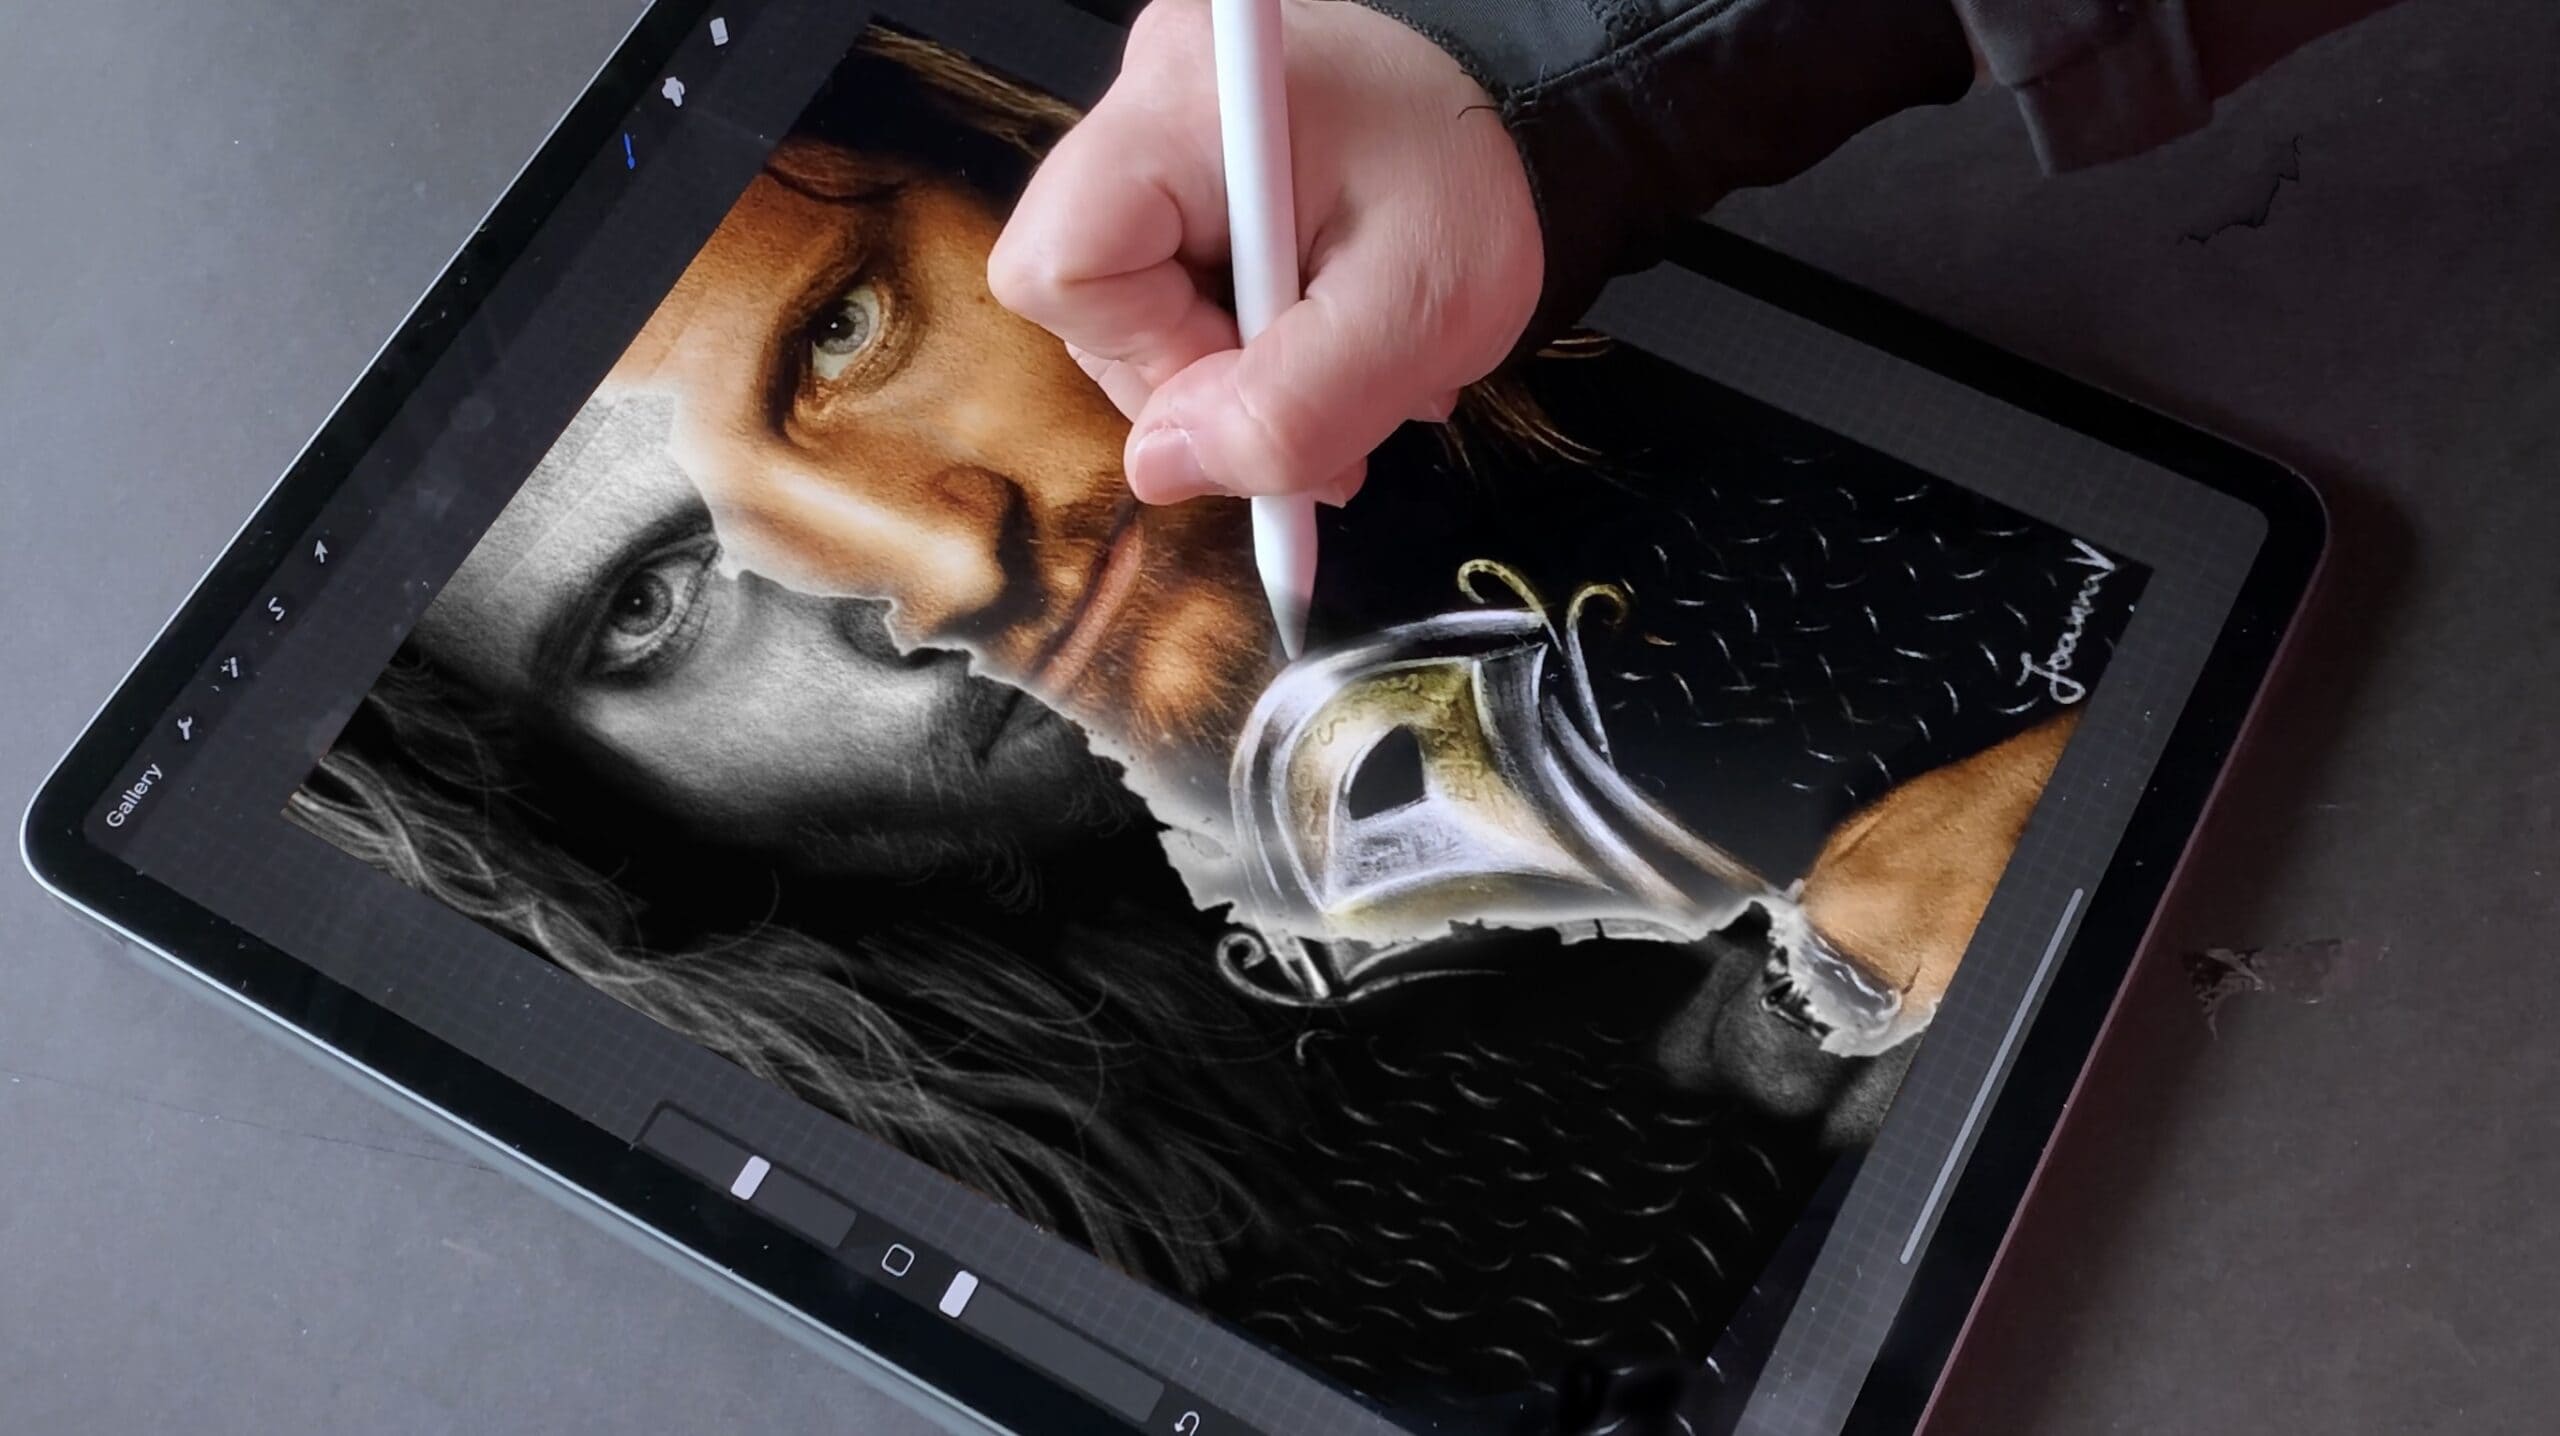
Anyways, today I have a tutorial for you, how I add color to my grayscale portraits in procreate.
Create the color palette
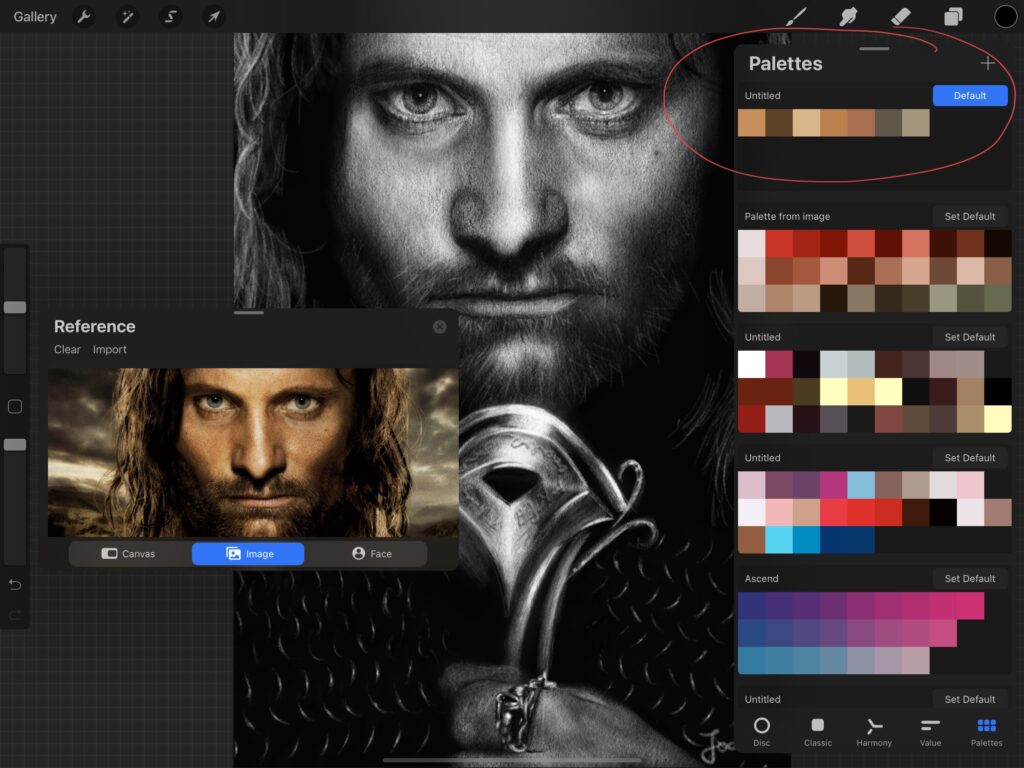
Before the actual colorizing, I load my reference photo if there is any. (actions->canvas->reference) I create a new color palette where I save selected colors from my reference. I try to choose the most representative colors.
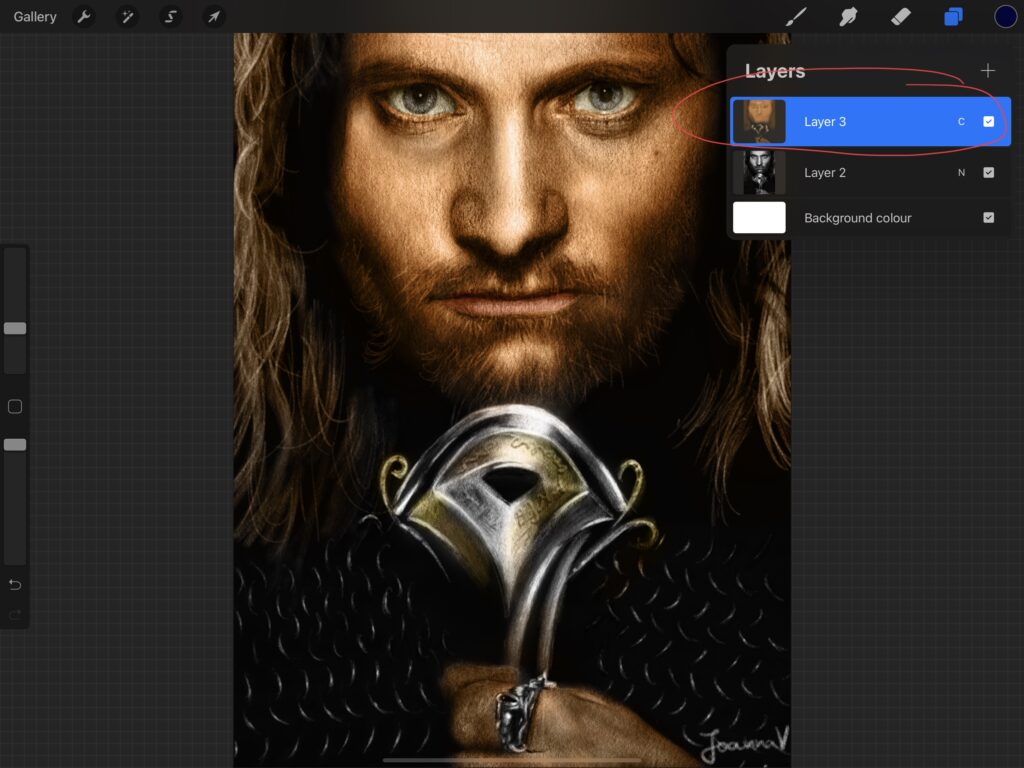
Add a “color” layer
Having my colors ready, I start off with my grayscale image and what I do next, is add a new layer and set layer mode to “color”. Then I paint on top with a soft paint brush, such as the default soft airbrush. The process is similar to when painting from scratch. I try to blend, mix and match the colors, in order to make the image as realistic as possible.

An extra tip
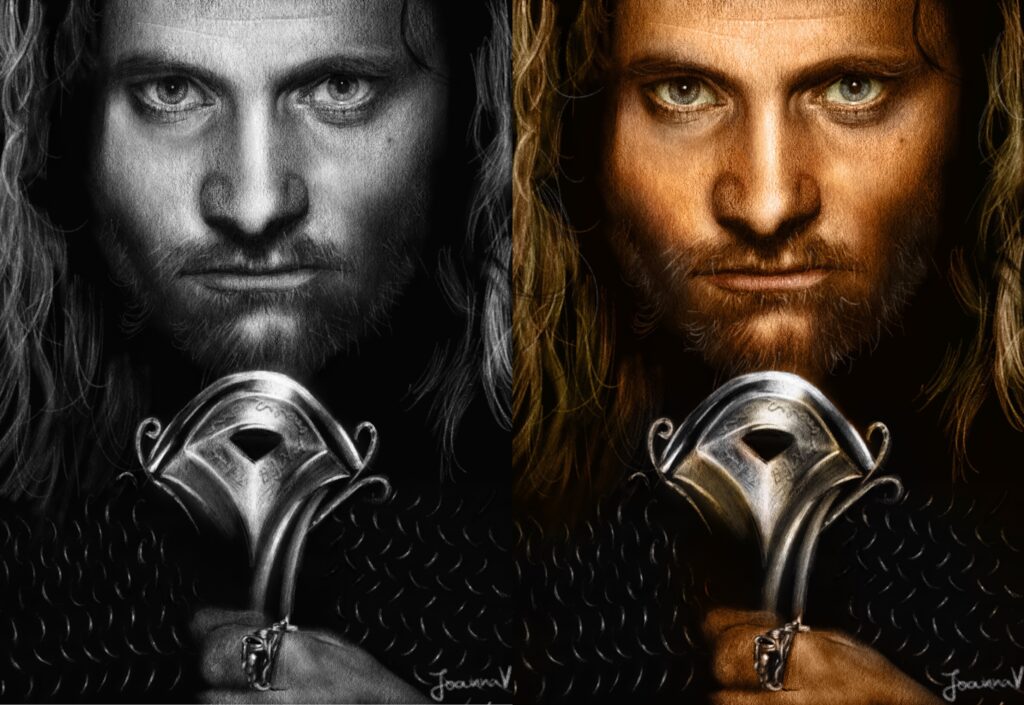
We can leave it here and call it done, but what I like to do is add a couple of extra layers on top. I set the first one to “multiply” mode, where I paint over the dark parts to make them darker and add depth.
And I set the second layer to “overlay” mode, where I paint over the bright parts with a bright color, to make high points stand out.
And that’s all! Grayscale to color with minimal effort.
 Fonts
Fonts Fontself for iPad Review – vol2
 Art discussion
 The future of Art (or why AI won’t take over)
 Colored Pencils
 My 5 top High End Artist Grade Colored Pencils
 Acrylic Markers
 Ohuhu Acrylic Markers Review
 Colored Pencils
 Woomer Art Colored Pencils Review
 Graphite
2 Responses
I’m just starting out in digital painting and haven’t developed my skill in drawing or tracing on an iPad. I turned a few pictures into line art, but realized no matter how many videos I watch, I still have a lot to learn about digital painting. I did notice that some artists develop their drawings into a grayscale before adding color such as you did and I think this is the path I will pursue. Thank you.
I understand, digital painting can be intimidating especially at the beginning. I personally saw progress when I stopped trying to make everything perfect. In any case, the best of luck with your artistic endeavors!