
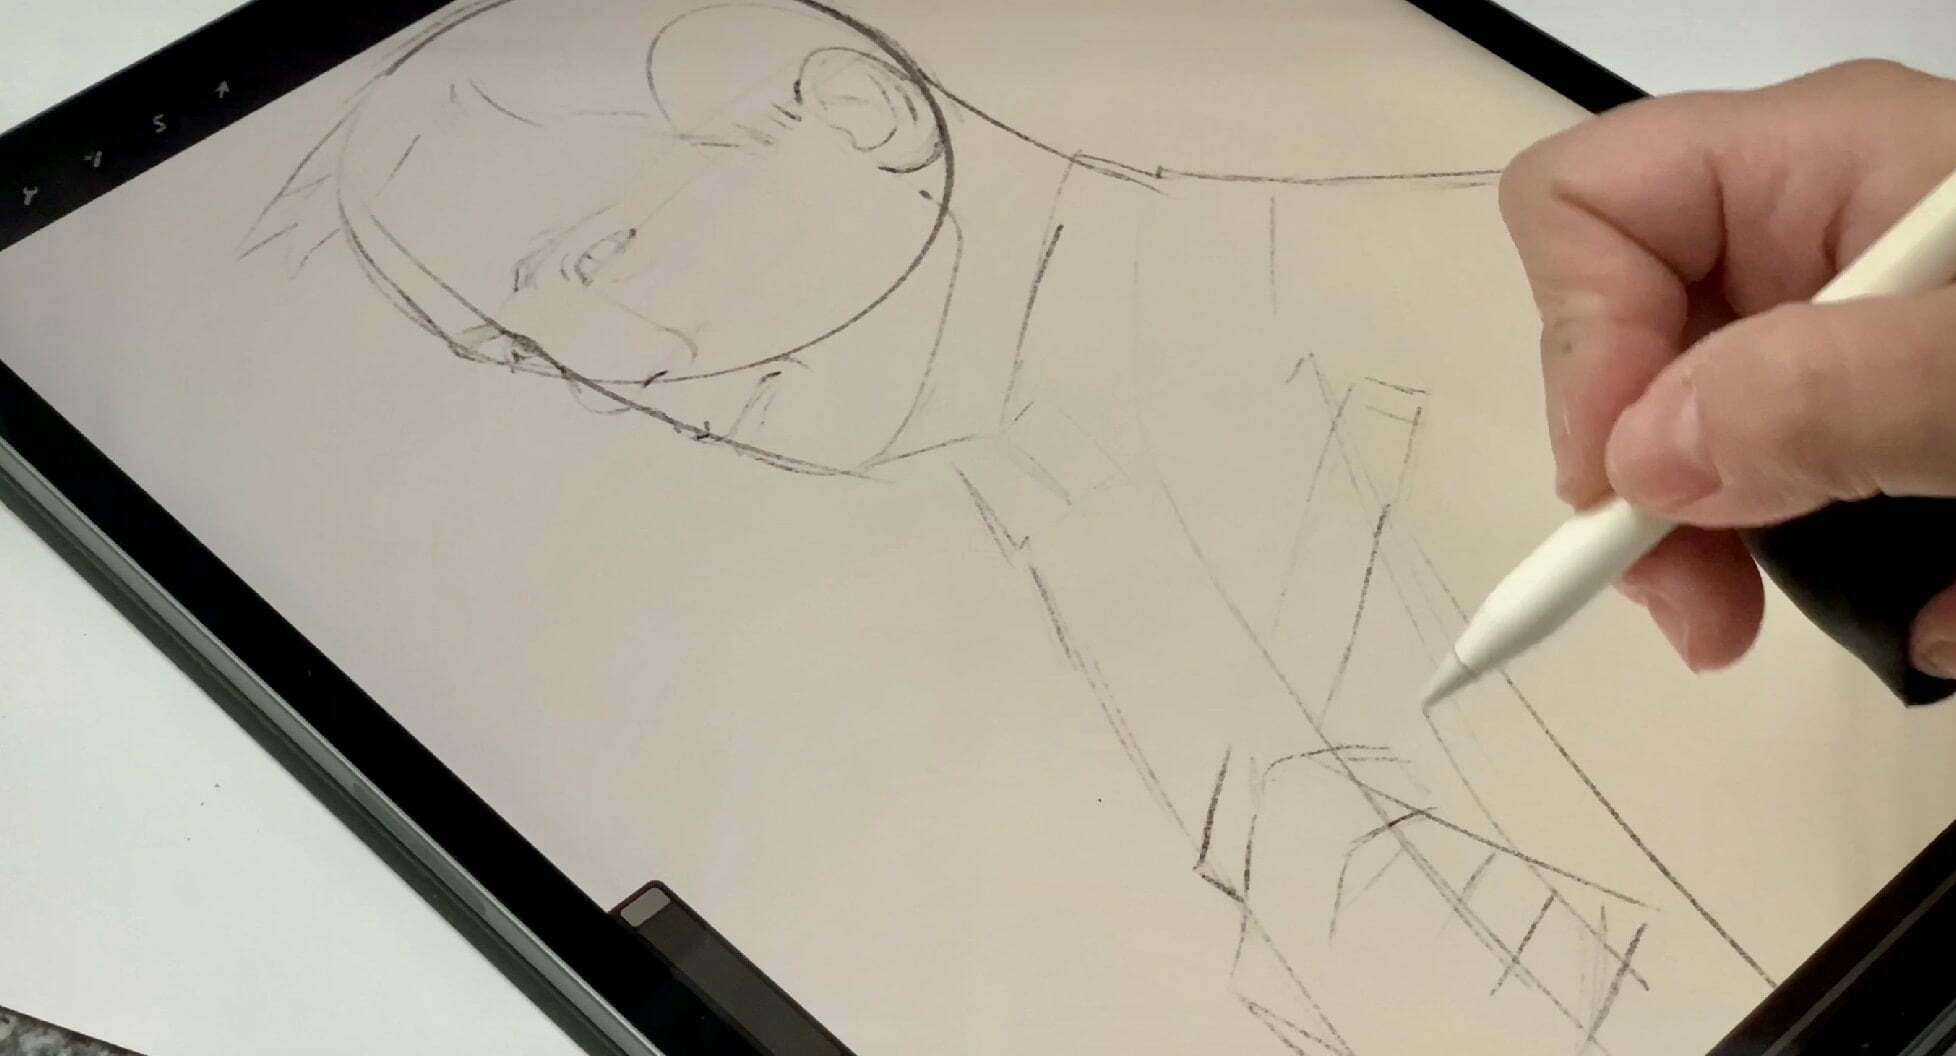
How to get the proportions right, is a question I get asked almost on a daily basis. I did a mini tutorial some time ago, but it is mainly for beginners. Here I will try to elaborate and expand the topic, so as to include “intermediate” artists. Without further ado, let us list the most popular methods (that I am aware of) on how to get the proportions right.
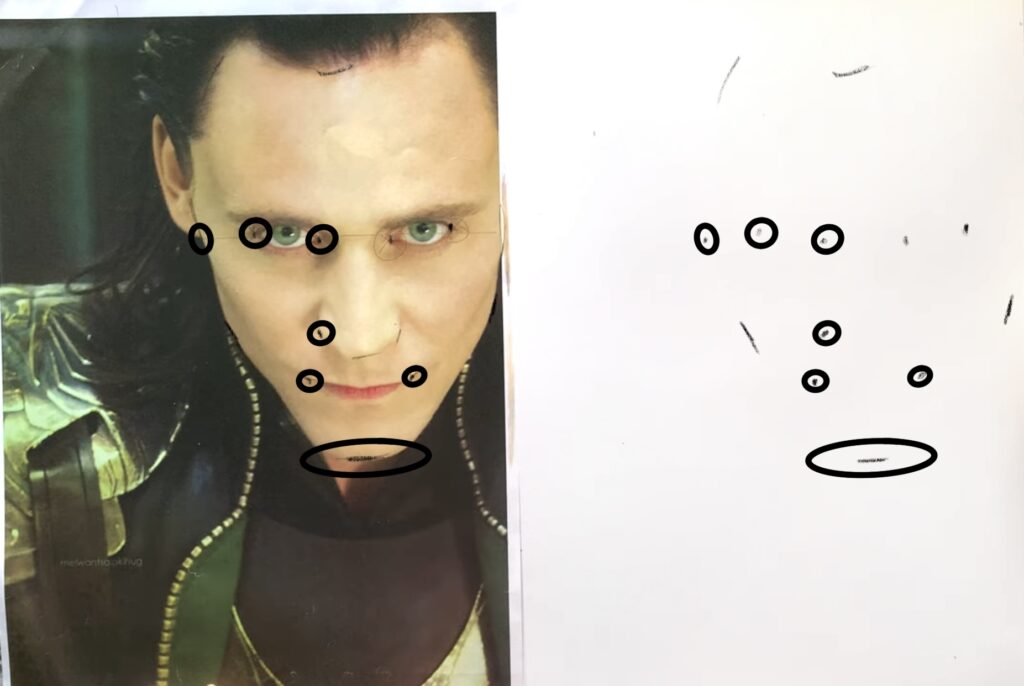
1. Measure key points.
By far, the easiest way to get the likeness of your reference photo. I won’t go into details here, you can read the original post for more information. Suffice to say that measuring key points and placing on the drawing paper, is a cool way to get basic proportions right, even if you are a total beginner.
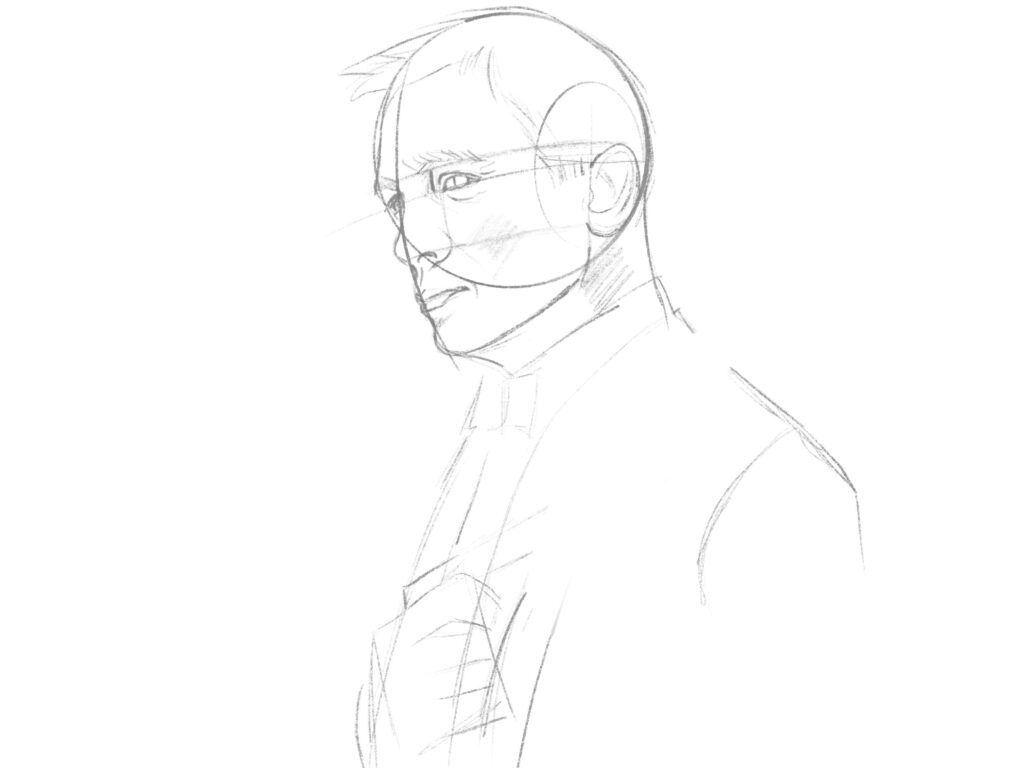
2. Construct guidelines and build upon them
This is not so easy (at least at the beginning), but it is the most rewarding method, long term. It trains your eyes and your brain to recognize shapes and form, so that you begin to create intuitively, and not relying to measurements so much. Not to mention that it helps you view your artwork as a whole and not miss the forest for the trees. Personally, when I was just starting out with my drawing journey, I used to measure key points all the time. (=I was using method number1) When I began constructing guidelines, I saw a dramatic improvement in my art. Not necessarily in actual placement of all individual details but in the overall quality. For example, you know that a head will look like a head no matter what. Bad news is that it is not something you can learn overnight, you have to study shapes and forms, you need to do all the hard work beforehand. But if you determined to do so, I guarantee you will not regret it. There are countless sources on the internet to get started. I really recommend Andrew Loomis , because he is the real deal, and his books are available for free.
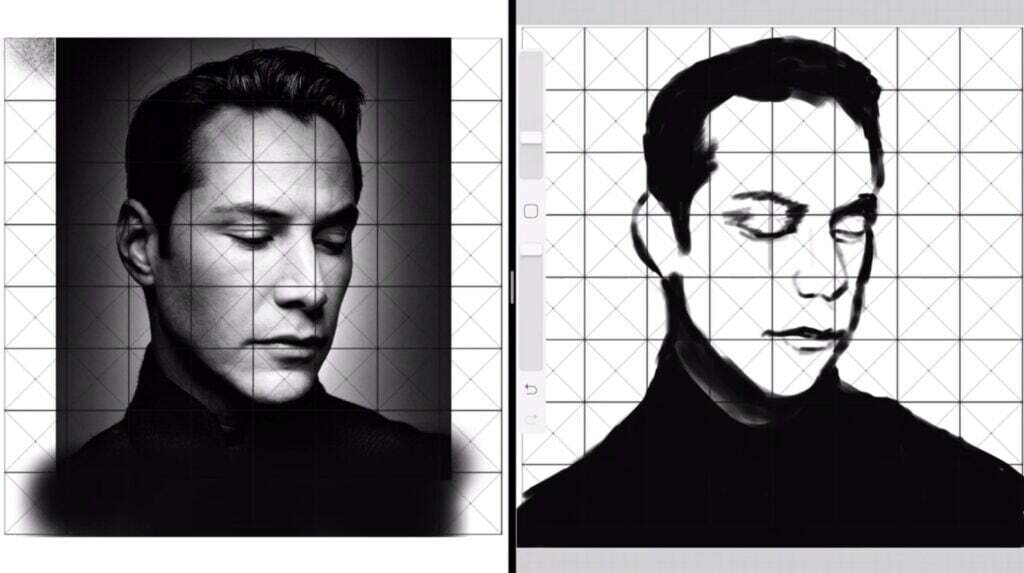
3. Use grid lines
Another popular way to get perfect proportions is to use a grid. A grid is basically a bunch of vertical and horizontal lines (a grid can be expanded so that to include diagonal lines, circles etc) When you use a grid, you basically draw these lines twice, once on your reference photo and once on your sheet of paper. Then you draw on the gridded paper, ensuring (theoretically) that proportions will be ok. I have some experience with the grid method. (I even have an app on my iPad) It is not my favorite, I am way too lazy, and using a grid requires a lot of time and patience. But the main problem with grids is that many things can go wrong. Just a slight deviation from the “perfect” vertical line, can have a huge impact on the final work and your drawing might look “off”. Not to mention that a mistake is so easy to make, you may count incorrectly, or make a wrong estimation. (Of course, all these apply to traditional art, in digital art, grids are made automatically) But I understand that a grid might be necessary in large scale, hypperealistic artworks, so it doesn’t hurt to familiarize yourself with the method if you are serious about art.
4. Tracing
Tracing is copying a part of the drawing (normally the outlines) then fill the rest in. Not my favorite method either. And quite a controversial one I might add. I remember there was a huge debate all over the internet many years ago. Artists were debating whether tracing is cheating, and many argued that tracing is not real art. I think this is absurd. Art is art, and as long as tracing allows you to express yourself, I don’t see a reason why it should not considered art. However, I don’t believe tracing will help you long-term because you don’t train your brain to “see” the proportions, you have them ready. So, if you are serious about art, do not trace, it won’t help you get better. You can however use tracing as a tool to correct yourself. For example, you can estimate the proportions, then check them out to see what was wrong. I remember there was a time when I would draw my outlines mostly freehand, and then I would hold my drawing against the reference on my computer screen. If the lines were way off, I would start all over again. This way, tracing is used in a more productive way.
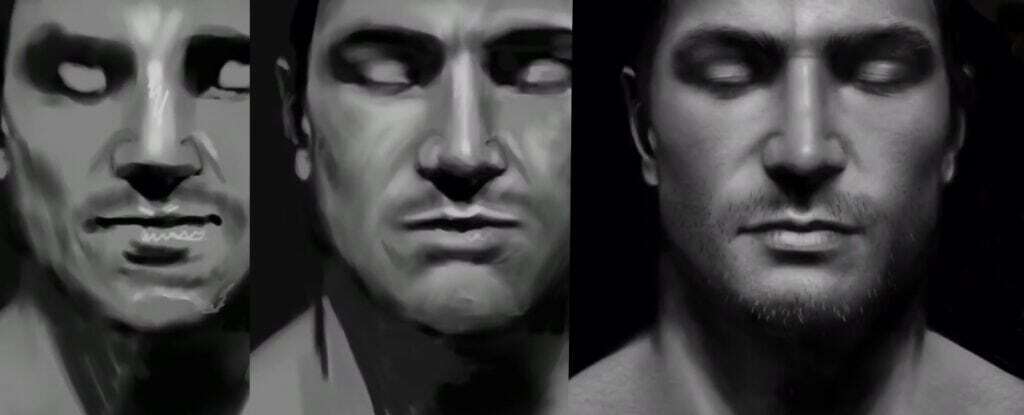
5. Project the image on the surface
This method is almost identical to tracing, but I believe it deserves a paragraph on its own! Basically, you do the same as before, you project an image on a surface and draw on top. The difference is that you can adjust the size of your artwork, which makes the method indispensable when painting on REALLY large areas (walls, etc) There is also evidence that the old masters used this method on their masterpieces.
Lately with the augmented reality technology on smartphones, there are several apps that do (or claim so) the same thing. Your phone projects an image on a surface, and then you basically trace over it. Well… I tried an app like this and… let’s say it didn’t work. (I’m not gonna tell you which, because 1. I don’t remember and 2. I do not like to say negative things for no apparent reason) The image was hoping all the time, I believe it has something to do with augmented reality technology. But I assume as the technology behind augmented reality will get better, these apps will become better too.
6. No sketch, just observing
That’s the most difficult for me, because it requires a great deal of concentration. It is basically based on constructing large forms and building upon them until the desired image slowly emerges. I only used this method a handful of times, all digitally. (Since I draw with pencils only, I find it hard to firstly construct large forms with the pixel-precision of a pencil.) But it is the most intuitive method, one that really requires you to envision the 3D shape in space. And even though I haven’t really painted much like this, it is my favorite method. I plan to paint more like this in the future. 🙂
So these are all the ways (that I know of) you can use to get proportions right. Till next time… Pick your favorite and start drawing!
 Art discussion
 The future of Art (or why AI won’t take over)
 Colored Pencils
 My 5 top High End Artist Grade Colored Pencils
 Acrylic Markers
 Ohuhu Acrylic Markers Review
 Colored Pencils
 Woomer Art Colored Pencils Review
 Graphite
 Staedtler Mars Lumograph Black Review
 Arrtx
Arrtx