
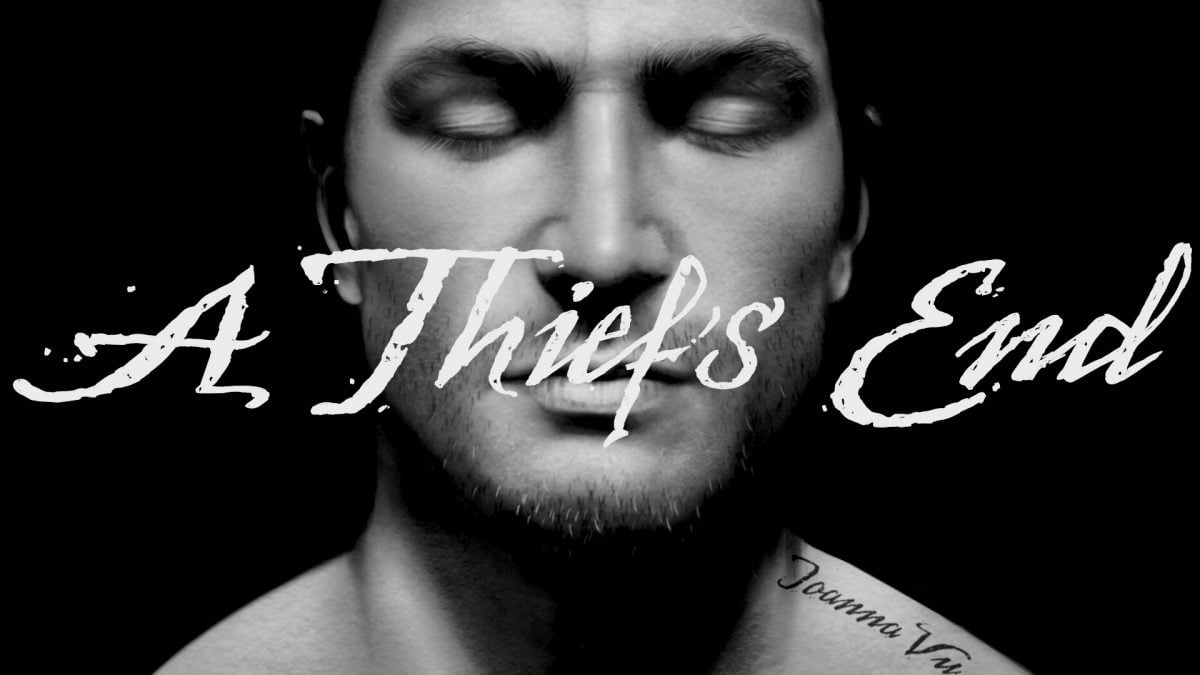
Painting Nathan Drake in Procreate and creating skintones
When I was young(er) my wildest dream was to work in the game industry. Yep, I am a funny person! Naturally I abandoned my dream too soon but my love for game art is very much alive. When I saw this poster from Uncharted … all I could do was marvel at the amazing art, game art has progressed so much!
So, I may not work for the game industry, but I can still draw my favorite characters. On IPad Pro, with Apple Pencil, in Procreate app of course. As always!
I started this painting to get back on track challenge myself to create as realistic skintones as I can. I did a similar post on creating realistic skintones traditionally with a pencil, which you can find here.
Let’s get started. When drawing traditionally, I try to make the initial sketch as accurately as I can, fill in the details as acuuratelly as I can, do everything else … as accurately as I can! Digital painting on the other hand is something completely different, gives you so much more freedom, that’s why i got hooked up. I start off blocking the basic shapes loosely and slowly I build everything up. I use the standard hard airbrush, you don’t necessarily need fancy brushes.
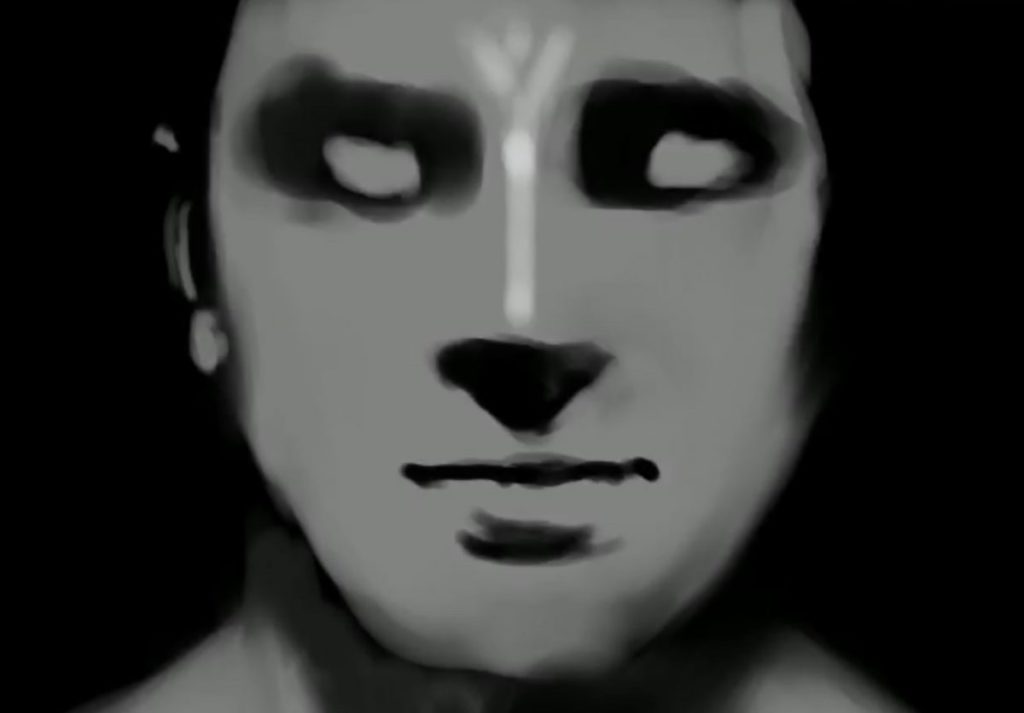
Super hilarious! However everything will start to make sense in a while. I use the standard hard airbrush, you don’t necessarily need fancy brushes.
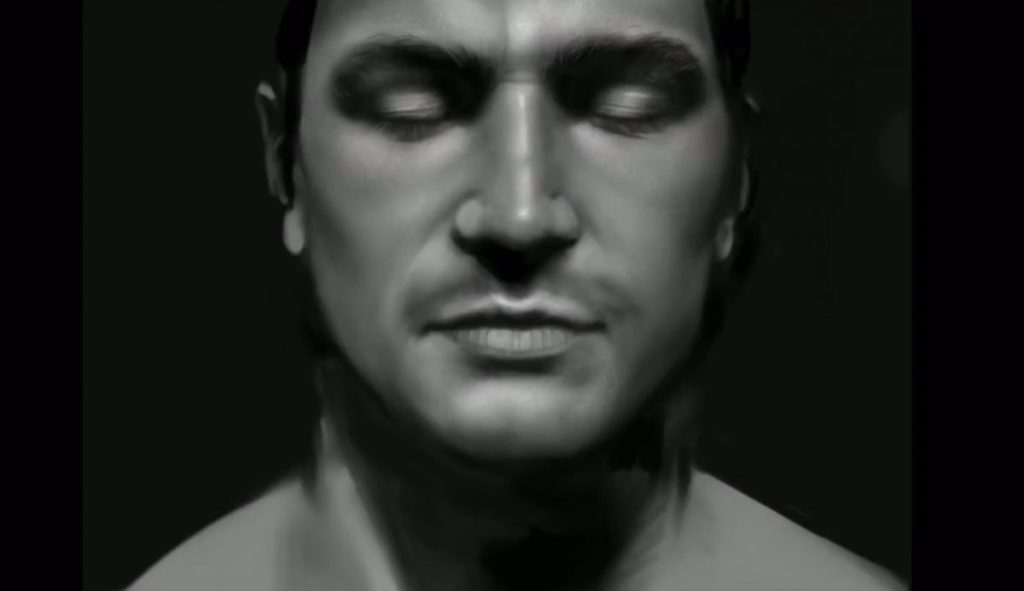
After blocking the basic shapes I start adding shadows and highlights so that to have an idea of the face as a whole. Still rough, but it gets better!
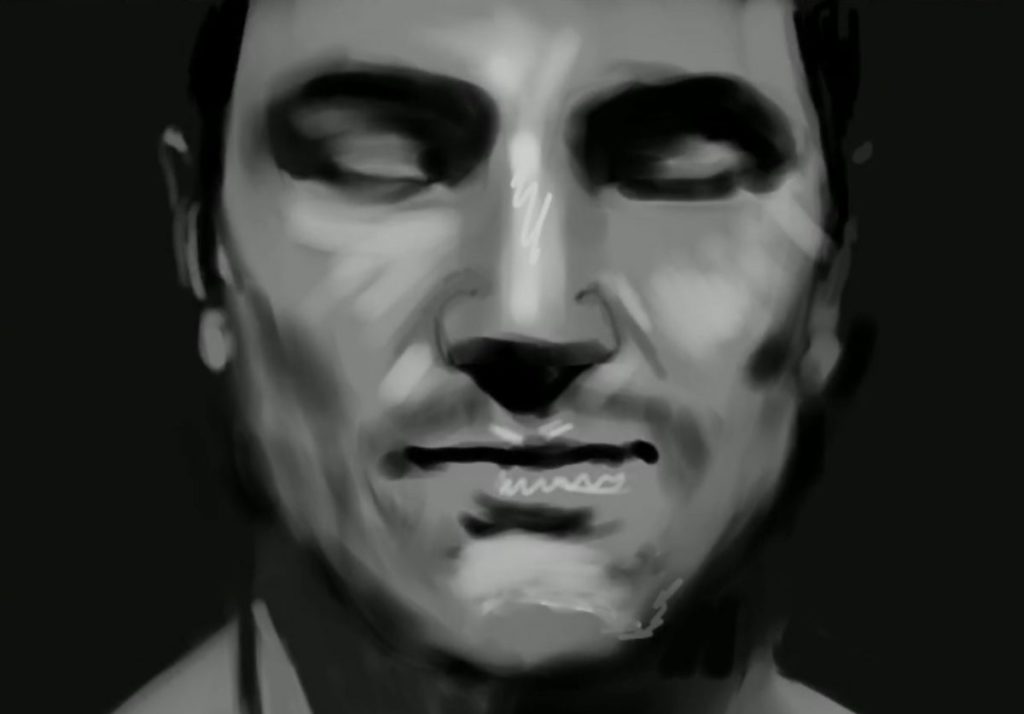
Now I adjust the size of my brush (still using the hard airbrush) and start adding details. I also use the smudge tool to smooth everything that needs to get smoother and make it as realistic as possible.
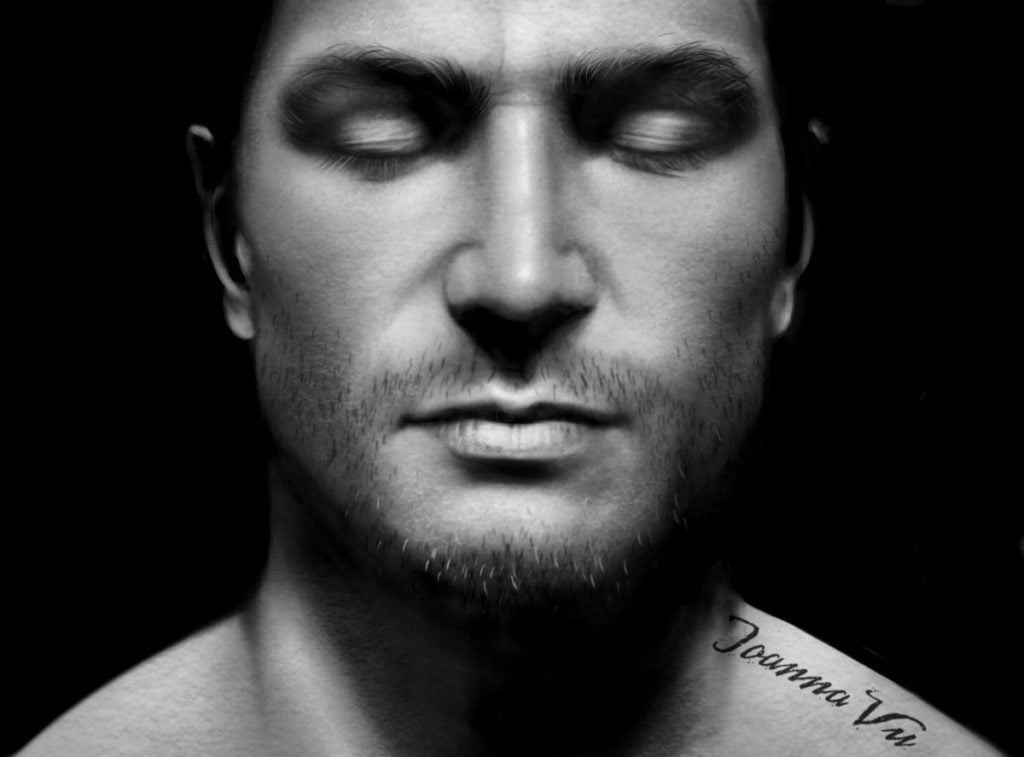
Now that it looks decent enough, I use some fancy texture brushes to create texture, hairs etc etc etc. Once again, you don’t necessarily need special brushes. Being primarily a pencil artist, I know well that all effects can be achieved with just a pixel-width brush. However, brushes can be great help. I mostly use them for the final stages of a painting because I am lazy to speed up the painting process.
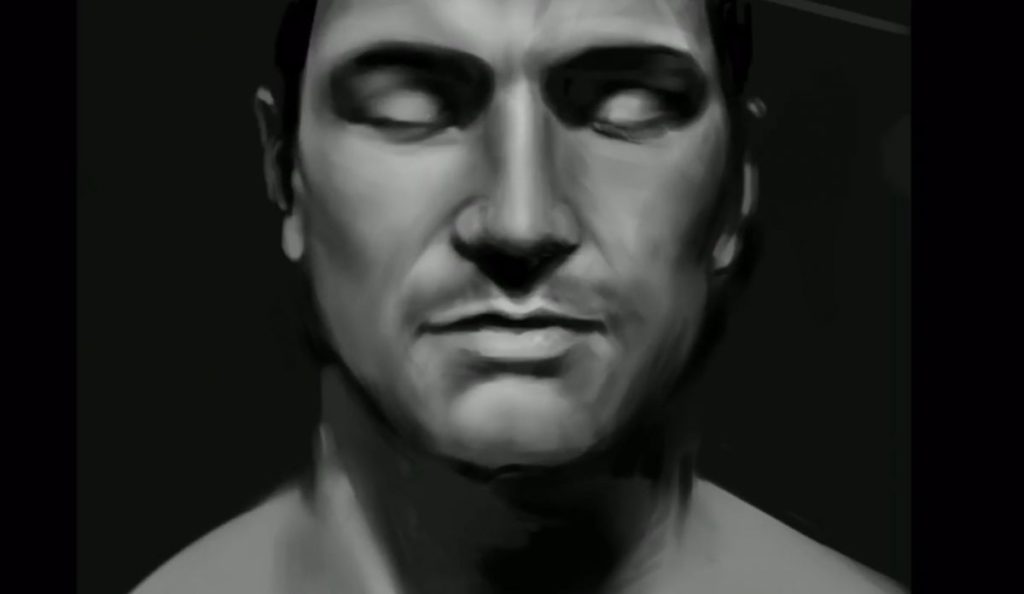
I keep working until I am satisfied. Sometimes I might come back to a piece and rework it. You can never be certain with art. Once I knew this amazing artist who worked on a piece for 10 years! The evolution of the piece over the years was out of this world!
That’s all folks. Be sure to check out the speed drawing on YouTube.
You can also get most of my digital resources on my gumroad page, where I occasionally share free assets as well!
 Colored Pencils
 My 5 top High End Artist Grade Colored Pencils
 Acrylic Markers
 Ohuhu Acrylic Markers Review
 Colored Pencils
 Woomer Art Colored Pencils Review
 Graphite
 Staedtler Mars Lumograph Black Review
 Arrtx
Arrtx Arrtx 60-piece Regular and Anime Acrylic Markers Review
 Art discussion