
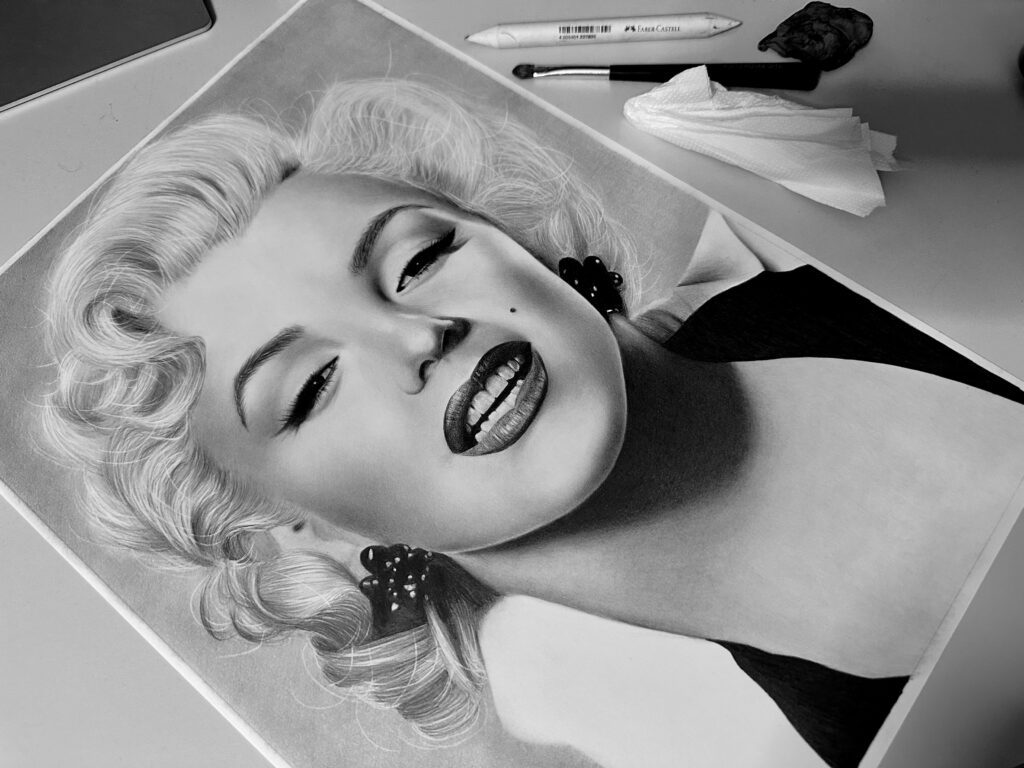
No matter what I do and no matter where my artistic journey takes me (colored pencils, graphic design, digital painting, you name it), graphite is my all time favorite medium and even though I’ve written about blending countless times, it’s a topic I still get asked about almost every single day. So I thought I would gather everything in a single place. Let’s spill the beans shall we?!
What is blending?
Blending is “smoothing” out the harsh texture of graphite, usually using various tools like your fingers, tissues, brushes etc. When I was a kid, I remember I would rub my finger on the pages of my notebooks until my mistakes would be would be practically ineligible. That’s what blending does. It smudges the graphite, so that pencil strokes become soft and blurry.
If your goal is photorealism (or any level of realism for that matter) blending is something you cannot escape. And before I talk about blending in depth, a little disclaimer, this post is about my own (obviously) point of view and as such nothing should be taken for granted, it’s just my personal way of doing things.
For starters, I don’t like blending. Yep, here I said it. I personally blend as little as possible. Why? Because I believe it strips the drawing of character. It is easy to overblend and create a perfectly smooth drawing identical to a poster. But what is the meaning of it? Don’t get me wrong, there’s no “correct” way of making art. I too am guilty of occasionally overblending my drawings, especially in the past. However, from where I stand now, I think blending is overrated. I think there’s such a hype about it, simply because people are mesmerized by the the technical ability behind the technique. However technical proficiency doesn’t necessarily mean artistic value. Oh well, that’s a whole new topic. 🙂
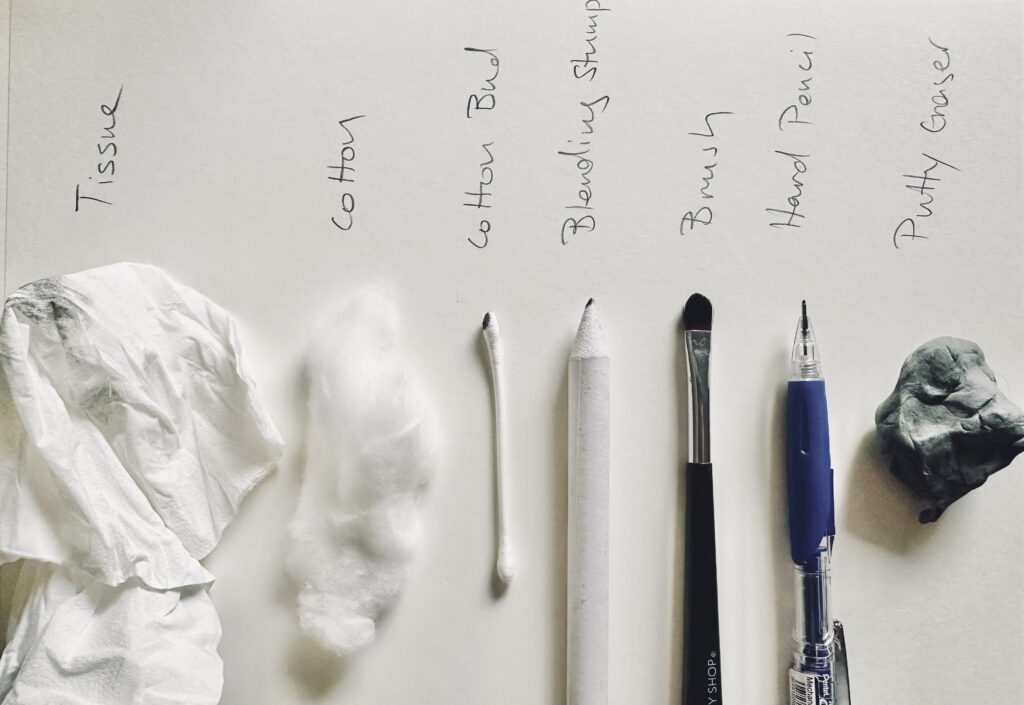
In any case, let’s not undermine blending. Since the post is all about it, let’s break down all the ways the blended effect can be achieved. Below you can see all blending tools discussed in this article. There may be others that I am not familiar with. Don’t hesitate to share your thoughts below!
Tissues
The easiest and most inexpensive way to blend is by using a humble, plain, paper tissue. And the most efficient way, in my humble opinion. Depending on the strength you use to rub the paper, you can achieve any degradation of blending, from a barely-there smudge to a heavily smoothed out, plastic-like result. I love paper tissues, not only they are inexpensive but also “a little goes a long way”, their surface is so big, you can blend and blend and blend and they are still clean and effective (perfect for the “lazy” ones like myself!). The only problem with tissues is that they may be problematic when blending small areas (because it is actually your finger wrapped in the tissue, that does the blending).
Cotton
Plain cotton (yes, the one you use for medicinal reasons!) is another great alternative, also inexpensive and efficient. Because it is soft and cotton-y, you need a lot of pressure to do the job (and pressure is never a good thing, as it can damage the tooth of the paper/the drawing itself). However, it provides a flawless, smooth result, perfect for large areas.
Cotton buds
Cotton buds are just like cotton, however, since the material is concentrated on a single spot, they are mostly efficient in blending smaller areas. Unlike plain cotton and paper tissues, cotton buds can alter a small area, while keeping everything else intact.
Fingers
We’ve all been there! Yep, I too declare guilty. Rubbing the pencil with your finger is almost too good to be true, since you have absolute control over your … own finger! XD However, please please please do not ever do that. It may initially seem that your finger is the perfect blending tool but you see, your fingers are never 100% clean. They have oils that can contaminate the drawing. Sometimes these oils can rise to the surface after many years, which results to a patchy, not-so-flattering effect, which is impossible to clean and it might also spread over time. (at this point I should have had a finger-blended drawing to show you. I don’t but I’m gonna fingerblend a dummy drawing for you. That’s how much I love you guys! Keep checking out this space! 😉) So, even though the result might look good in the beginning, never ever use your fingers.
Brushes (Makeup brushes)
Some years ago I was really proud of my makeup collection. That was before I was a mum. Now that I have three kids, I can’t tell the difference between a lipstick and an eyeshadow. 🙁 However, I found a way to use my makeup brushes. Yep, for blending my graphite drawings. They work like a charm! If you are cringing right now (i would too, if anyone touched my makeup collection a few years ago), you can use plain inexpensive brushes from your local craft store!
Blending Stump
A blending stump is a pencil-shaped tool, made by compressed paper that looks like this:
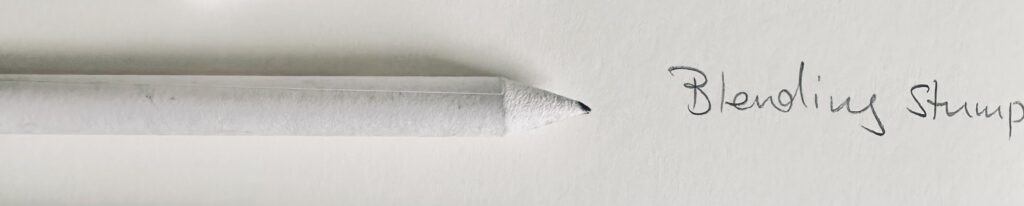
Blending Stumps are superb at blending graphite. Their super thin point is perfect for blending really small areas. If I had to choose the best blending tool, that would be a blending stump. Period. However, I do not use it. Why? Well, their main disadvantage is that they get dirty instantly. And then they cannot blend anymore unless cleaned. (Actually a dirty blending stump can be used as a painting brush, it still stains the paper but the result is not identical to blending) I have already said that I am lazy, I totally hate spending time cleaning my blending stumps. However, on the rare occasions that I am jolly enough and have the patience to use them, the results are super rewarding.
Hard Pencil
This method is not strictly considered blending, but it is my favorite and it is well worth the effort. You see, when you use a hard pencil on top of a drawing, the tip sweeps the graphite (and it also deposits more graphite on top), creating a subtle, barely-there smudge. Remember, the strokes must be made with minimal effort, we are not using the pencil to “draw” but to blend the existing layers of graphite.
Putty Eraser
Another unusual tool, a putty eraser is pretty common among graphite and charcoal artists. It is basically a soft eraser similar to play doh, used to “pick up” excess graphite, thus creating the illusion of subtly erasing. Likewise, a putty eraser can be used to blend. The final effect can be patchy, but when used together with another blending medium, the result is interesting.
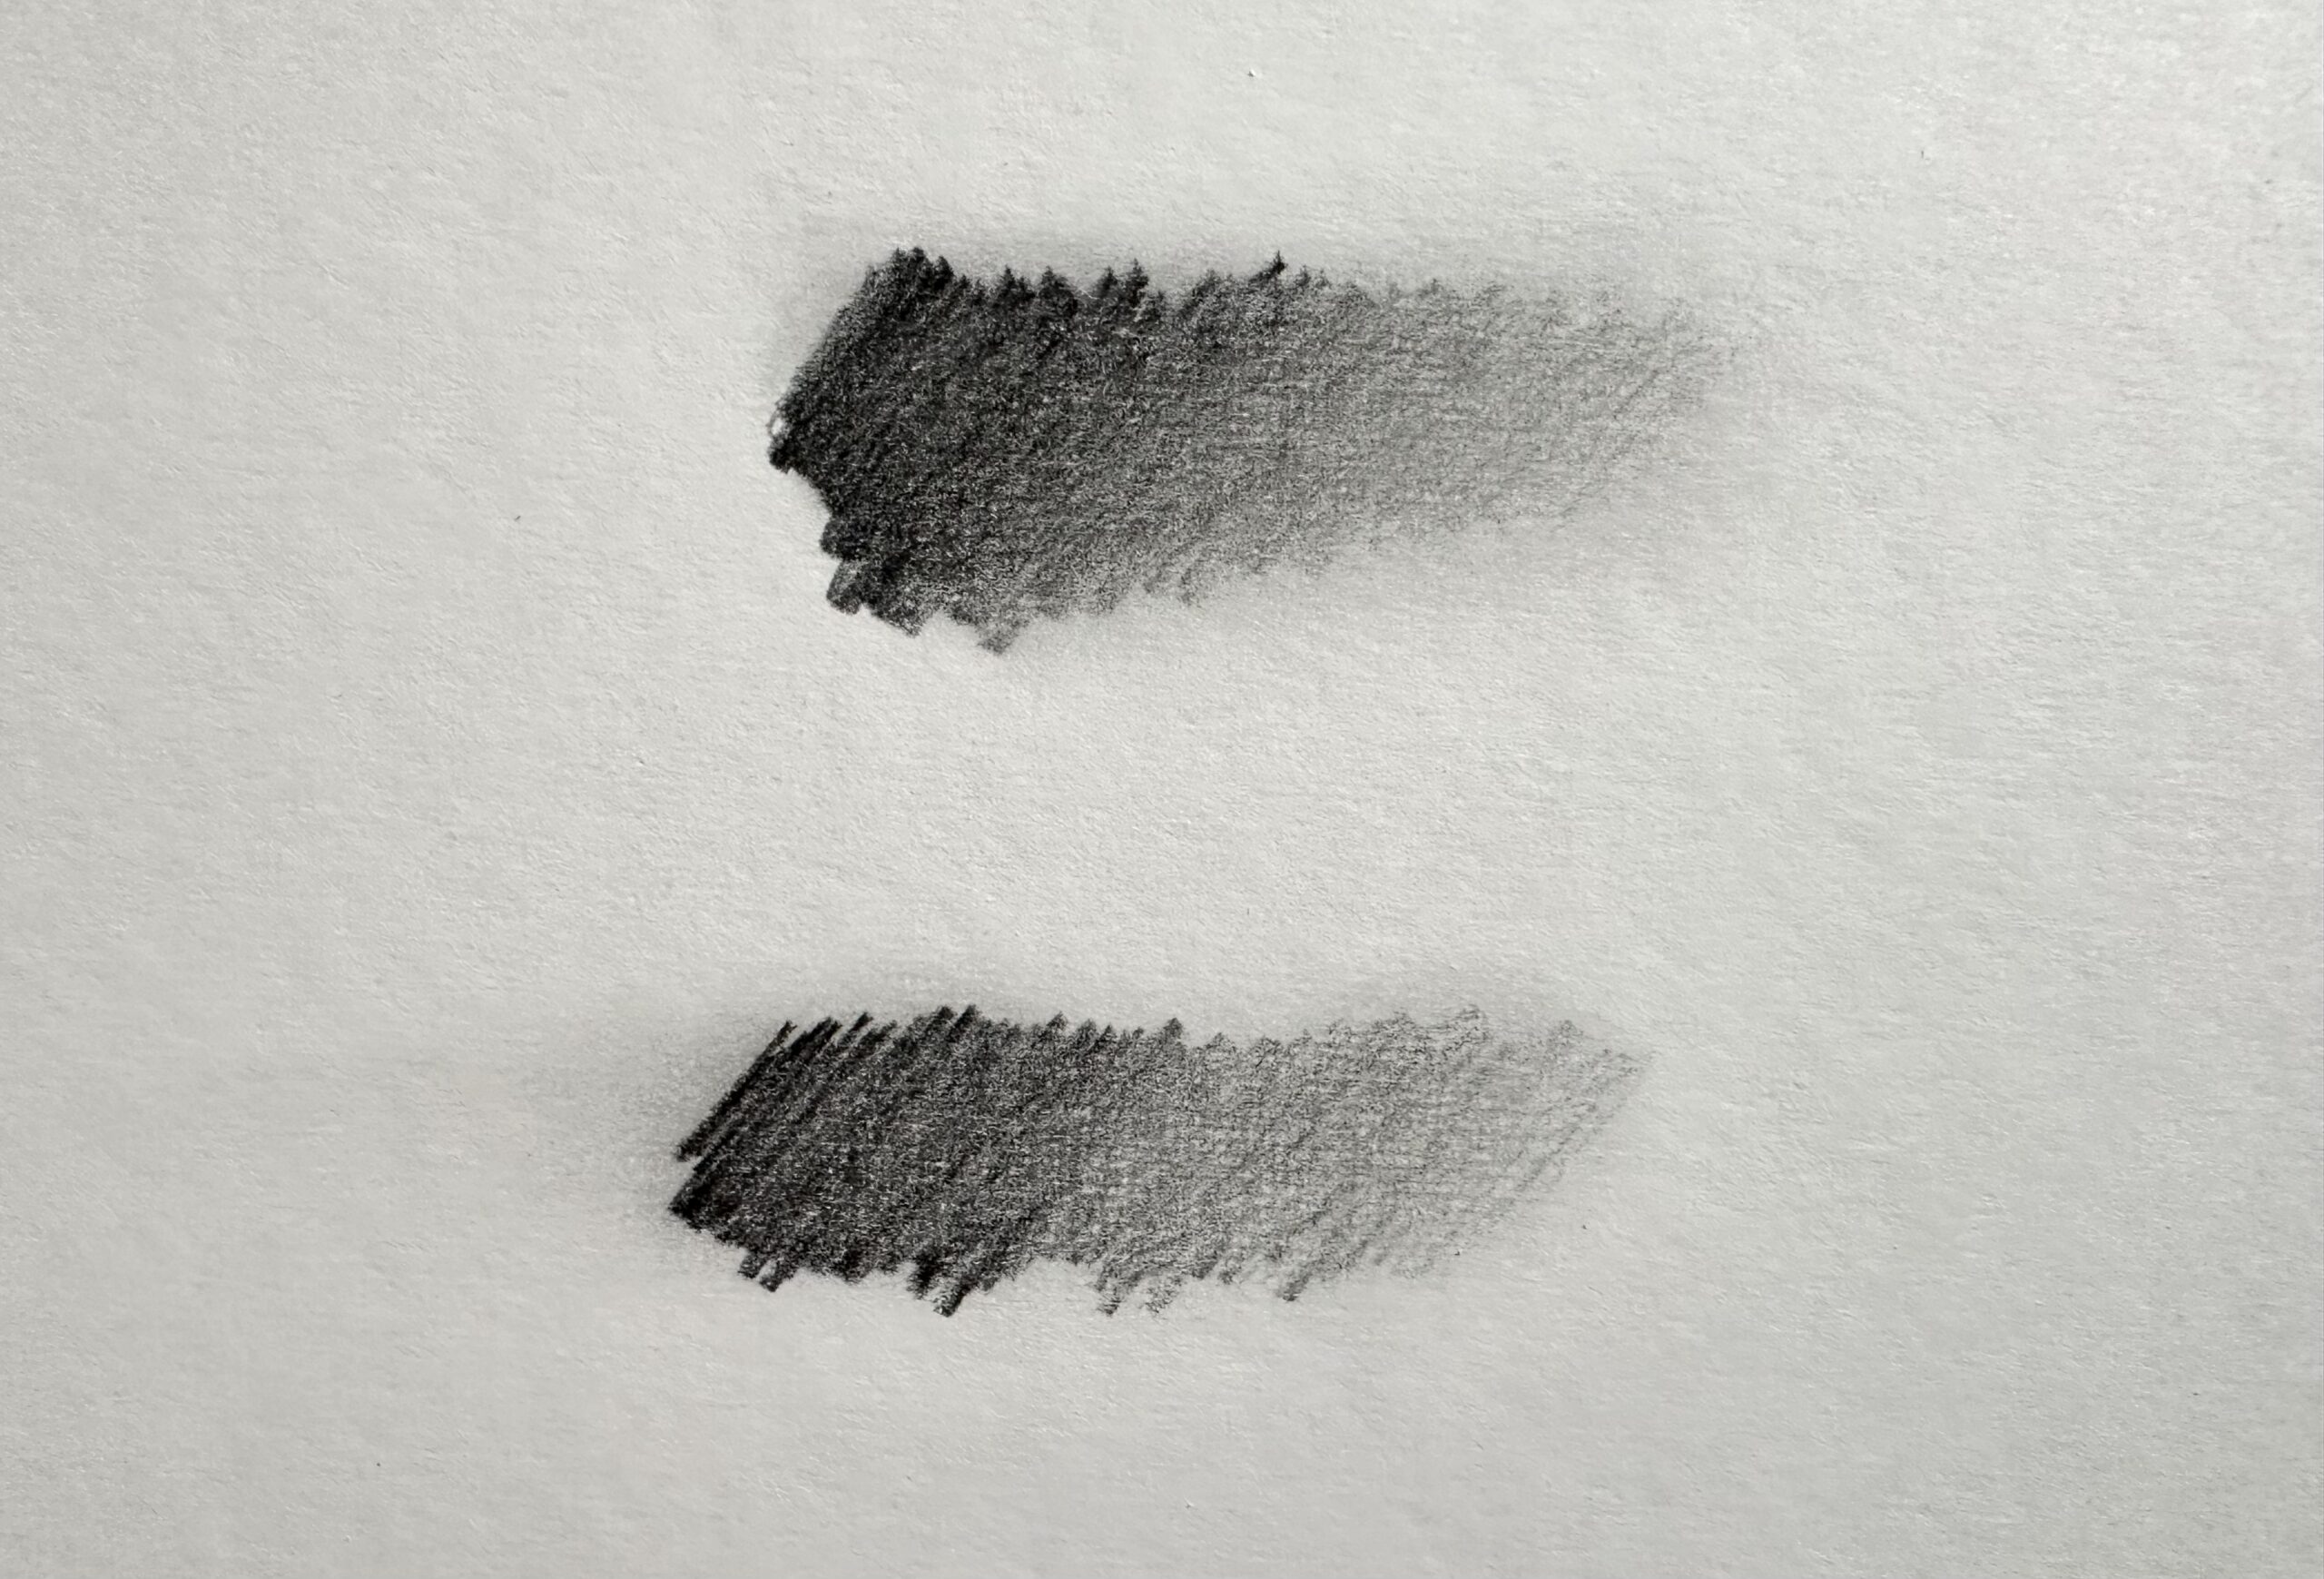
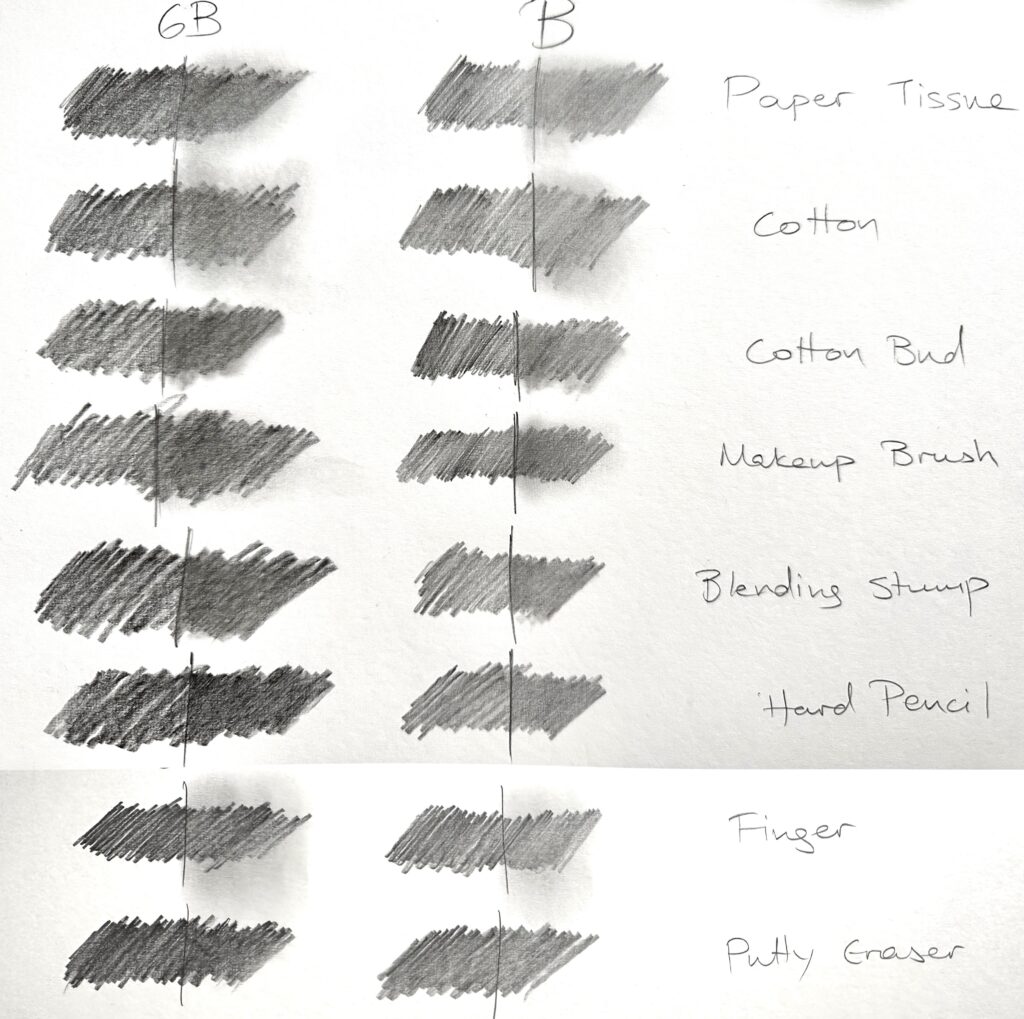
All the above tools and the results can be seen below. I used all mentioned tools on two different pencil grades, 6B and B. Graphite is unblended on the left, and blended on the right.
So, this is it? Choosing the appropriate tool, then blend and that’s all? Alas, I wish it was that simple. In fact we’re just starting. Because HOW we blend matters even more than WHAT we blend with.
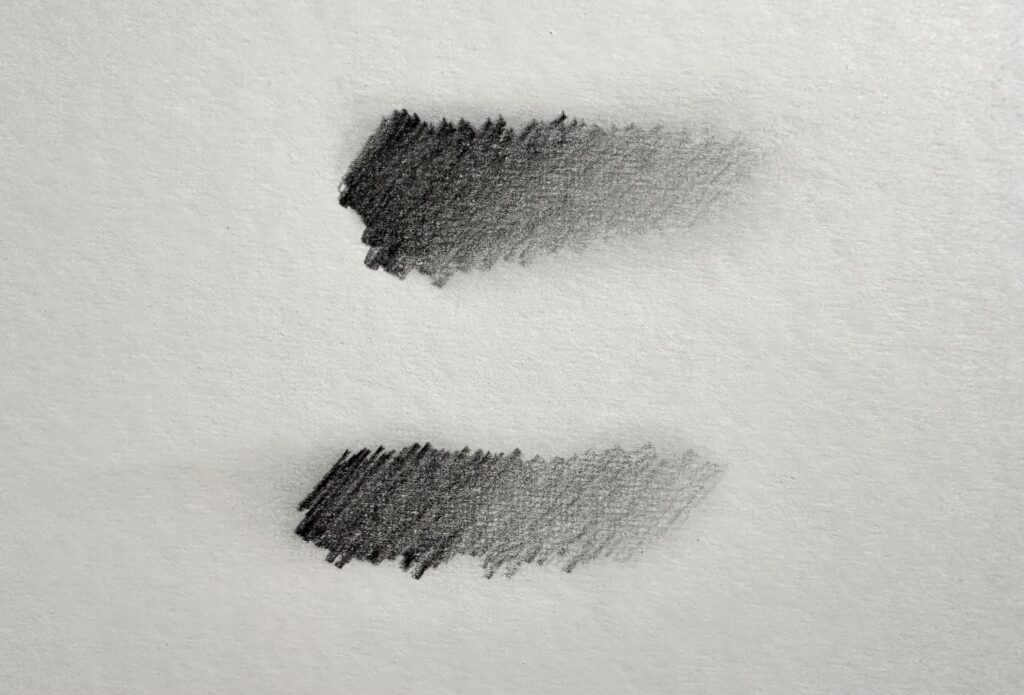
Blending from light to dark vs from dark to light
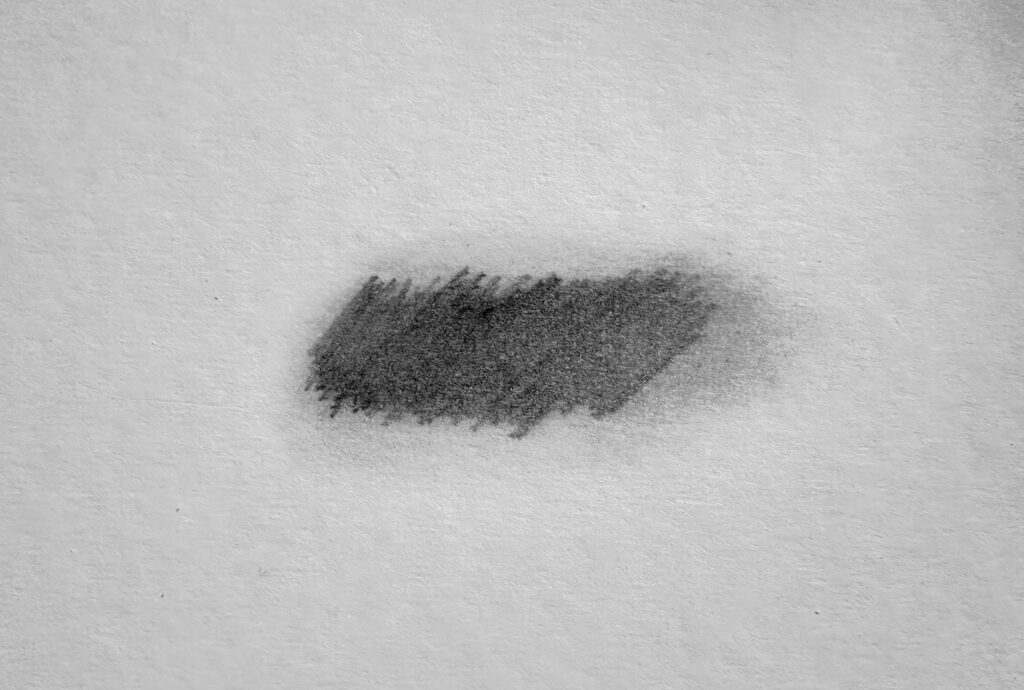
When you want to produce a gradient effect, the direction of blending plays some role. Because blending is essentially “smudging”, blending from dark to light produces a softer, more subtle effect, (because it swoops some graphite from the dark area to the lighter area) whereas blending from light to dark produces a slightly harsher effect.
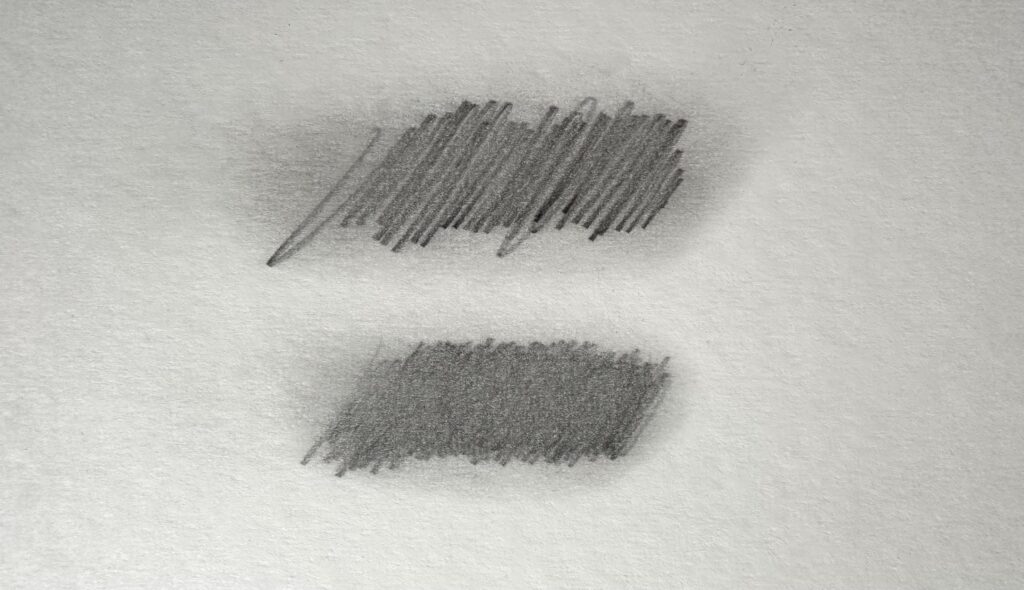
Blending dense strokes vs blending sparse strokes
The initial layer matters when it comes to blending, if the layer is thick or thin, the result can be different. Generally the denser and the more uniform the strokes, the smoother the result after blending.
There are other factors to be considered and even though I like to over analyze, things are actually a lot simpler when you actually try blending for yourself!
Below I will try to elaborate more about how blending works in an actual drawing.
Firstly, you don’t have to use all blending tools to be considered an expert. Personally, I mostly use tissues, occasionally brushes and nothing else. And most times (as I have already said)I blend minimally, in fact I try to make my drawings as smooth as possible before I begin blending.
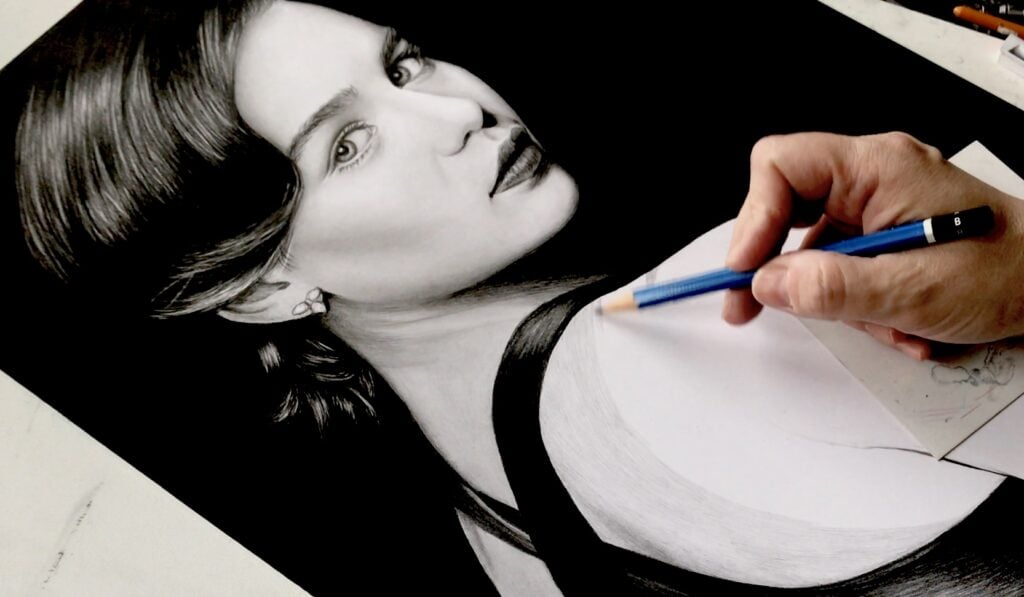
Blending large, smooth areas
When blending large areas, like her cheeks, I firstly shade with a semi-soft pencil (like 2B), then blend vigorously with a tissue to the direction of the strokes. I also make certain that the blending process doesn’t dissolve the pencil strokes completely, the strokes should be visible. It’s a drawing after all, not a plastic poster!
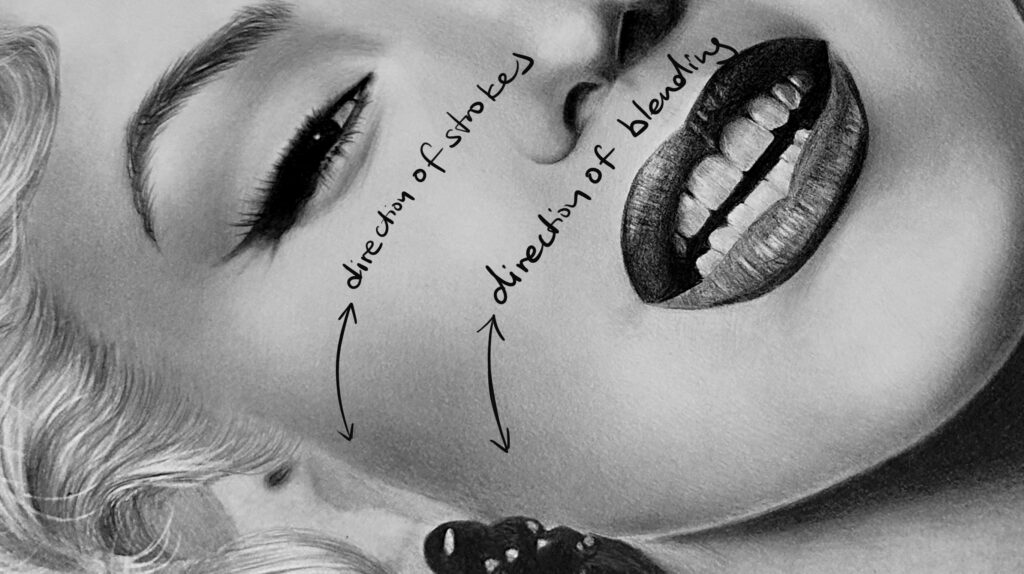
Blending small, rough areas
When I deal with small, rougher areas, I normally use a brush and blend softly towards the direction of the pencil strokes. Here, to blend the teeth, I firstly shade with a soft pencil (2B or higher), then use a brush to “sweep” graphite towards the direction of the strokes. Notice that here my initial shading is much more uneven than that of her skin.

Blending highly contrasted areas
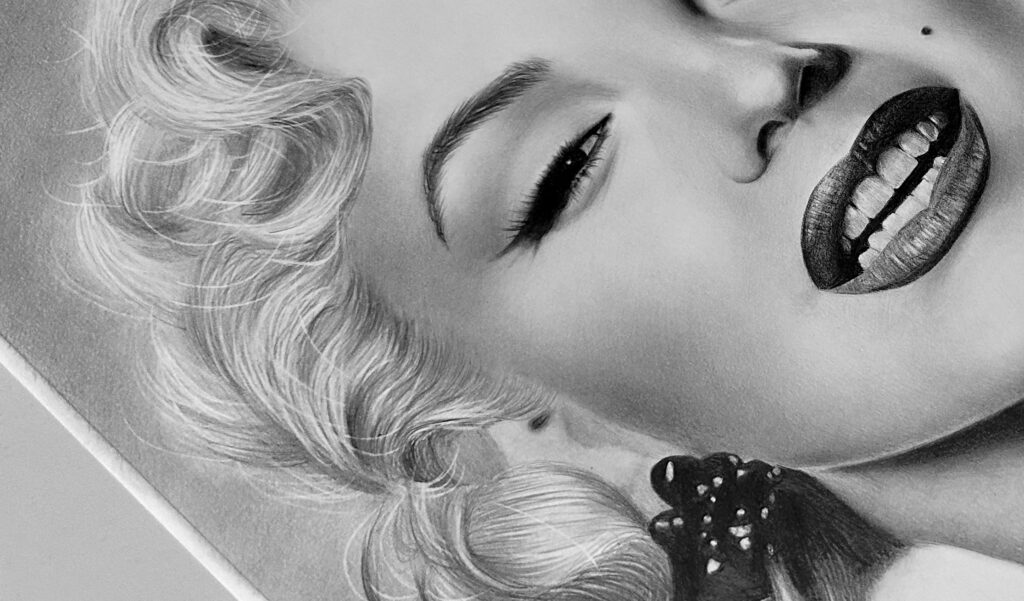
When dealing with sharp gradients (eg the shadow on her neck) I use a tissues (you can use anything with a big surface) and blend from light to dark (remember what we just discussed about blending from light to dark? It creates a sharp effect)

Blending hair
Finally there are cases when we want a smooth-ish effect but we don’t want to “destroy” the layer underneath. In these cases, I normally use a soft blending tool like a brush, to sweep some graphite, leaving the majority of the layer intact.
Ok, this post is getting too long now and I’m afraid I’m already starting to miss the point. If you are worried about blending, there is one thing I want to say to you. There is no right or wrong (which is kinda contradictory to this super analytic post, but hear me out!) just do the work (=draw) and don’t worry about technical aspects too much. Art is expression and as long as you do what you love, with love and respect, you cannot miss. Blending can range from non-existent to heavy, that doesn’t mean that one way is “right” and one is “wrong”. It’s just a matter of perception.
Hope I helped, let me know what you think if you give a go to any of these techniques and till next time… keep drawing!
 Art discussion
 The future of Art (or why AI won’t take over)
 Colored Pencils
 My 5 top High End Artist Grade Colored Pencils
 Acrylic Markers
 Ohuhu Acrylic Markers Review
 Colored Pencils
 Woomer Art Colored Pencils Review
 Graphite
 Staedtler Mars Lumograph Black Review
 Arrtx
Arrtx
3 Responses
Hi ionna,
I’m new to the site and I am getting all the information I can on blending with graphite, what do you use for blending graphite,what works best?
Sincerely Randy
Hello, Ionna!
This is the best site which I have read about , “Blending”.
Your comments are nicely written without overdoing the need for blending.
I do like also, “Art is Expression” line…I will keep that saying when I do my drawings.
Thank you and regards.
Daniel
Thank you so much Daniel! Yep, “art is expression” is my favorite motto too.
All the best with your artistic journey, keep drawing!