
I’m still quite new to 3D art, but throughout my whole journey I am particularly awed by one thing: (This is a lie, I am not awed by just ONE thing, but I hope you get my point!) Seemingly easy structures are sooo hard to sculpt.
The other day I began modeling a vintage phone. This one.
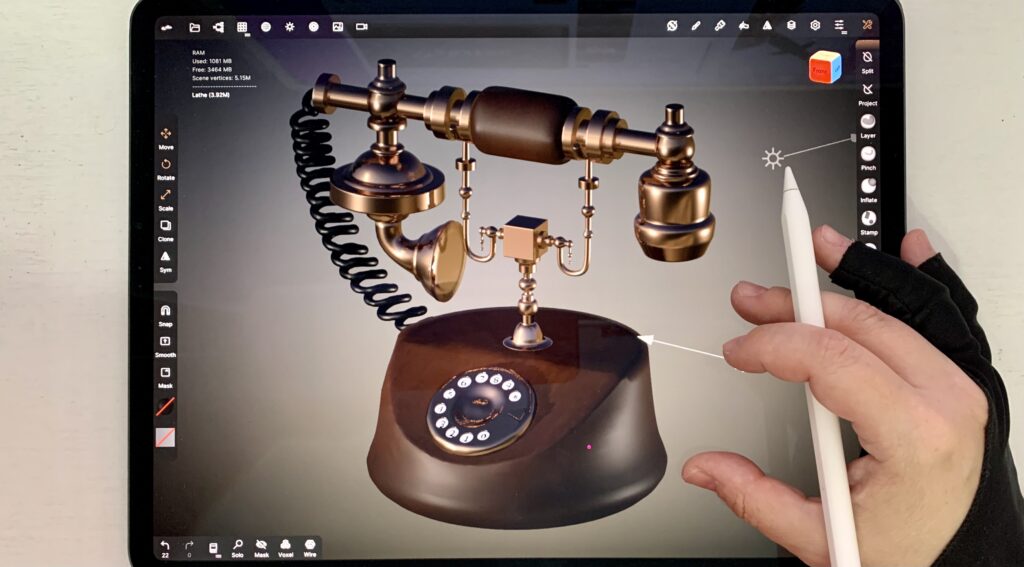
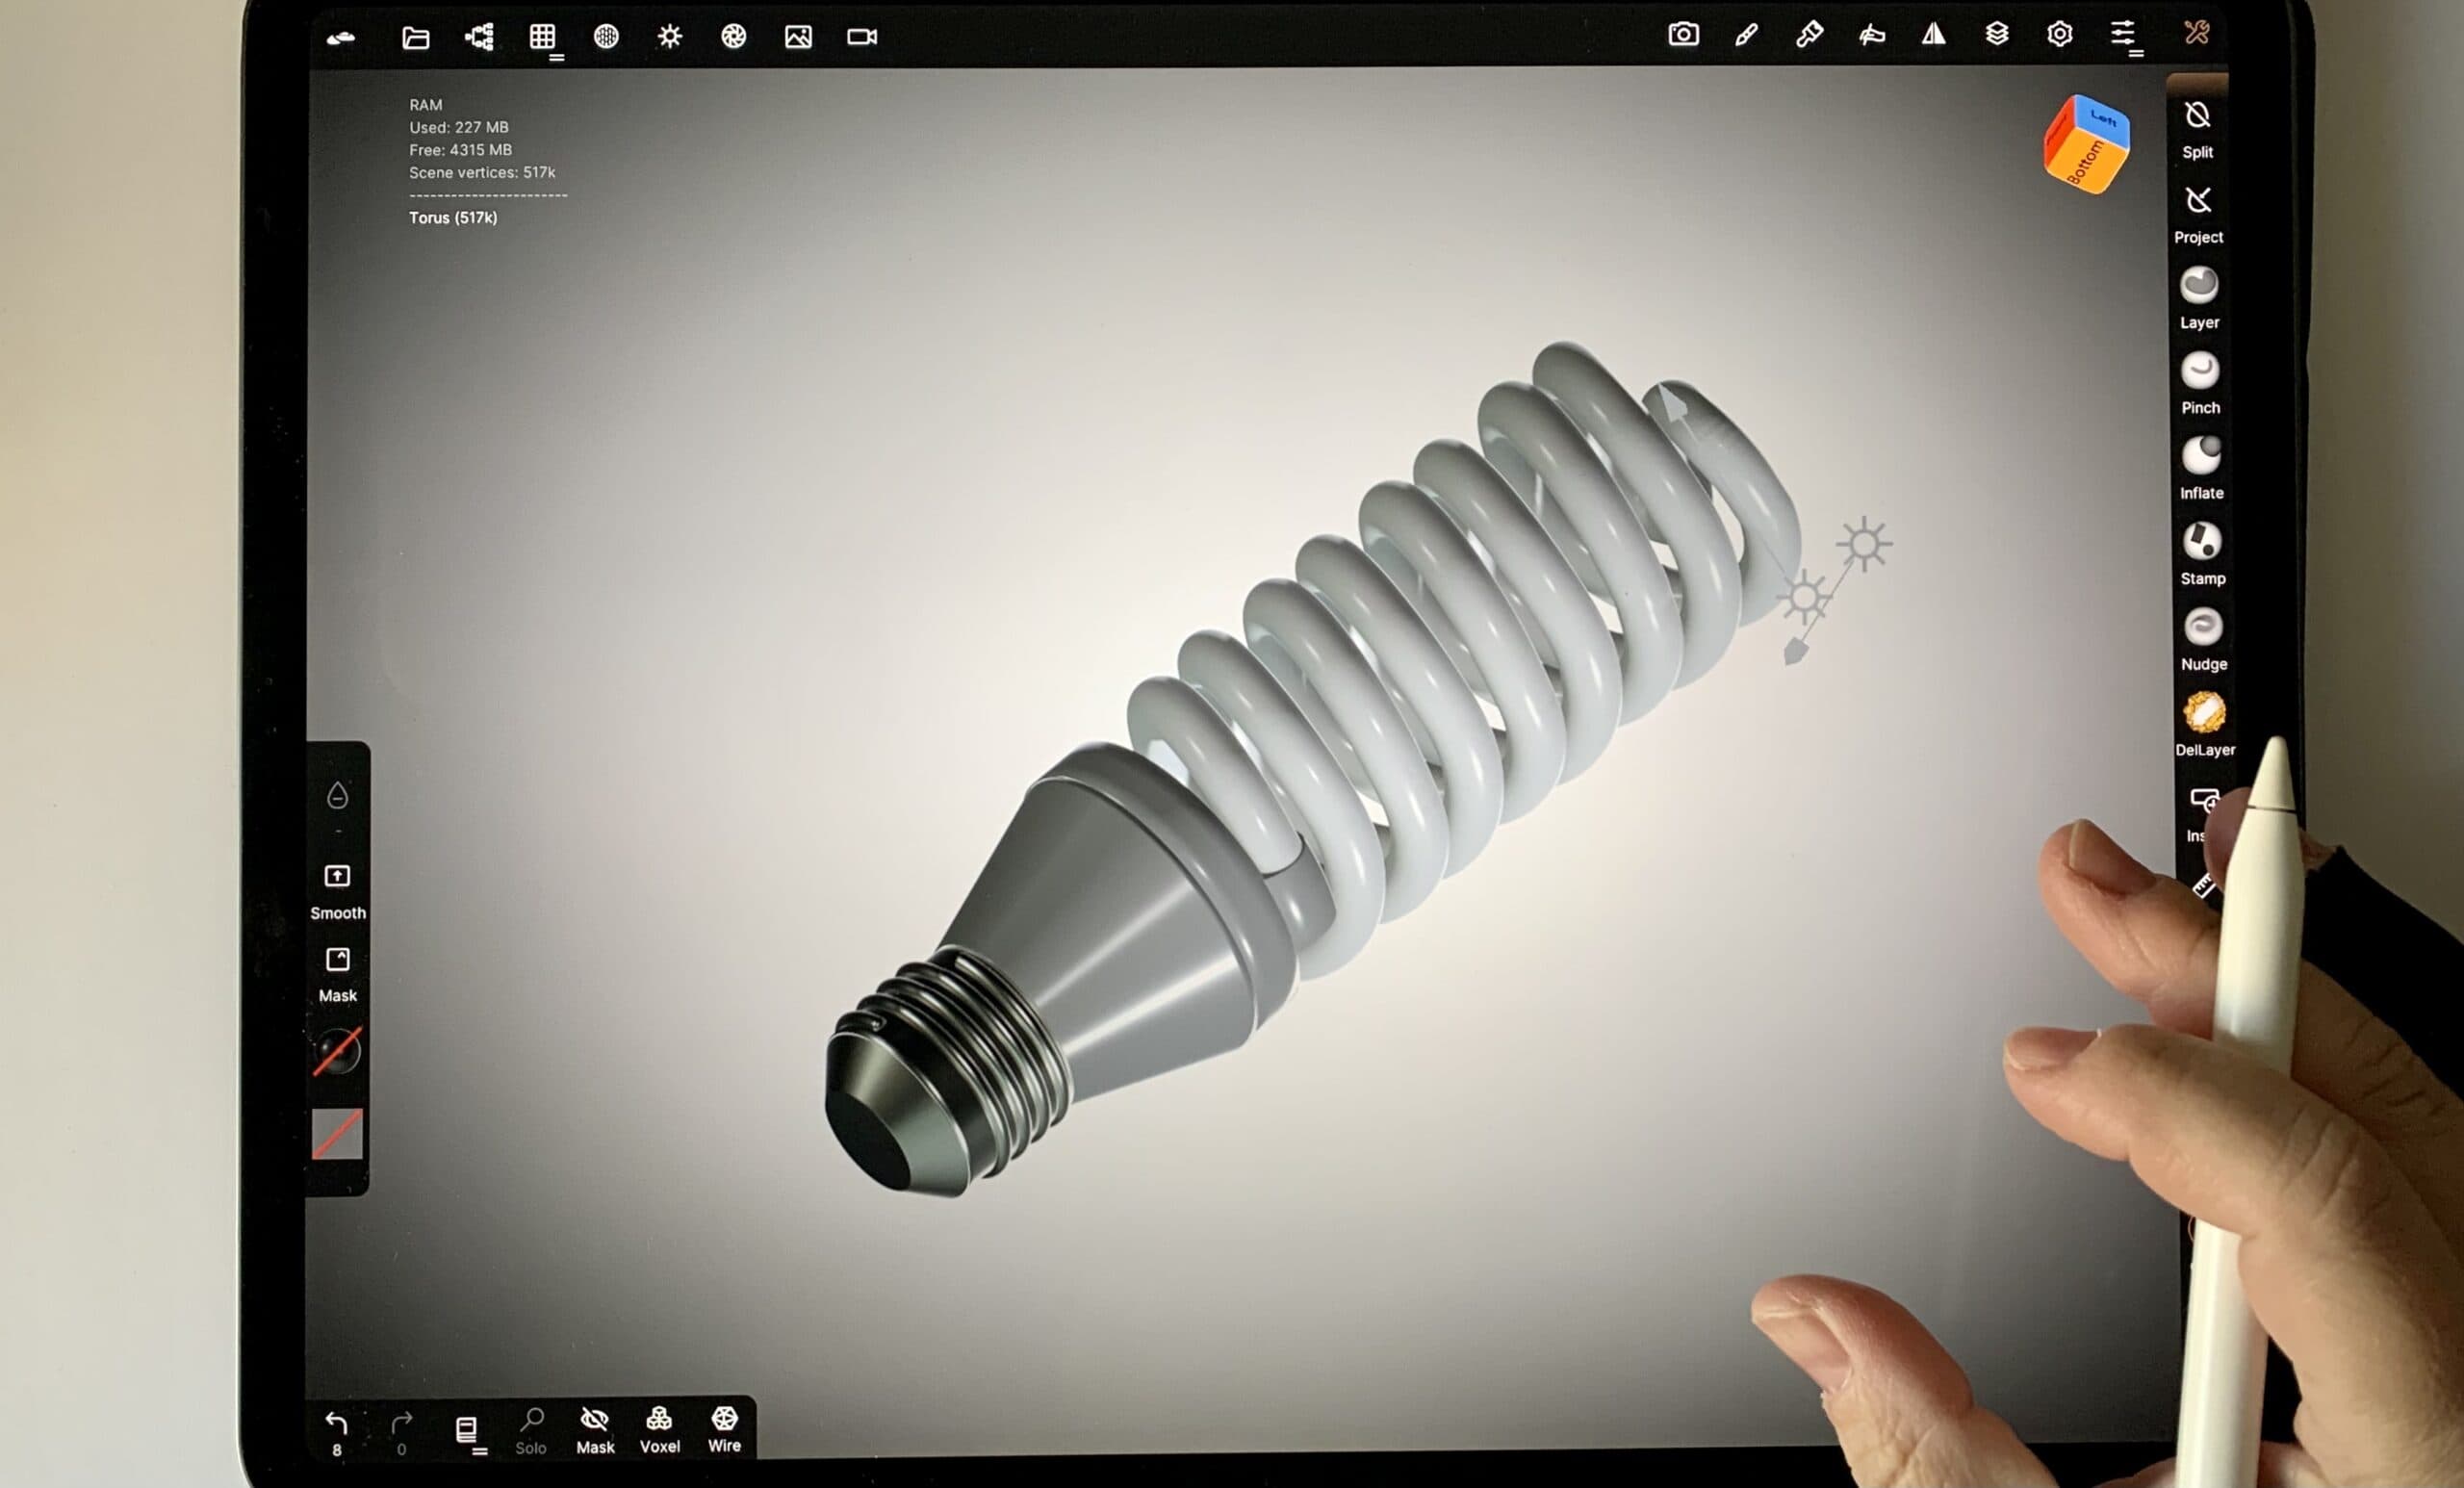
I thought it would be child’s play. And it was. At least until I got to the cable. Remember when I said that seemingly easy structures are hard to model?!
Luckily I am primarily an engineer. And we, engineers, tend to “find” solutions even when there don’t seem to be any. Also many times we tend to find the best solution. (Also many times we fail miserably, but that’s another story) So here’s a small tutorial how to make a simple coil in Nomad Sculpt.
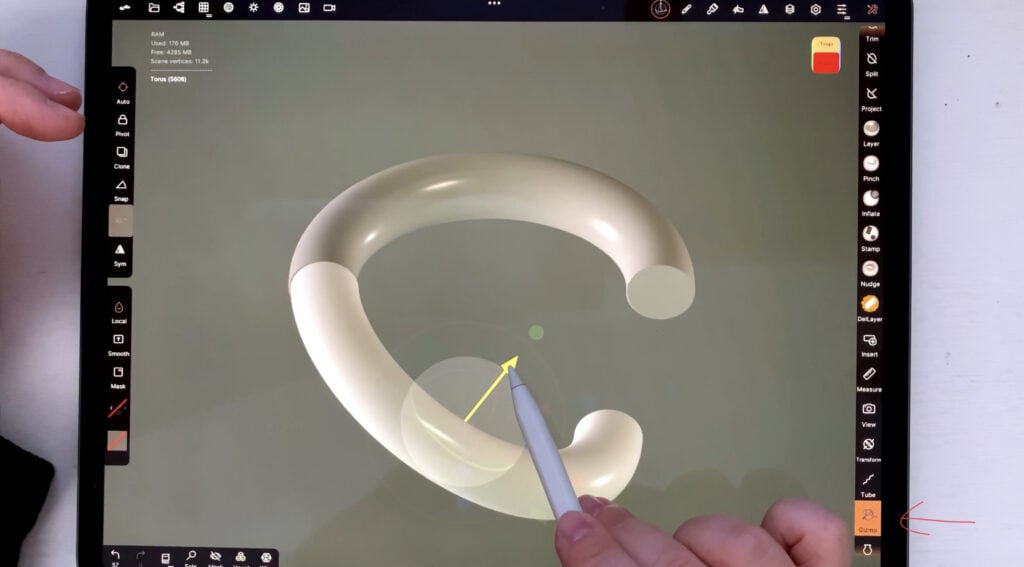
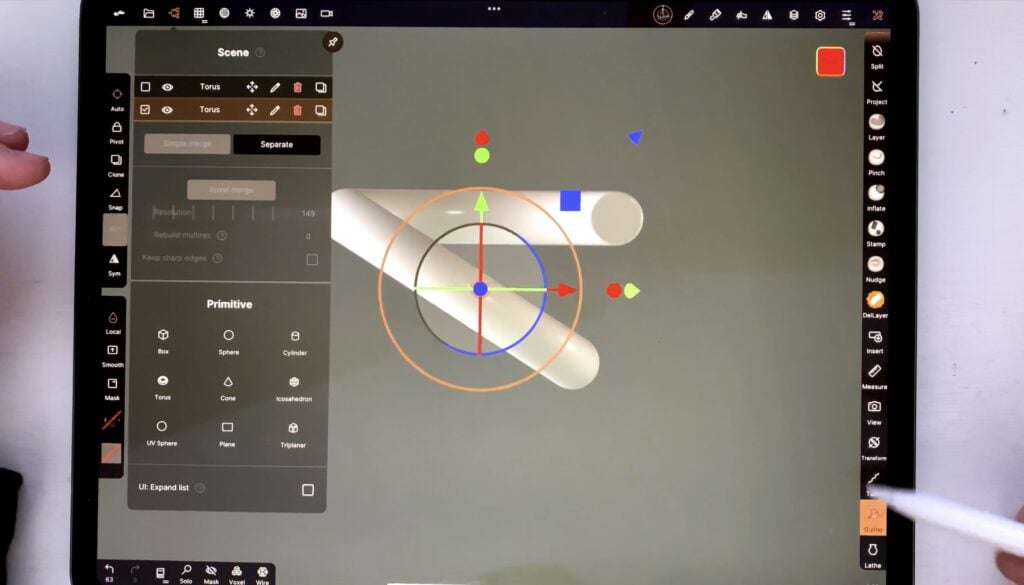
I’m starting off by deleting the default cube and adding a torus. Exact size doesn’t matter, just keep in mind that the dimensions of the torus will determine how thick the coil will be. Then, while on top view, I take the “split” tool and divide the torus approximately in half.

With the “gizmo” tool, I tilt the first part to my liking (the angle will determine the density of the coil) and place it next to the second.
Then, I select both parts from the “Scene” menu, and tap “voxel merge”.
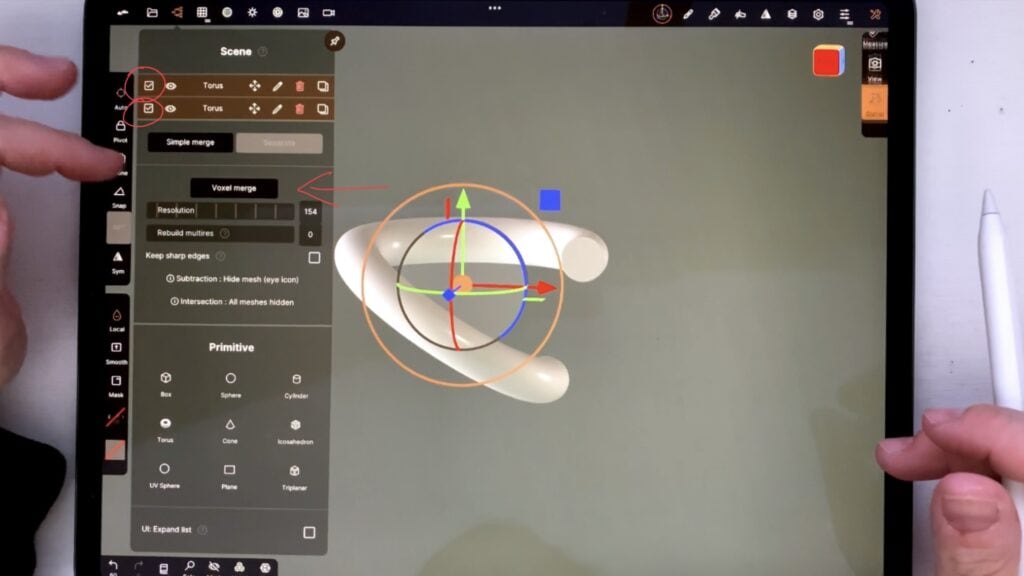
I duplicate the newly merged shape and bring the copy below the original, so that the edges are aligned.
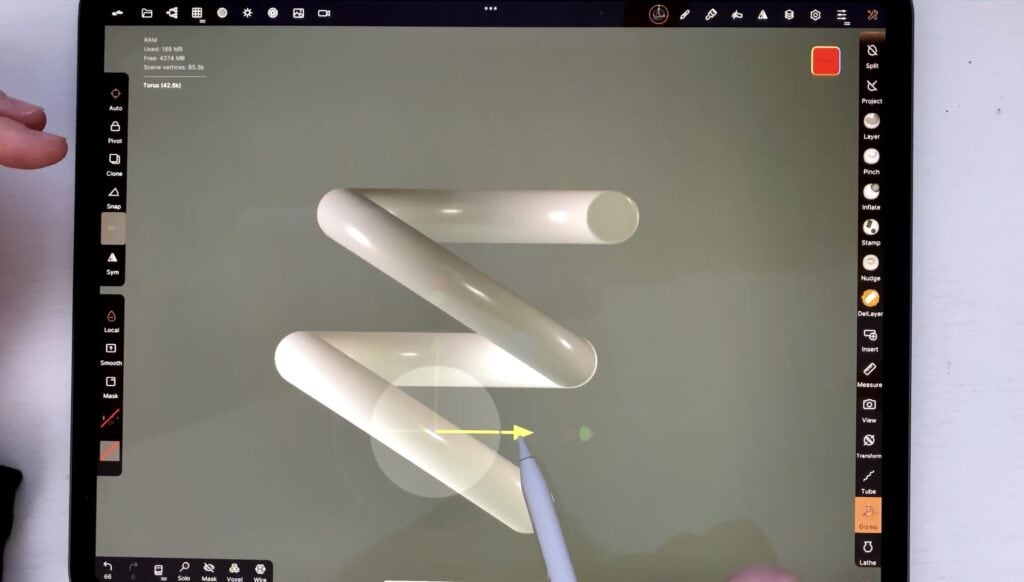
And, believe it or not, that’s all. I repeat the previous steps a couple of times, till I have a coil long enough for my liking. When I am done, I once again select all parts and tap “voxel merge”.
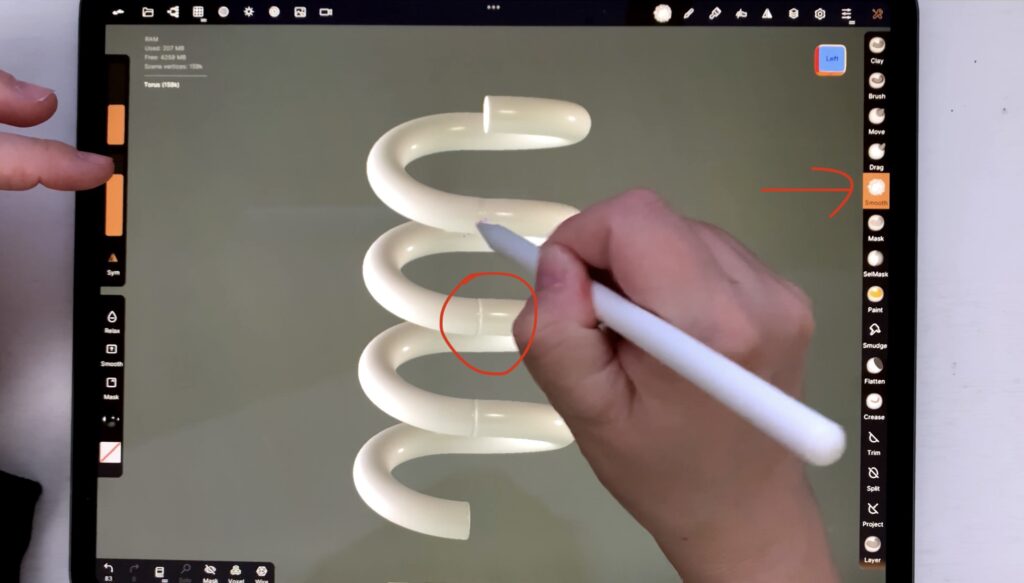
Extra tip: If there are bumps/imperfections on my coil, I am smoothing them out with the “smooth” tool.
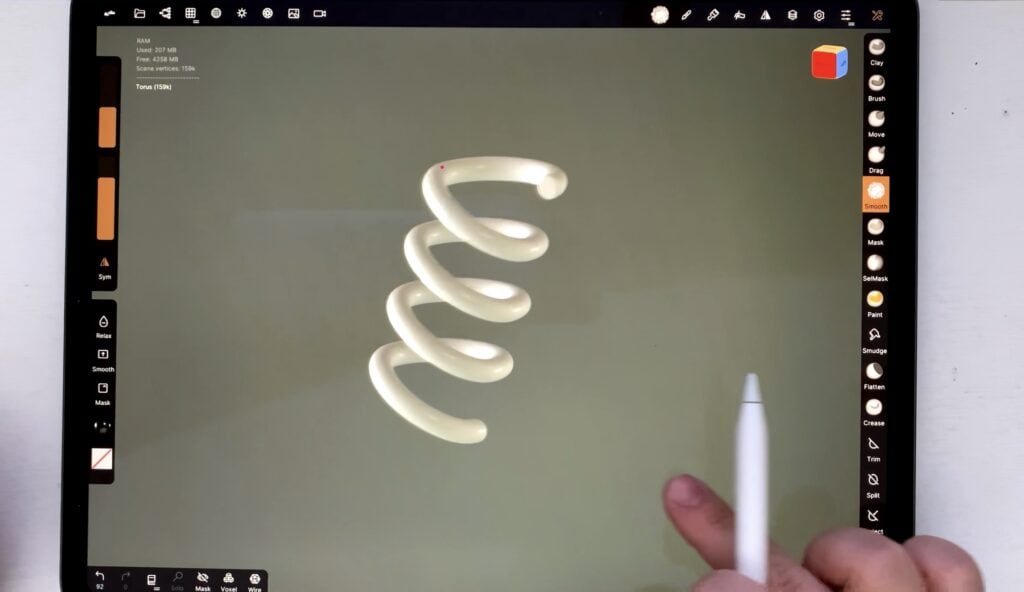
And my awesome coil is ready!
What do you guys think of it? Will you give it a try? And make sure to check out the tutorial in video format below. Happy sculpting!
 Fonts
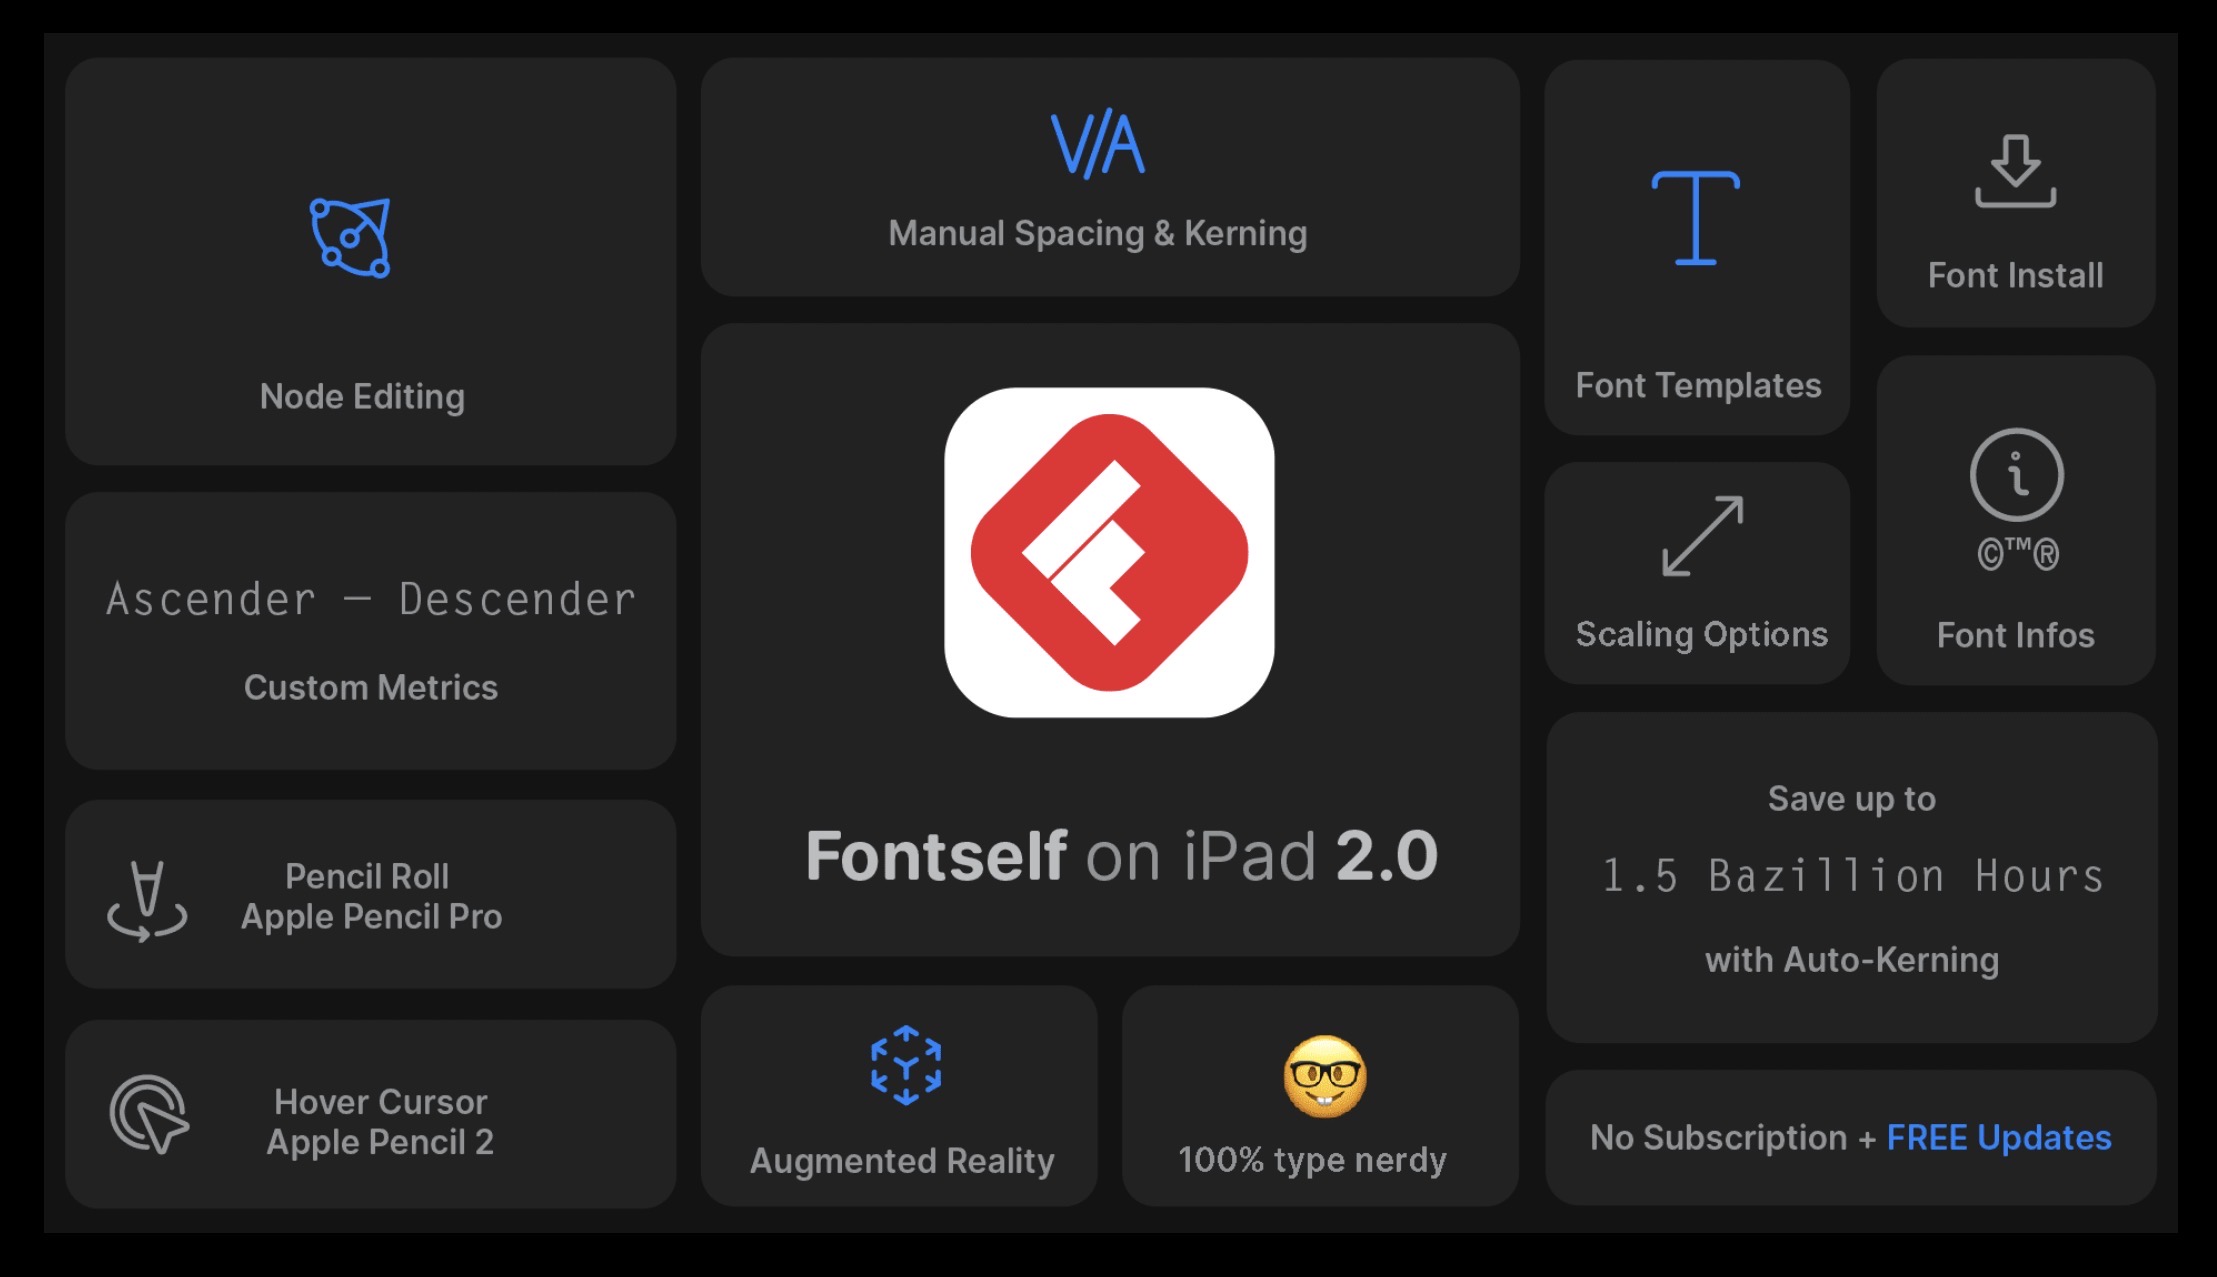
Fonts Fontself for iPad Review – vol2
 Art discussion
 The future of Art (or why AI won’t take over)
 Colored Pencils
 My 5 top High End Artist Grade Colored Pencils
 Acrylic Markers
 Ohuhu Acrylic Markers Review
 Colored Pencils
 Woomer Art Colored Pencils Review
 Graphite