
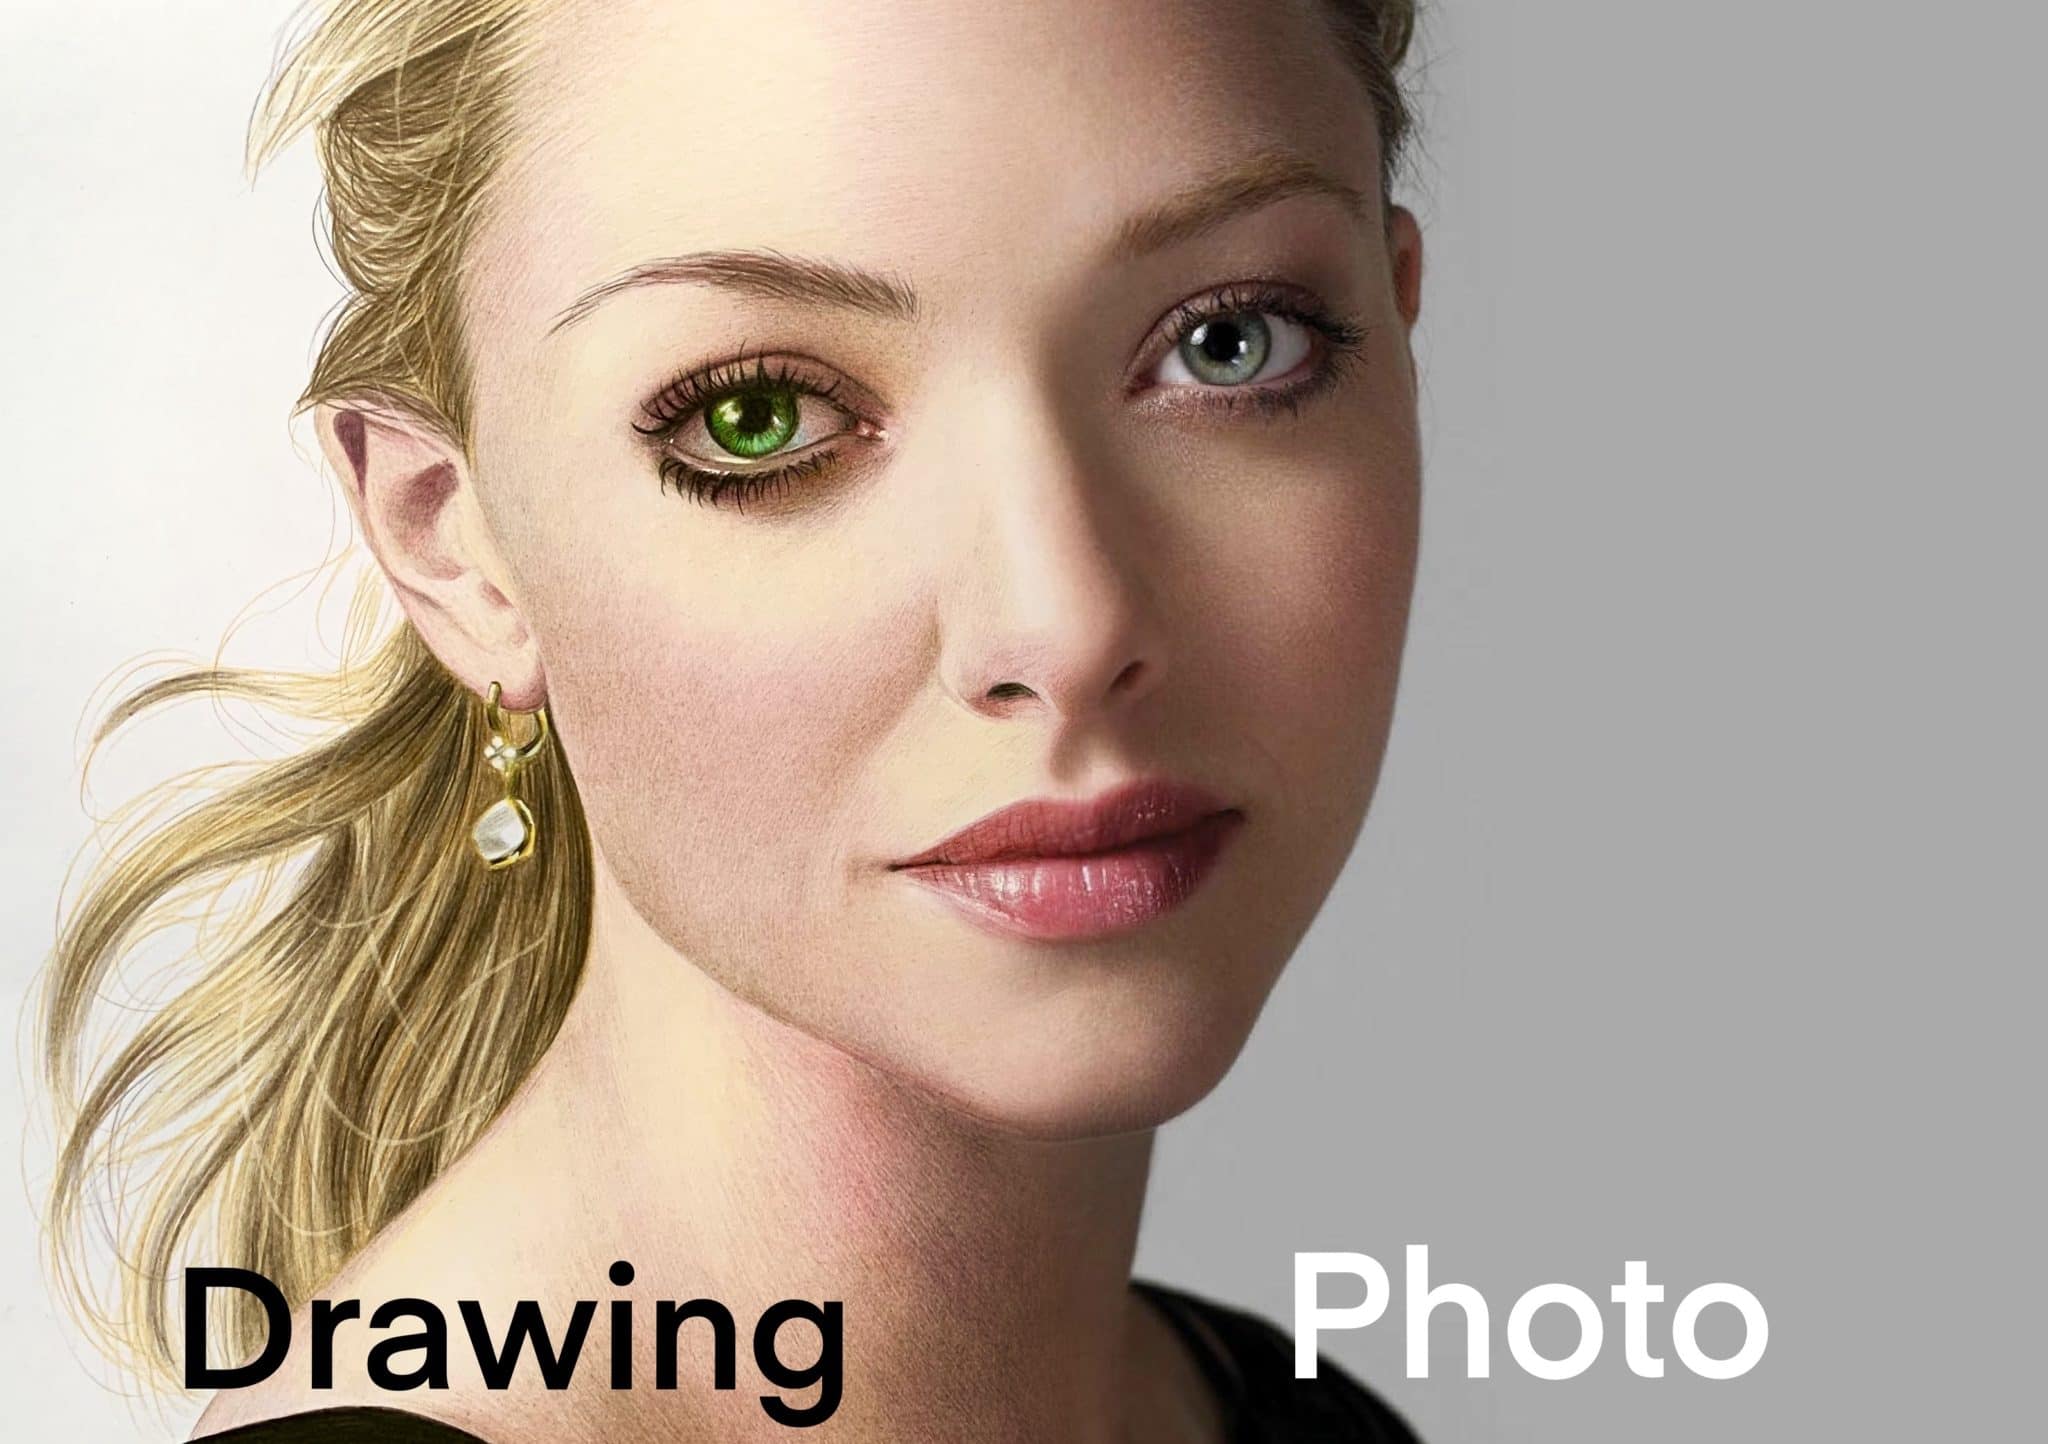
When I started drawing, I remember searching and searching for tutorials, tips or methods, and never finding exactly what I was looking for. Especially for drawing skin. Even though there is a ton of “tutorials” on the internet, they are either too complicated, or missing crucial points (intentionally or unintentionally!). Or they are not about photorealistic drawings. So, I decided to share all my personal tips, most of which I found out by myself, through trial and error. I strongly believe that knowledge should be shared and not kept to ourselves, so here we go!
Drawing realistic skin with colored pencils can be tricky for many reasons. Colored pencils cannot be actually mixed, strictly speaking, color combinations are possible through many individual layers. That might sound complicated, but you know me guys, I am notorious for always searching for the fastest/easiest way possible. And I tried to simplify the process so that it can be beginner friendly. And you can actually create amazing realistic skintones!
Process
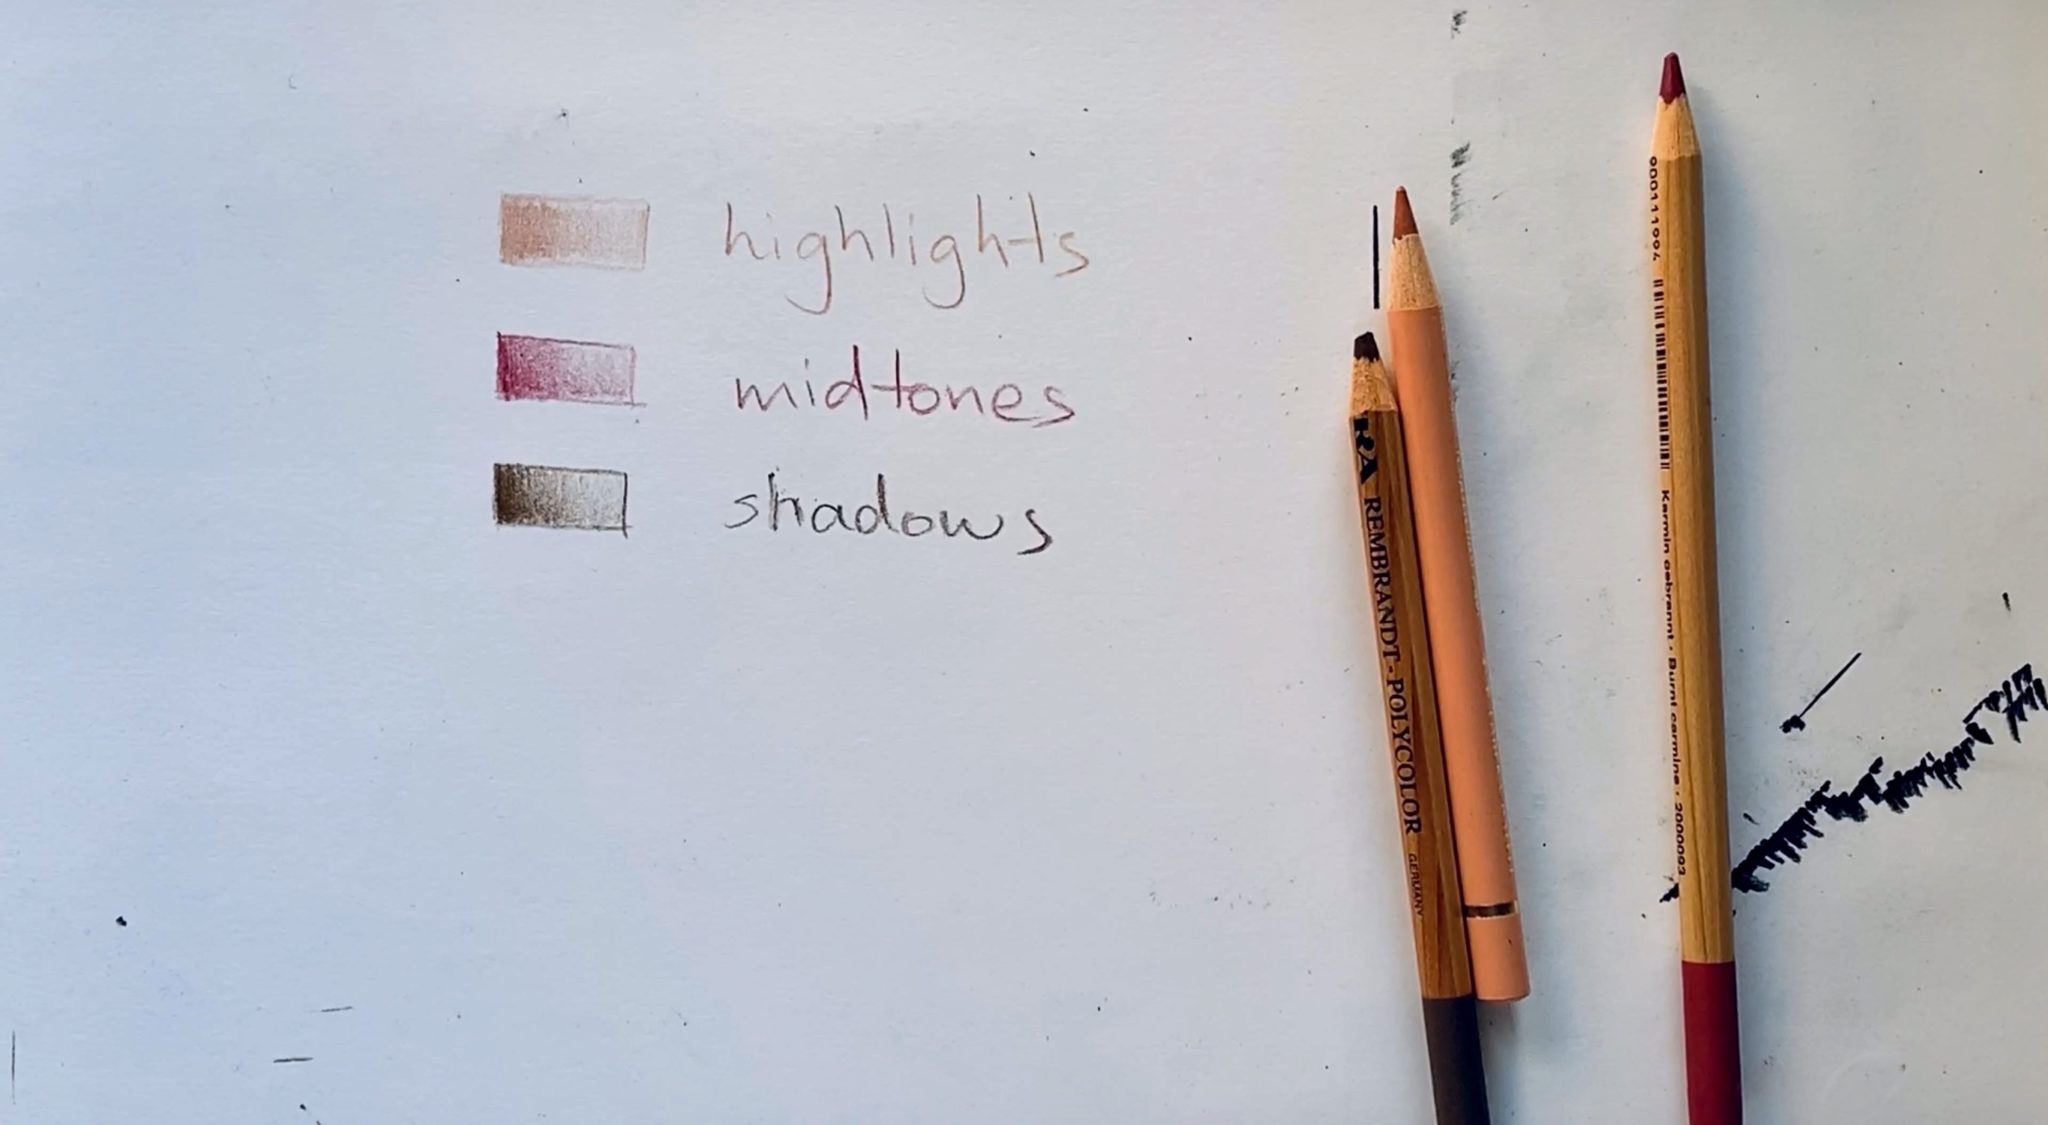
It all starts with basic color theory. I will skip the details here. Suffice to say that skin color can be broken down to three individual tonal values: highlights, midtones and shadows. So, we basically need three different colors to create these tonal values. Next question is how to choose these colors. I have drawn too many portraits and when I look at my reference I can pretty much say which colors match it. If you are a beginner, the task might seem intimidating. But I can guarantee this: It doesn’t matter which colors you will choose. As long as you stick to three colors only, your drawing will be consistent and potentially fabulous! 😉
Color choice
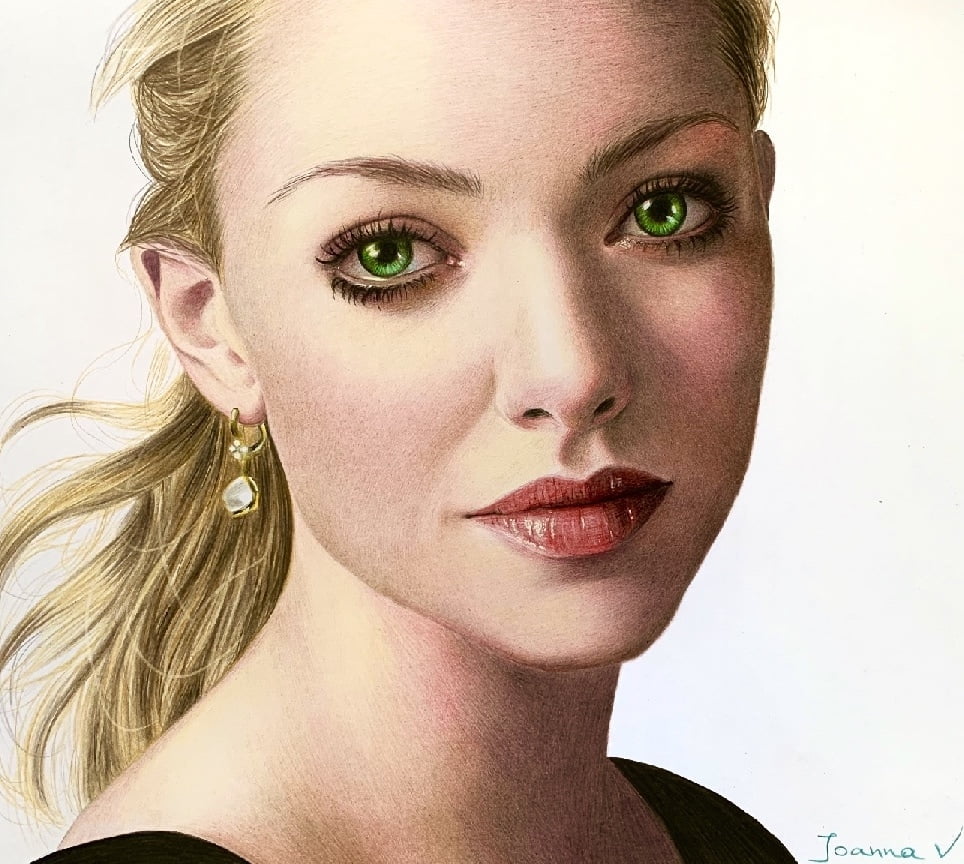
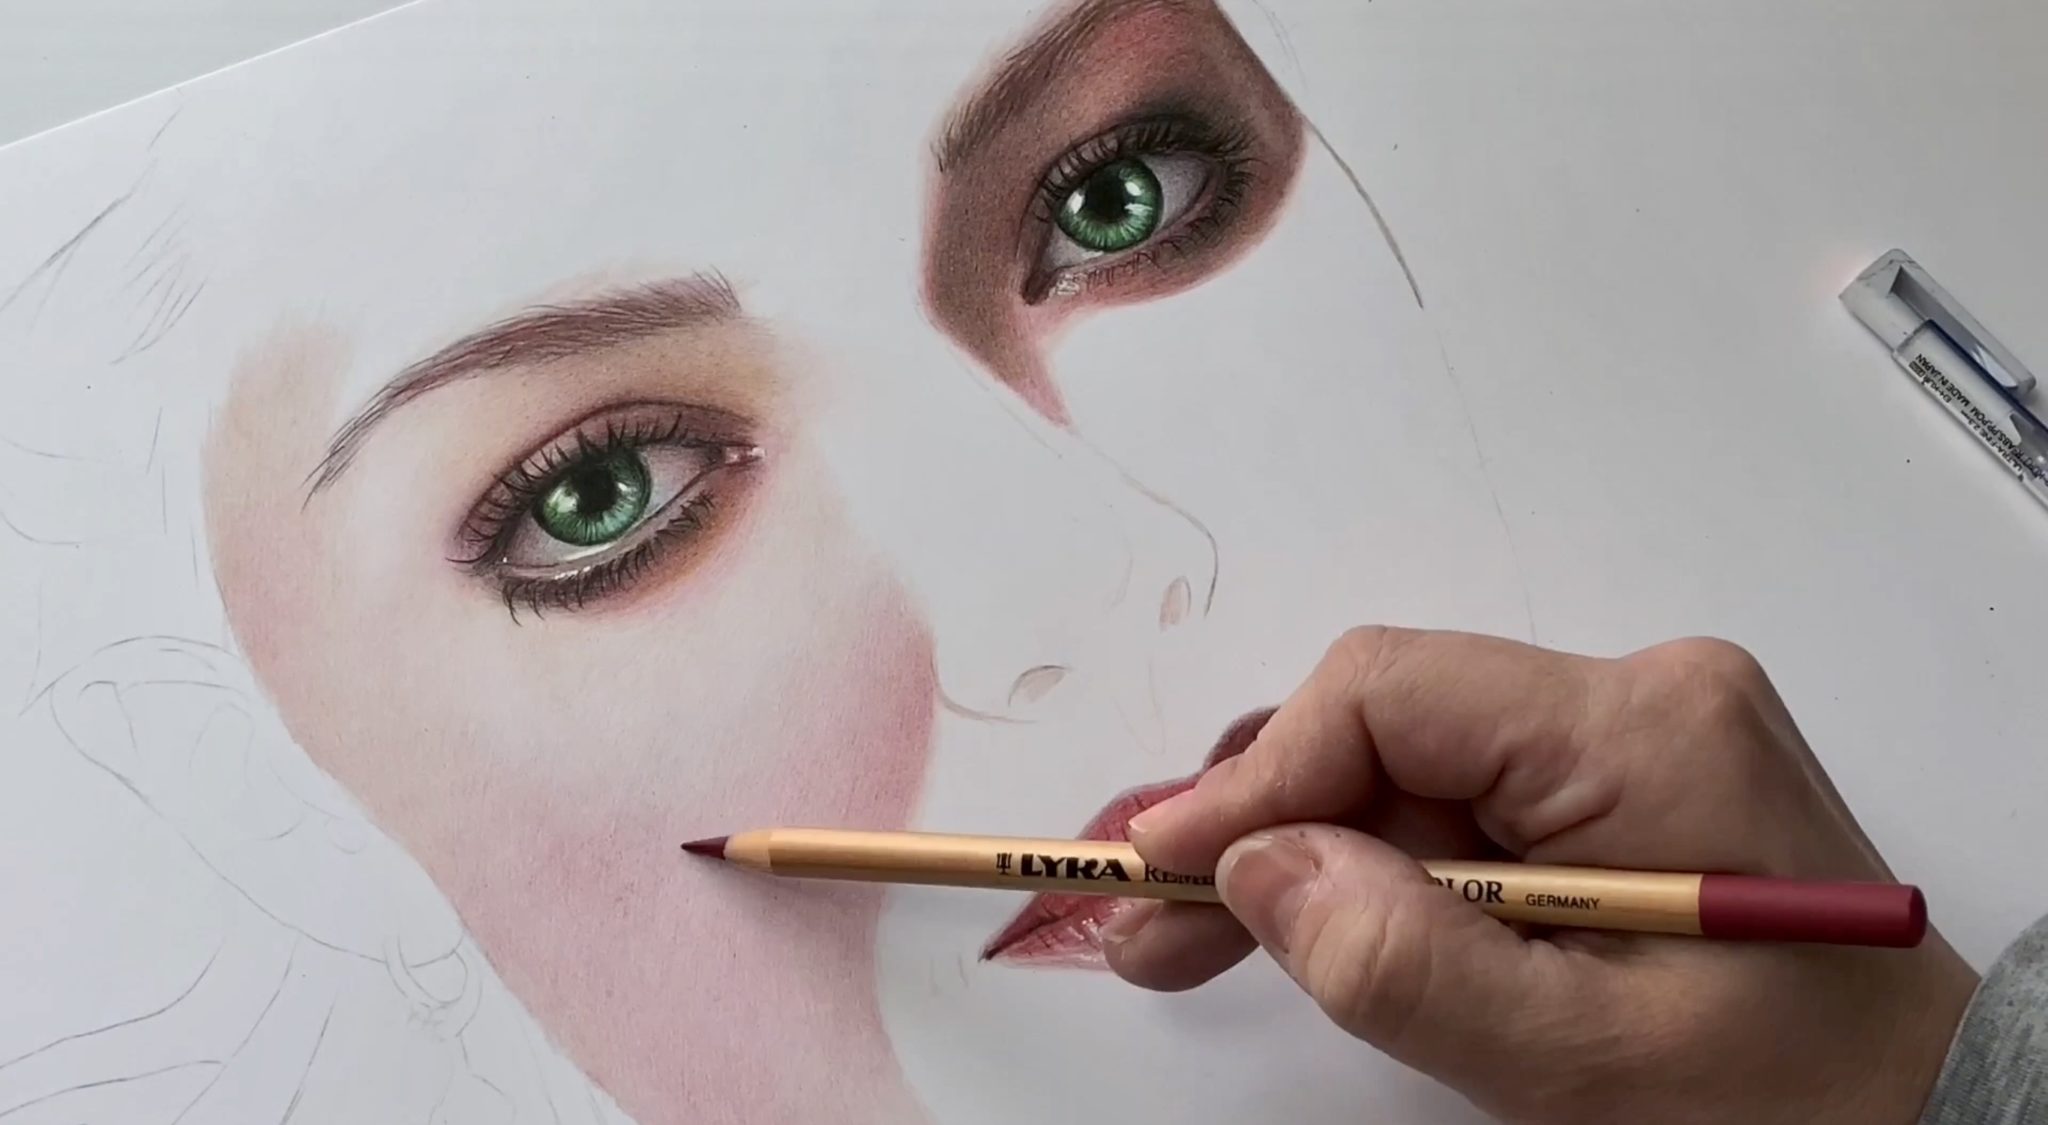
For this drawing of Amanda Seyfried I chose three different shades of brown/pink. They are 1) cinnamon (faber-castell polychromos) for the highlights, 2) burnt carmine (Lyra Rembrandt polycolor) for the mid-tones and 3) van-dyke brown (Lyra Rembrandt polycolor) for the shadows. As mentioned before, you don’t need to use the exact same colors, and of course brands don’t matter. (Here I created a piece with kids colored pencils)
highlights
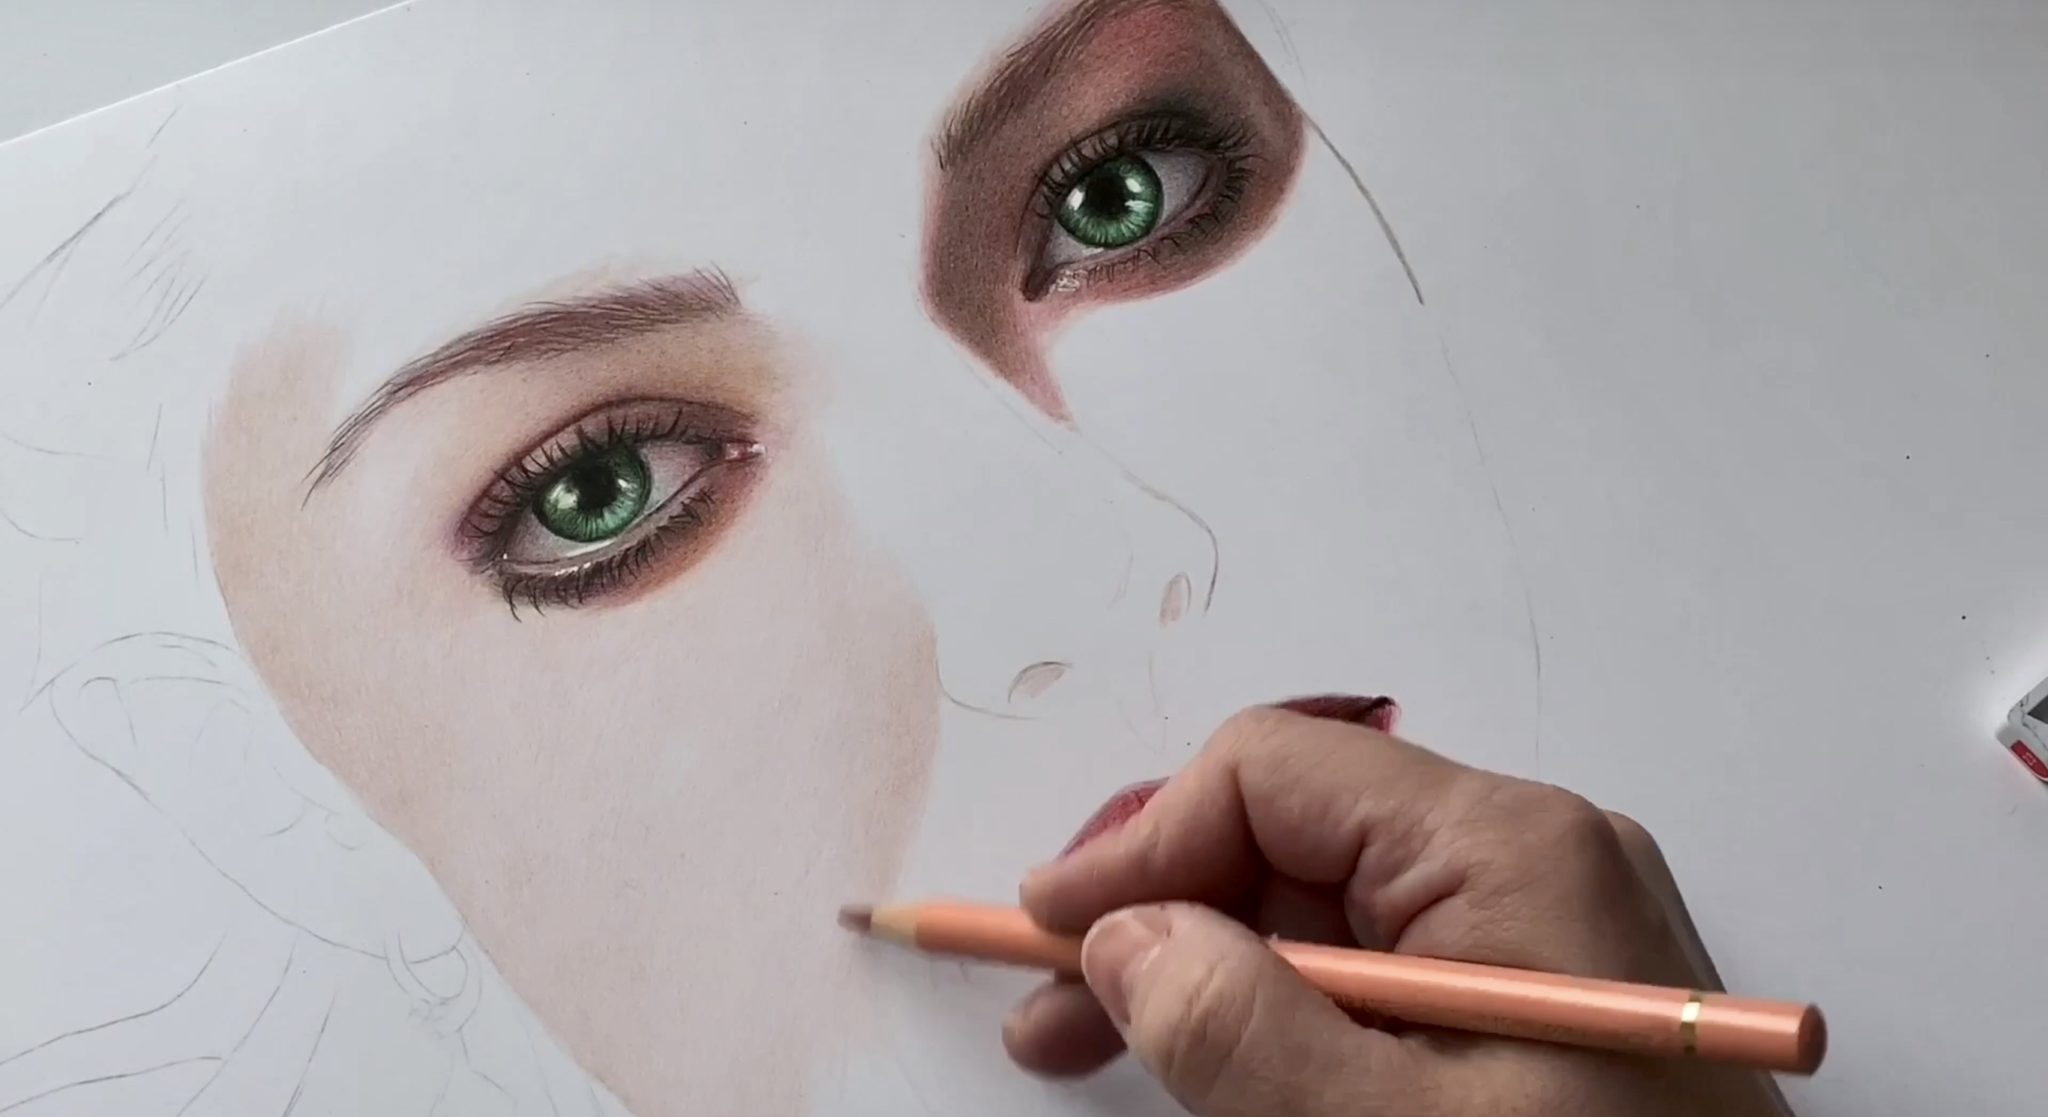
After choosing my palette, I take my lightest shade (cinnamon=highlights) and shade the whole area as uniformI fly as I can. At the same time I try to concentrate the color to the darkest parts of the drawing. This way I create the base, the lightest parts of the skin.
mid-tones
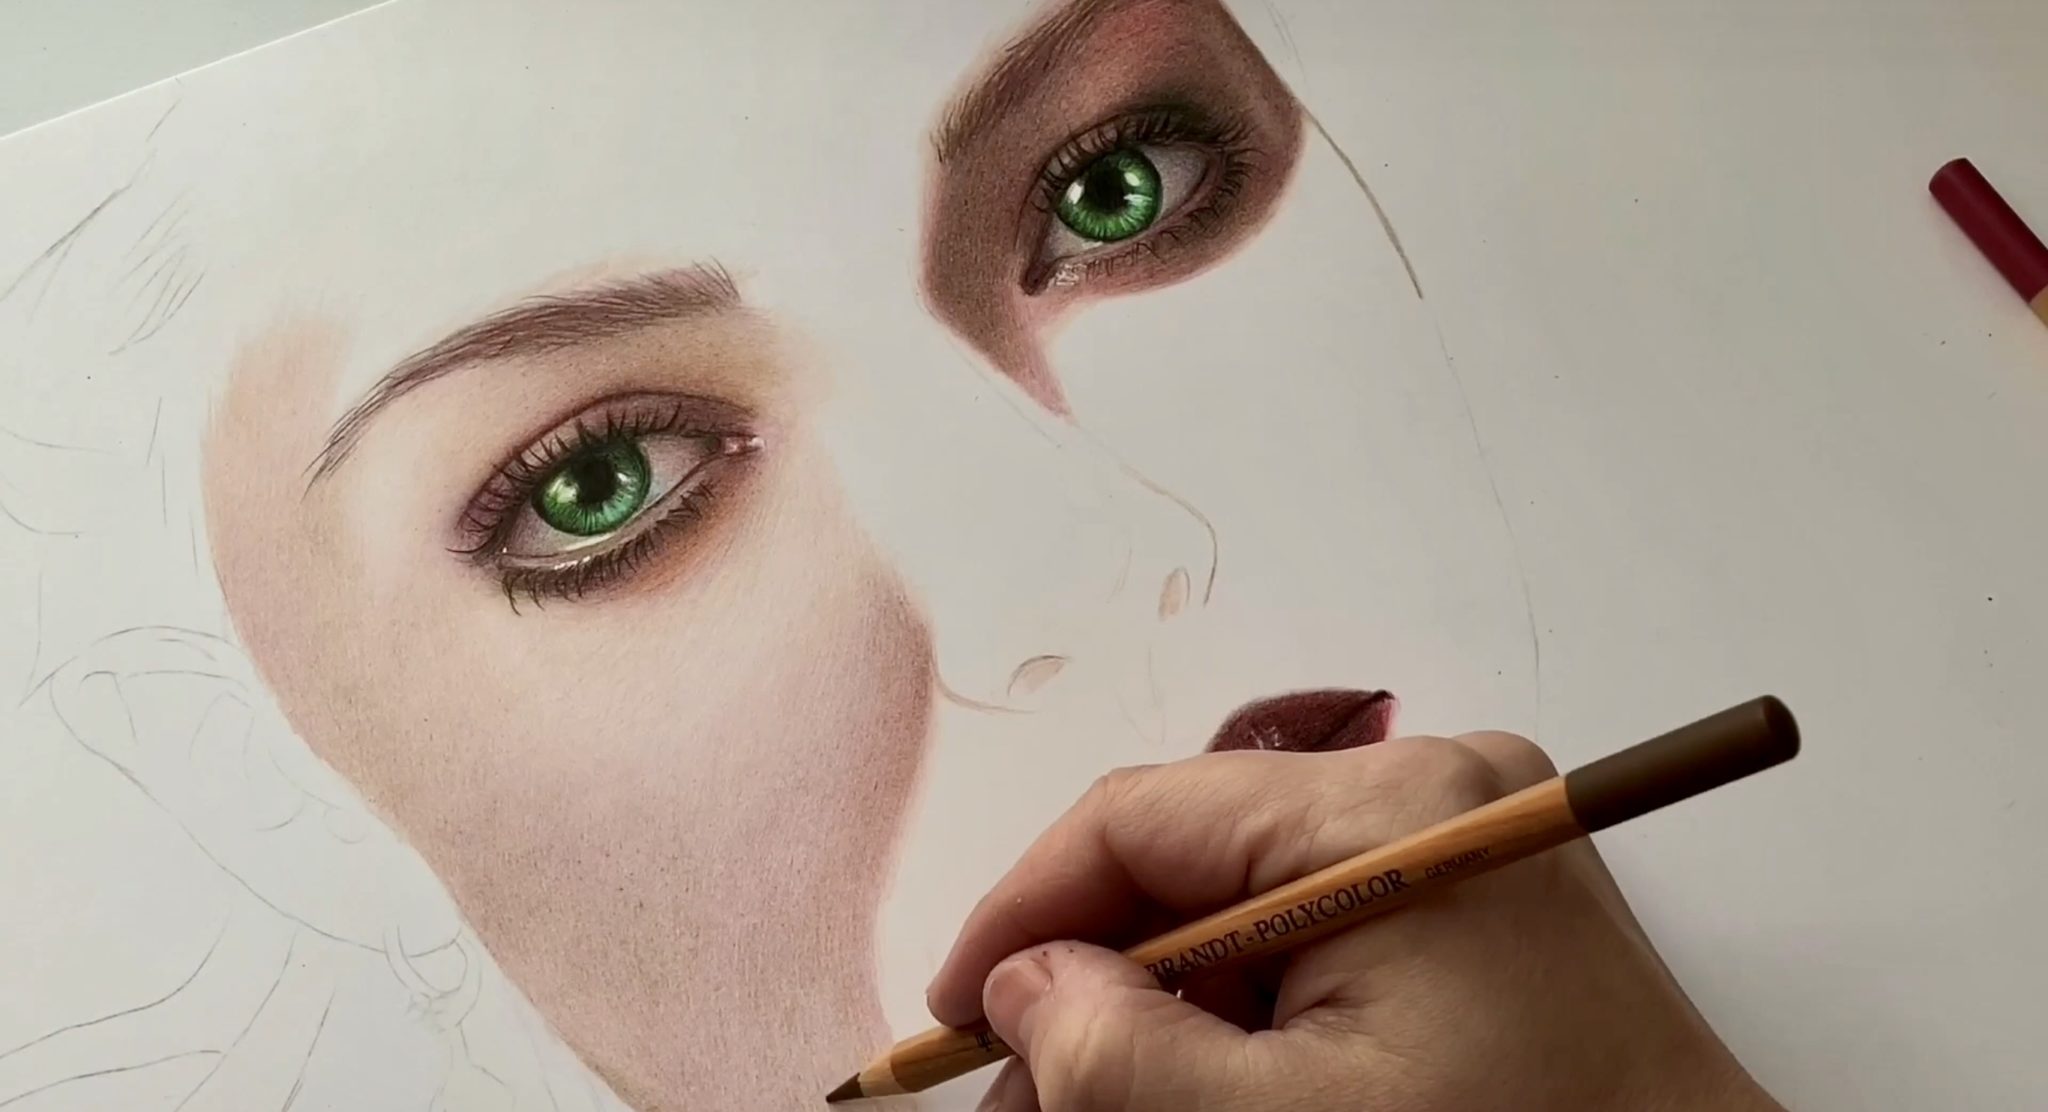
After that I move to the medium shade (burnt carmine) and I pretty much do the same. Shade the whole area, except for the very light parts. Again I try to be as uniform as I can and I concentrate the color to the darker parts.
shadows
Then again I do the same with the darkest shade (Van-Dyke brown).
And that’s all! Optionally you can go back and forth using your three colors, in order to create a seemless transition between the different skin tones.
And you are done. This is the easiest way (as far as I am aware of) to create beautiful, realistic skin tones.
Additional tips on drawing skin
- In reality, I (almost) never use only three colors. Although three colors can do wonders. Most times I use additional shades of red to warm up my drawing or shades of green and blue to mute down my skin tones. You can read more here, this is an older, slightly more advanced tutorial of mine, but the basic idea is the same.
- As stated before, the point is to create a beautiful drawing, not make an exact copy of the reference image. Do not worry if your colors do not match the reference photo. As long as you are consistent and use the same colors throughout the whole artwork, your drawing will be consistent and beautiful, just slightly different.
- Also do not be afraid of “crazy” colors. Apart from the obvious skin colors, oranges, pinks, reds and browns, skin consists of blues and greens as well. And to be honest adding green or/blue can produce more interesting results, can give “dimension” to your skin. Otherwise, even though it is colored, your skin might look flat. For example if you use three shades of brown, the drawing will be monochromatic, the equivalent of using three shades of gray (just like graphite drawings).
- To darken a part of the skin even further, you can use black VERY CAREFULLY. Keep in mind that using black cancels color, so try to keep these parts more saturated, add more color to them.
I know I didn’t cover everything, I kept a lot of things out, like blending and creating textured skin. But this is supposed to be an easy, beginner-friendly tutorial. I will cover these issues in a future tutorial.
And for those who prefer a video tutorial you can check this one out:
 Colored Pencils
 My 5 top High End Artist Grade Colored Pencils
 Acrylic Markers
 Ohuhu Acrylic Markers Review
 Colored Pencils
 Woomer Art Colored Pencils Review
 Graphite
 Staedtler Mars Lumograph Black Review
 Arrtx
Arrtx Arrtx 60-piece Regular and Anime Acrylic Markers Review
 Art discussion
13 Responses
Thanks for taking the time to make these tutorials and videos! Super helpful and informative! I appreciate how it’s broken down into ‘simple’ steps, I just read the Arrtx tutorial-I like how you’ve laid out the steps; they’re built up to add more knowledge, depth and detail as you learn. Definitely less intimidating and more approachable than any other tutorials I’ve seen!
I appreciate the time you’ve spent sharing your experience/knowledge, which I agree, is great to share! It certainly doesn’t hurt another artist to be shared.
Going to check out your YouTube channel and hopefully find an eye tutorial 😉 yours have such detail and realism! You’re very talented, thank you again for sharing your process! I know these posts and videos take a lot of time/work.
Xoxoxoxox, SM
Thank you very much! Glad they are helpful. Whatever you might need, please don’t hesitate to ask!
Fine bro pls where do i find this colours from
Do you mean the pencils I use here? You can get them from anywhere, Amazon included. I get mine from small bookstores locally. 🙂
Buy prismacolor color pencils buy the set of 72 good luck
Thanks for teaching. But, how do you mute down a shade.? For example if I have too much pink tone in the drawing what do I use to bring it closer to reality
Hello Diana. What I normally do, is use a grey layer on top. Grey can vary from soft grey to black, depending on how bold the underlying color is. For example if I want to desaturate a peach color, I will use a soft layer of light grey on top. If I want to desaturate a bright red, I will use a soft layer of black on top. Hope this makes sense, and whatever else you might need, please don’t hesitate to ask!
To mute or desaturate a color, use its compliment to tone it down. If it’s too pink…too much color…too bright, add green! You’ll need to find the right green to mix to the pink, but it will work. Make color swatches and test it out and voila! If you don’t know what a color’s compliment (or opposite on the color wheel) is, find the color and draw a line directly across from that color to locate the compliment. We use green for pink because pink is red with white added. And green is across from red on the color wheel. Using this will add depth and richness to your artwork that using neutrals to try to do the same won’t achieve.
Green — Red
Violet — yellow
Orange — blue
Happy arting!
Hello I’m Maryah Curtis I’m 17
I also wanna learn how to shade the human skin but I don’t really know the basic colors used and how they are arranged please help me
Hello, I’m just learning. Did you use Zestt it on any part? I’ve seen it done on eyes, but should you do it on skin? Also, can you use the blender with oil based pencils?
Thank you, your work is beautiful!
Thank you Sandra! No, I do not use zest. I don’t use blenders either, but yes, you can use them with oil based pencils. 🙂
Hello. I’m a 21 year old artist yearning to improve my skills with realistic portraits. Overall I do really well, however I struggle to achieve the hyper-realism I desire. When I’m layering the colored pencil down, do I burnish each surface completely, or do i leave grit of the paper exposed to show more texture? I’m not exactly sure how to get that realistic skin texture I want. I’d love to chat with you and discuss some tips and tricks.
-Amyah C.
Hello Amyah, that depends on you, the way you layer and burnish your surface will eventually define your style. Personally I love heavy texture, so I rarely burnish. (and that, only when I draw females) You can check out my real-time drawing section on YouTube, https://youtube.com/playlist?list=PL_LhoQCF87xAb3XIhWX1cC2r5-hQjOrHy where you can see my entire progress. And whatever else you might need, please don’t hesitate to ask!