
Check out here the rest of my kids crafts and coloring pages. To download this template, scroll down.
I don’t exactly remember how it started, but recently my kids and I are very much into pins. We use them as pivot points, so that the baby animal (up until now, it’s only been an animal, thank goodness!) can move the head, open the jaw, flap it’s wings… you name it. (If you have additional ideas, please let me know!)
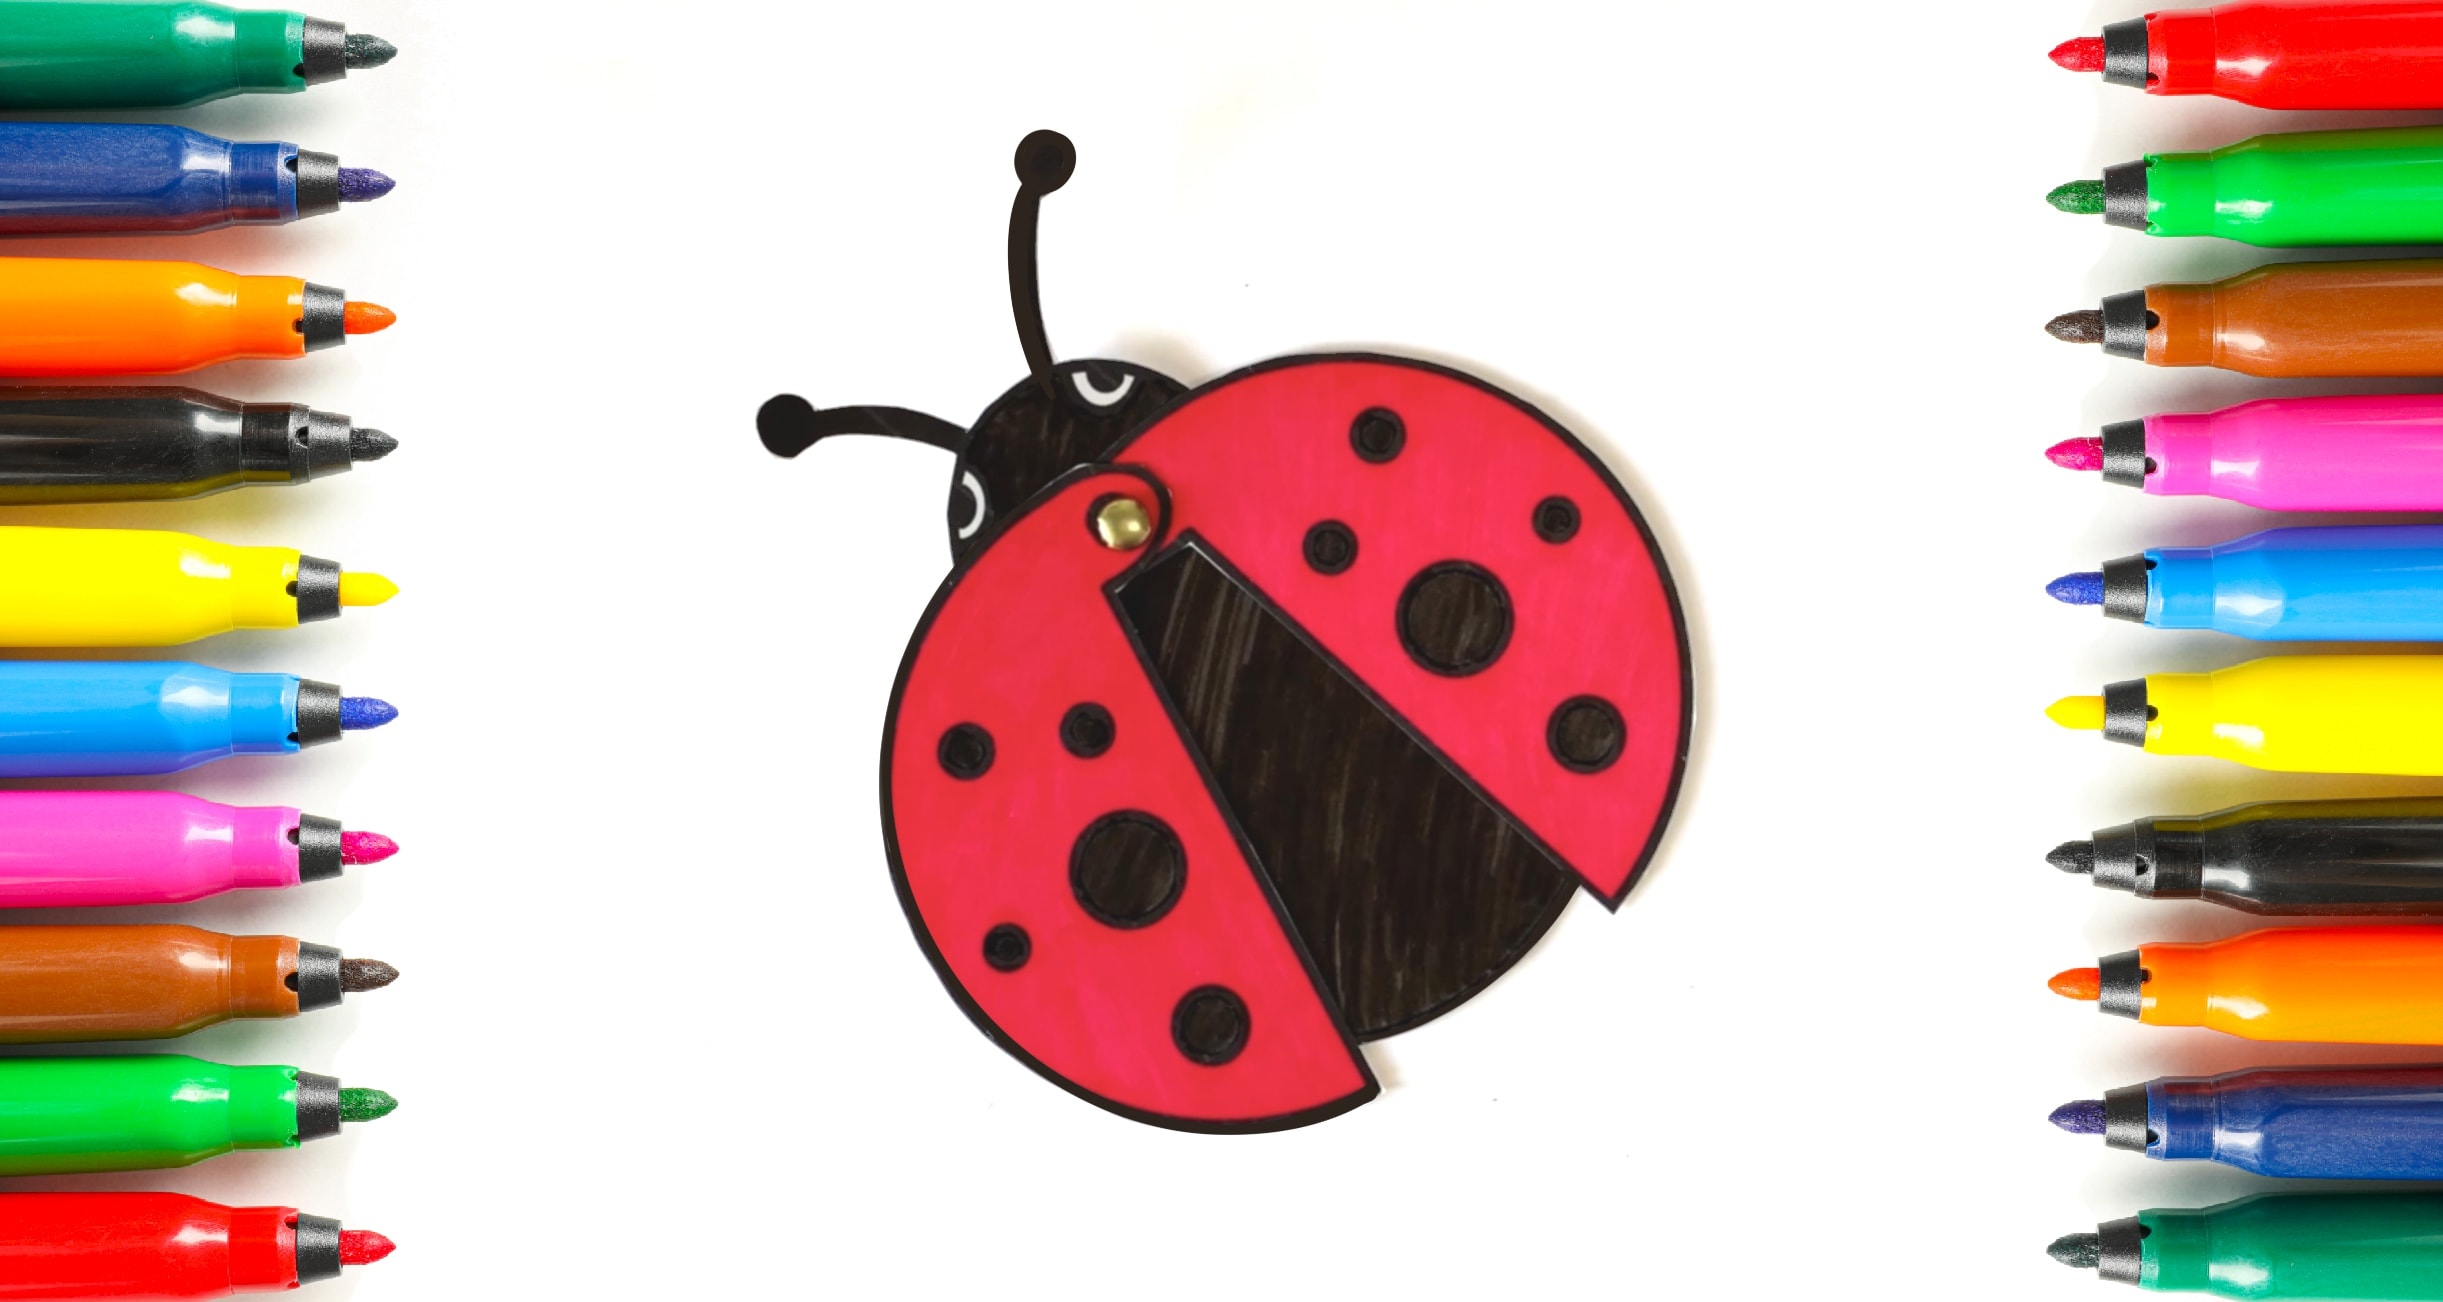
The other day I came up with this super simple ladybug idea. Even if you don’t print the premade templates, you can easily duplicate the design. (You can use a normal glass to trace the circles.)
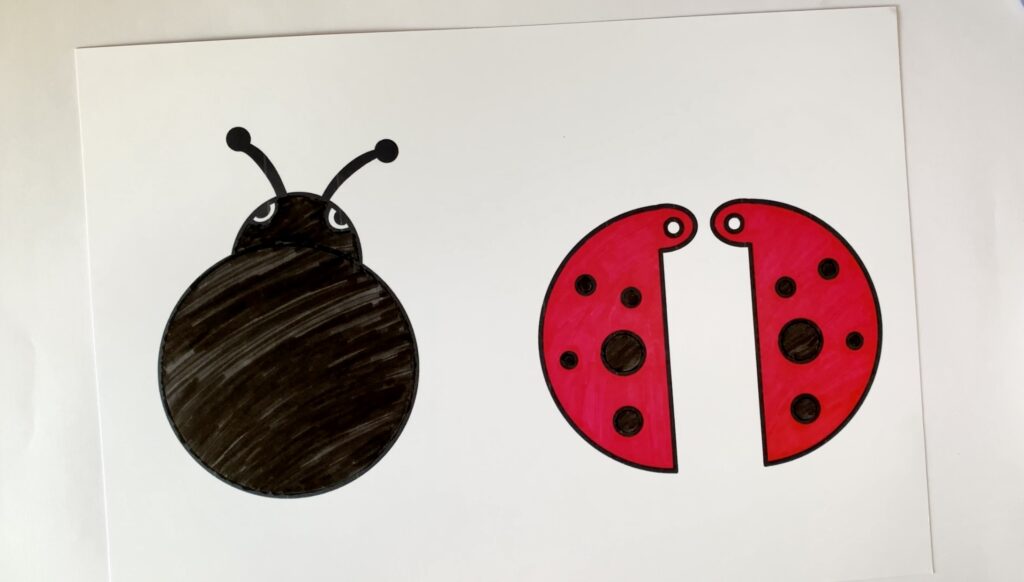
Once everything is colored and cut out nicely, you need to open three little holes with the tip of your scissors. (Sometimes I use a crafts knife, but be careful with these, keep them out of children’s teach as they are super sharp.) Two on the wings and one on the base of ladybug’s head.
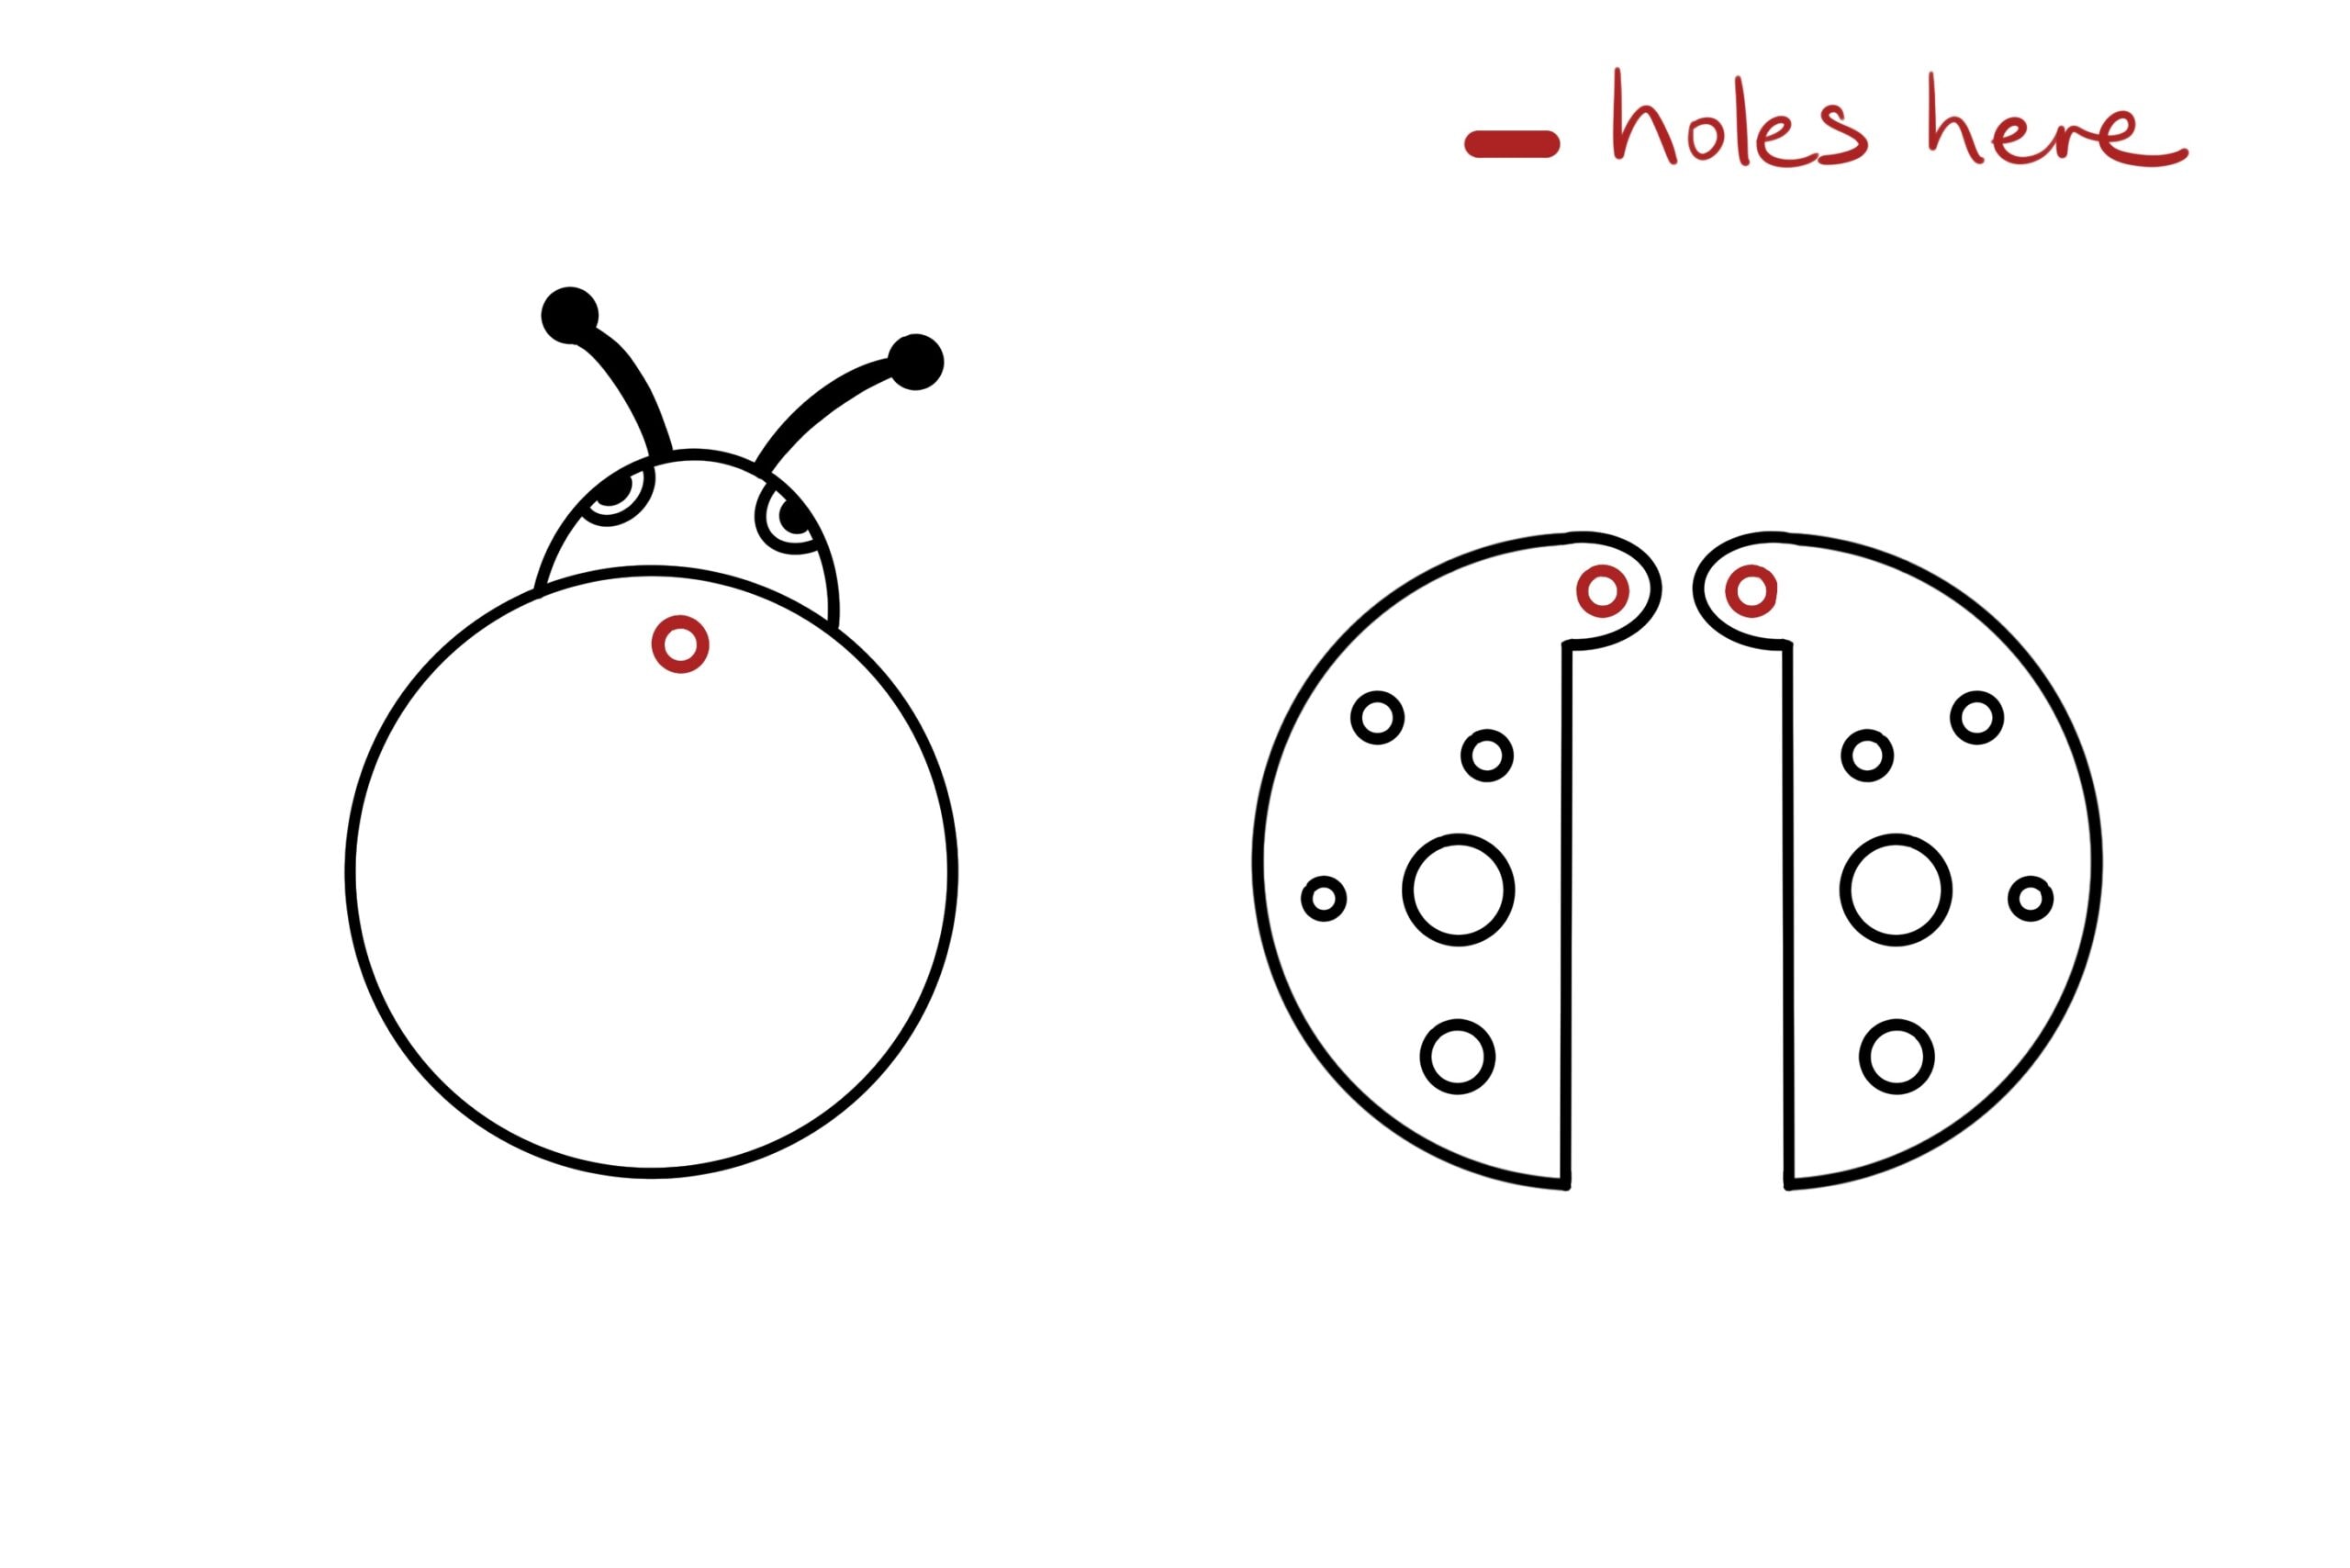
Then place the pieces one on top of the other, so that the holes are aligned.
Now you connect the pieces with a craft pin. I really don’t know how these are called, but they are pretty common at the local craft stores here. Since I live in the middle of nowhere… I don’t think you’ll have any trouble getting those!

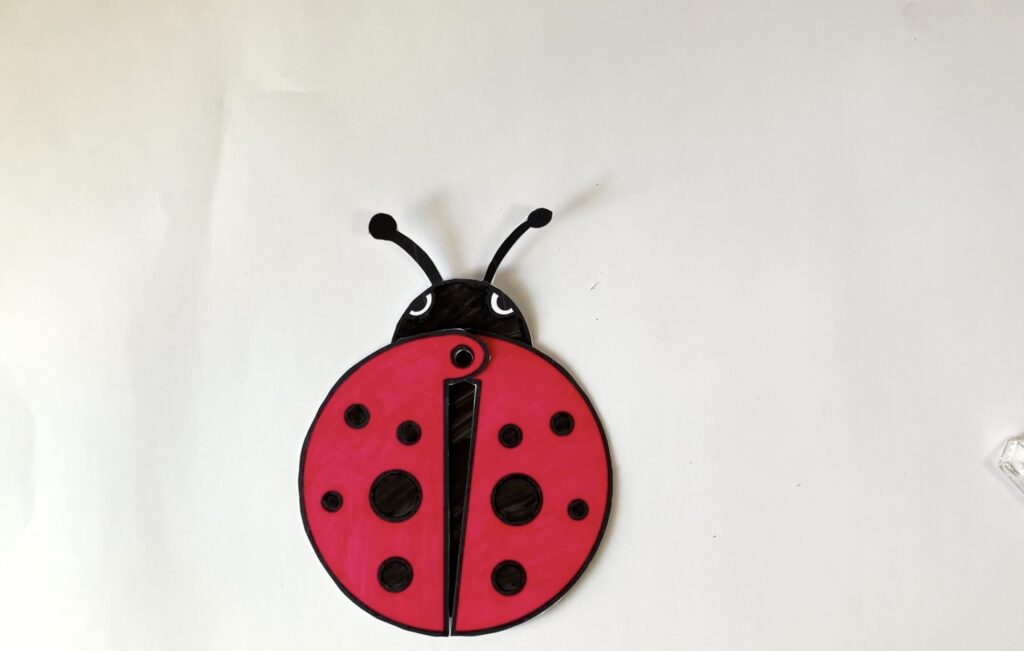
And tada! Your awesome, flapping-wings Ladybug is ready! Happy crafting!
 Art discussion
 The future of Art (or why AI won’t take over)
 Colored Pencils
 My 5 top High End Artist Grade Colored Pencils
 Acrylic Markers
 Ohuhu Acrylic Markers Review
 Colored Pencils
 Woomer Art Colored Pencils Review
 Graphite
 Staedtler Mars Lumograph Black Review
 Arrtx
Arrtx
One Response
thank you!