
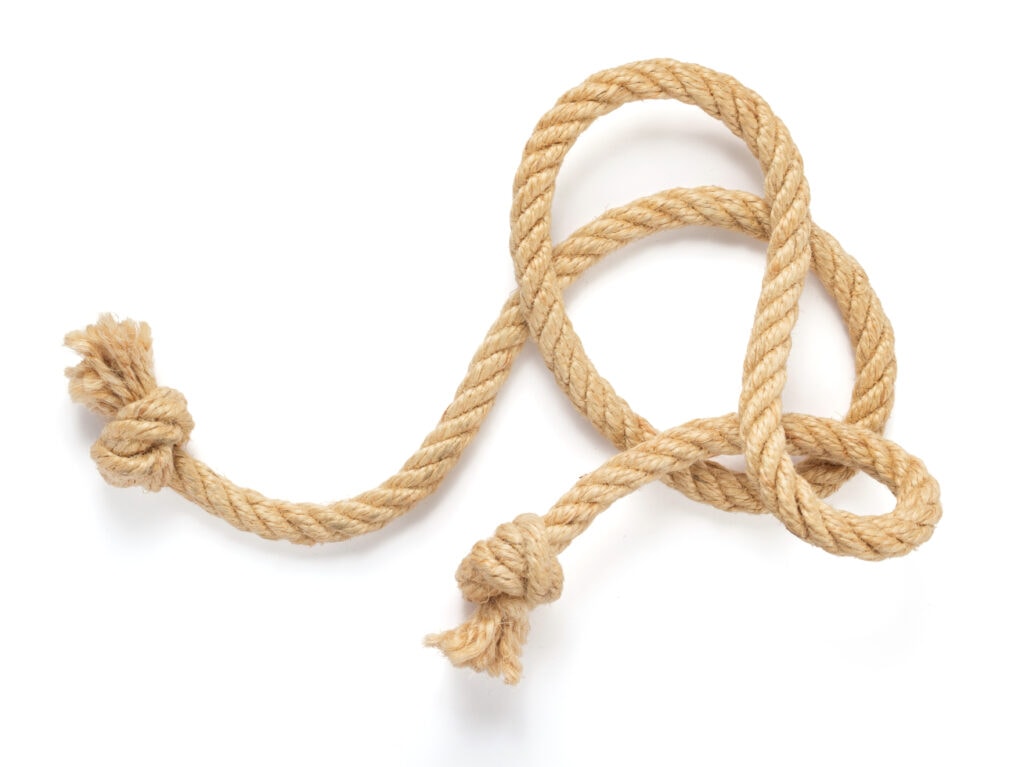
I was away for a few months and when I came back, Nomad Sculpt was like an entirely different app. And wow THE. TUBE. TOOL. I’m totally obsessed with the updated tube tool. A lot of things that were done painstakingly, now they can be completed with a couple of taps. Hence the tutorial. The easiest way to make a rope. Hang in there (pun not intended) and let’s get started!
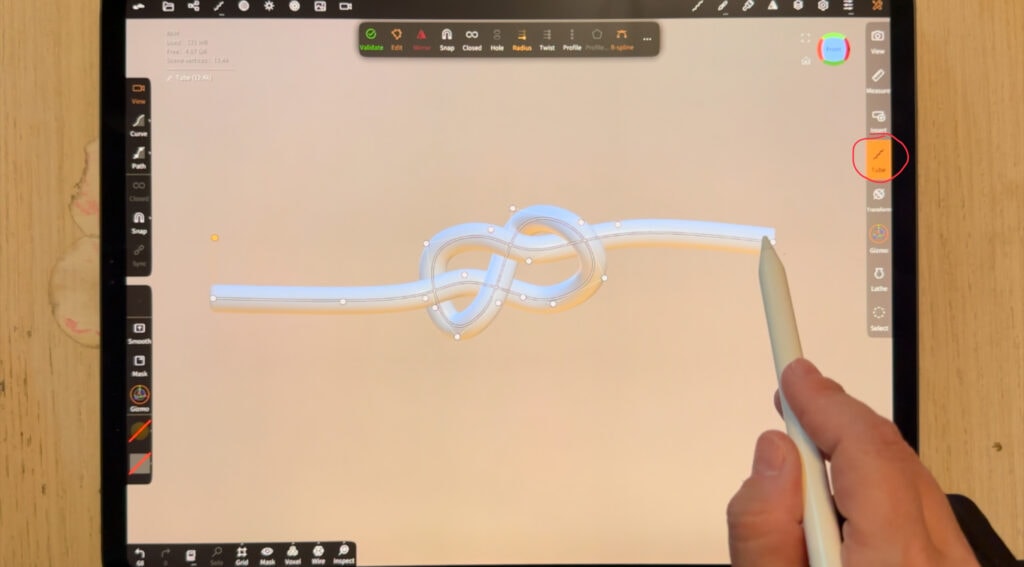
I am beginning with (of course!) the… tube tool. I am simply drawing a shape of my choosing. Personally I went for a knot, but you can make any curve you like.
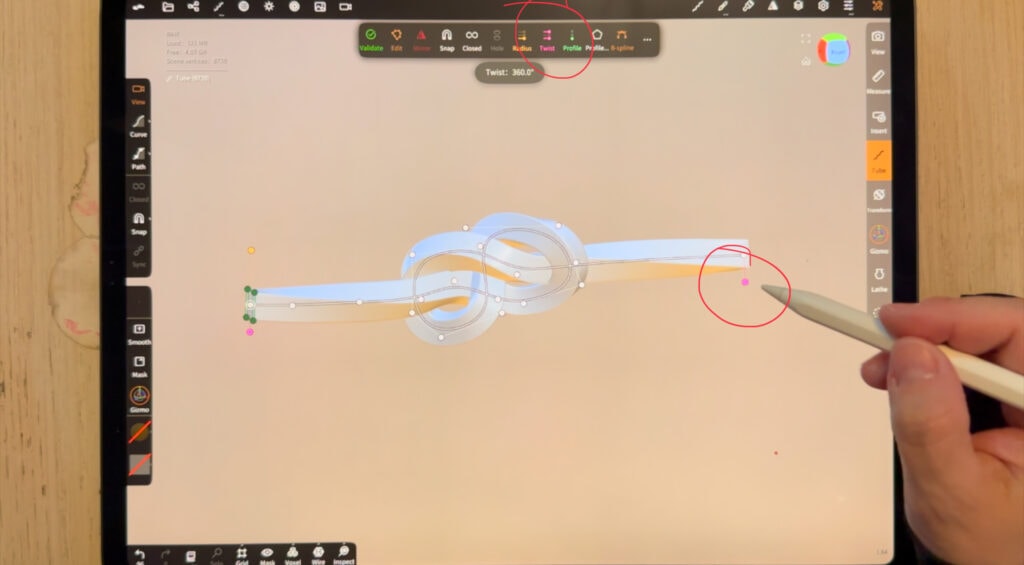
Then tap the “twist” button twice and the “profile” button once. Grab a pink handle and drag until the tube starts swirling. Oh my Gosh, we just got started and it already looks like a rope!
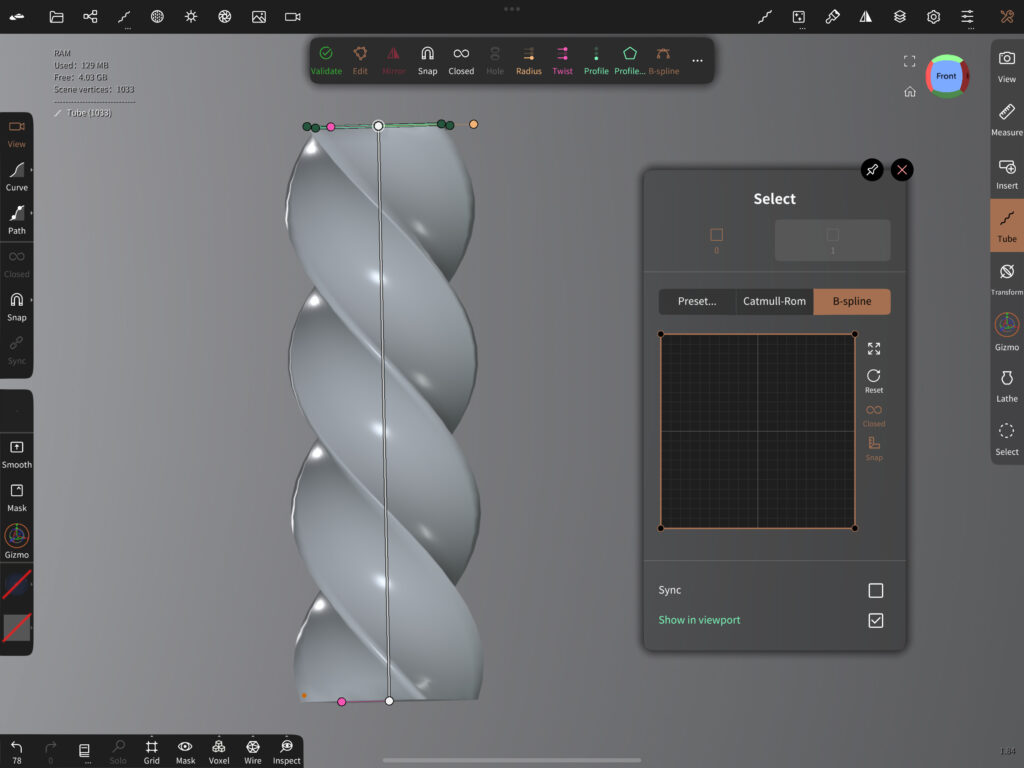
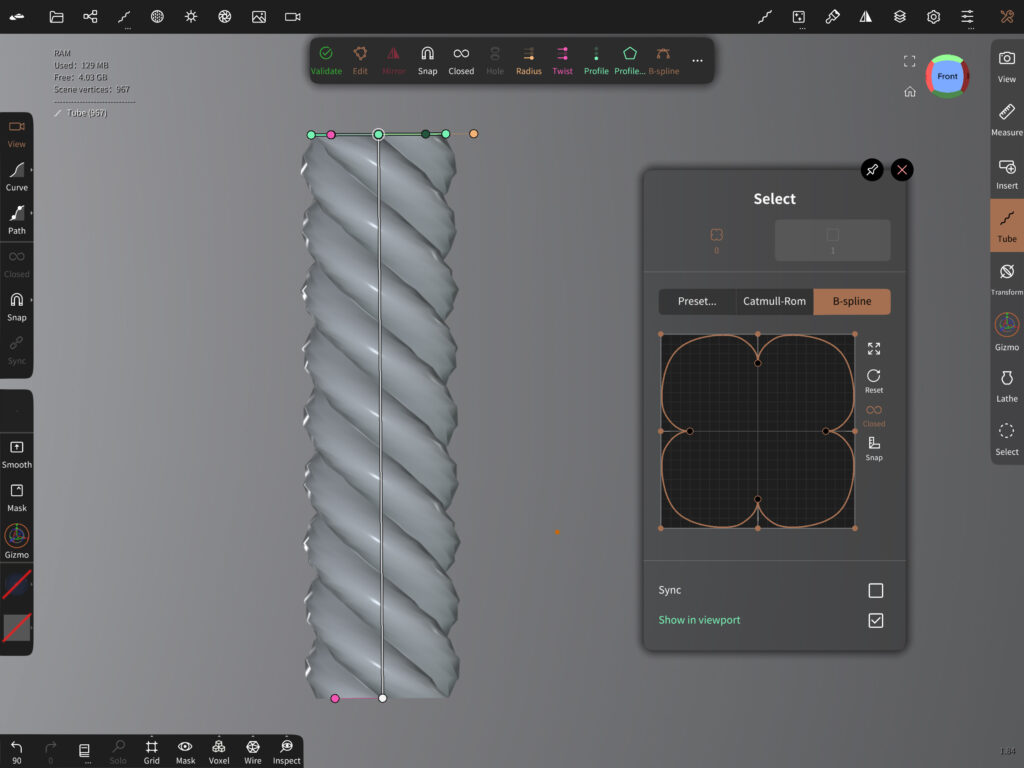
To make it realistic, you need to edit the profile curve. This is actually the cross section of the tube and makes a difference when swirling. The curve I personally ended with, is shown below.

To explain how this works, let’s use an example. Below is the default profile and the swirling tube it produces. The “bumps” are sharp, edgy, whereas in a real rope they are rounded. A real rope has actually soft, round bumps and sharp indentations – this is the effect we aim for.
By trial and error I found out that the curve below works pretty well with a rope. Of course you can create your own curve, there is no right or wrong, and of course art is art. Your personal, futuristic rope may as well haven sharp edges! 😉
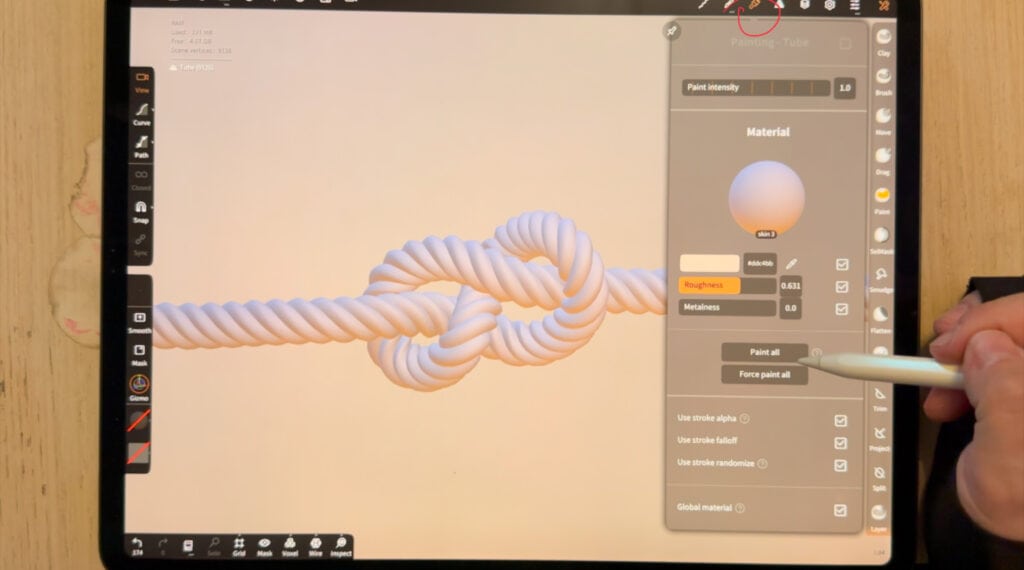
We are mostly done now, all you have to do is paint your rope and add light to the scene.

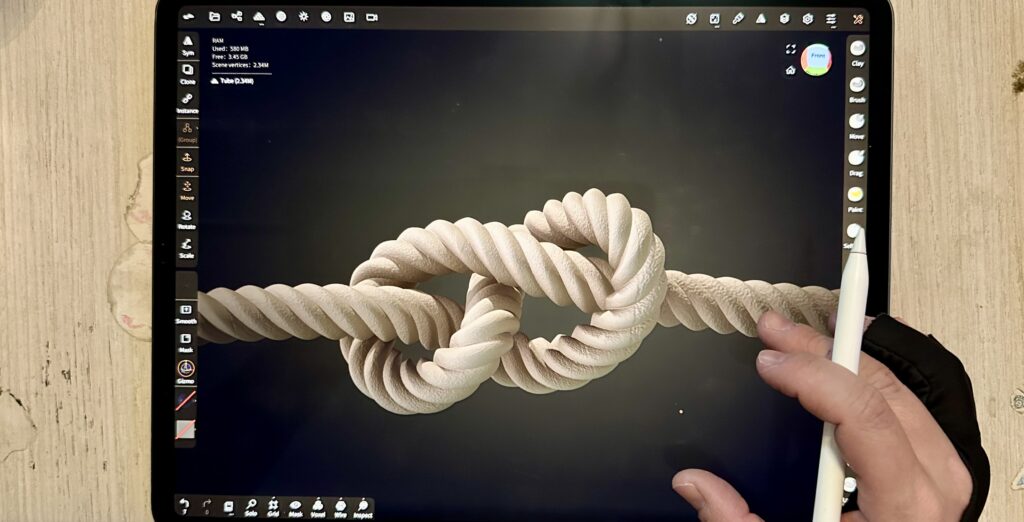
Pro tip: For an extra dose of realism, you can add some texture with the stamp brush. Just use the stamp brush from the left side menu, use an alpha of your choice and brush on the rope. I used a plain noise alpha. I don’t remember if this one came with the app, if it doesn’t I will add it below.

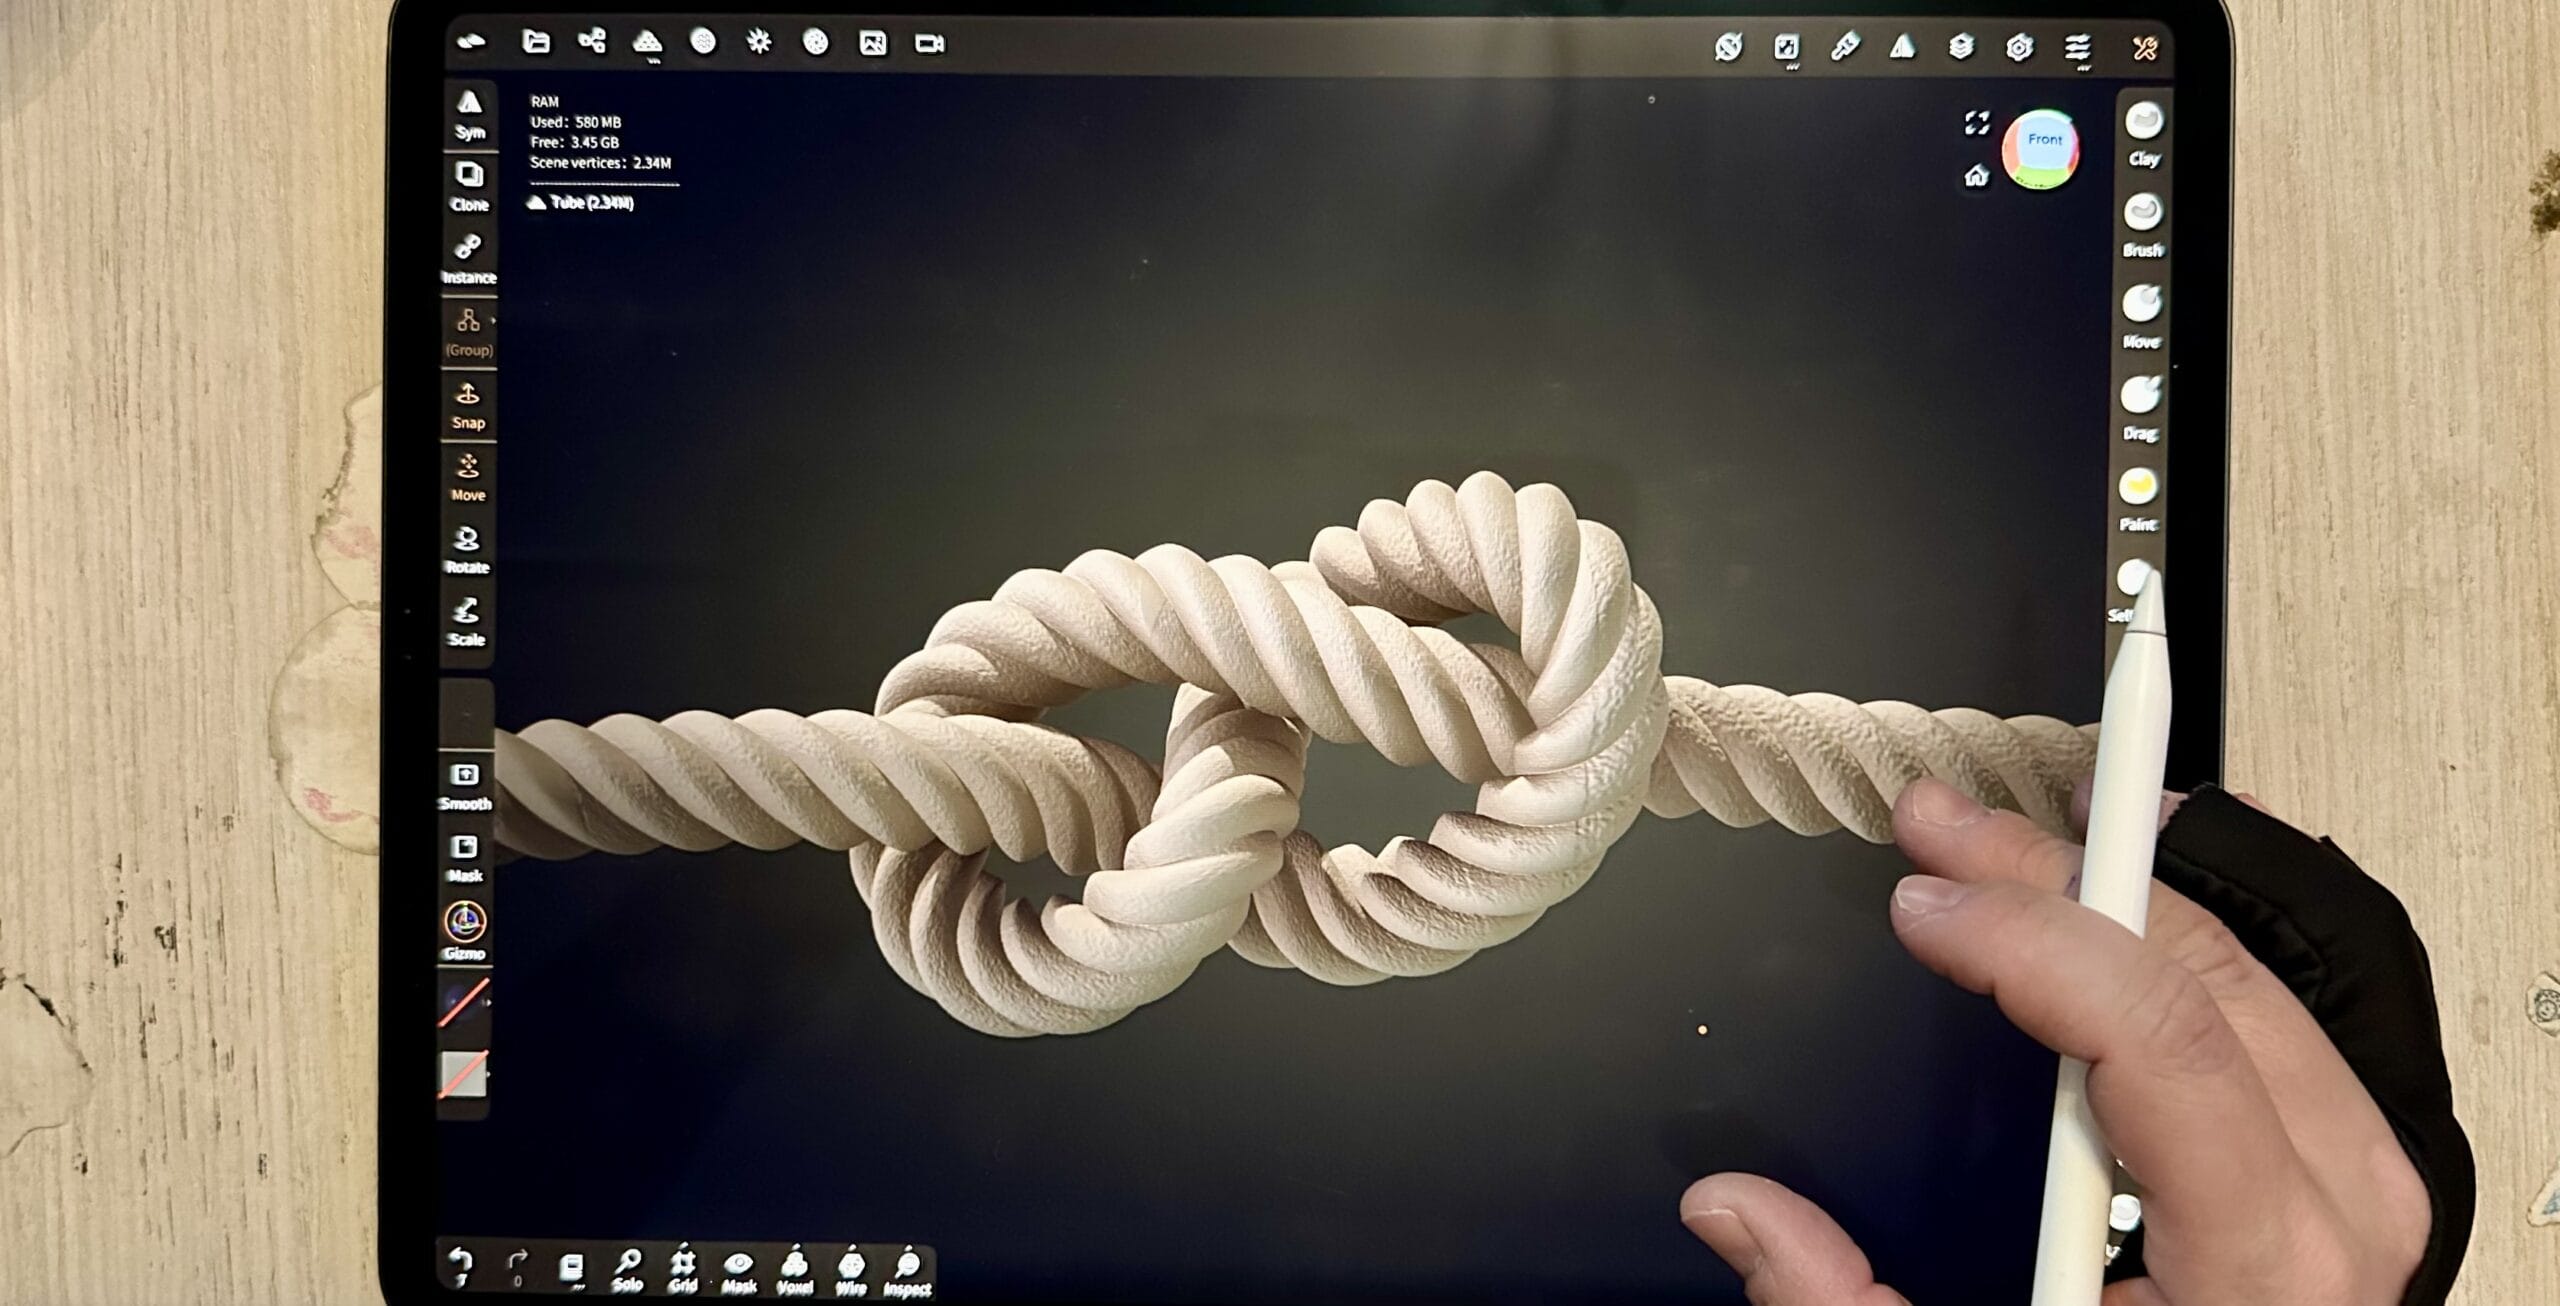
And voila! Your rope is done, as realistic as possible with minimal effort. What do you guys think? Do you use the tube tool? Will you give this tutorial a try?
 Art discussion
 The future of Art (or why AI won’t take over)
 Colored Pencils
 My 5 top High End Artist Grade Colored Pencils
 Acrylic Markers
 Ohuhu Acrylic Markers Review
 Colored Pencils
 Woomer Art Colored Pencils Review
 Graphite
 Staedtler Mars Lumograph Black Review
 Arrtx
Arrtx