
Today I will be talking about how to add texture to your digital paintings. Although I paint in procreate app, the same principles apply to photoshop as well.
I love digital painting, creativity options are endless, BUT it comes with a drawback, especially if you are a beginner. It is easy to overblend and artworks can look so plastic, it kinda puts you off. In my own beginning, I tried really hard to get rid of this “plasticity”, and here I am today to share my tips!
I won’t be talking about the obvious: Try to draw every tiny detail. Of course you are free to do so but 1) it takes a lot of time, 2) it can kill the joy of painting. Here I will be talking about shortcuts, small things that can make a huge difference. So, here we go!
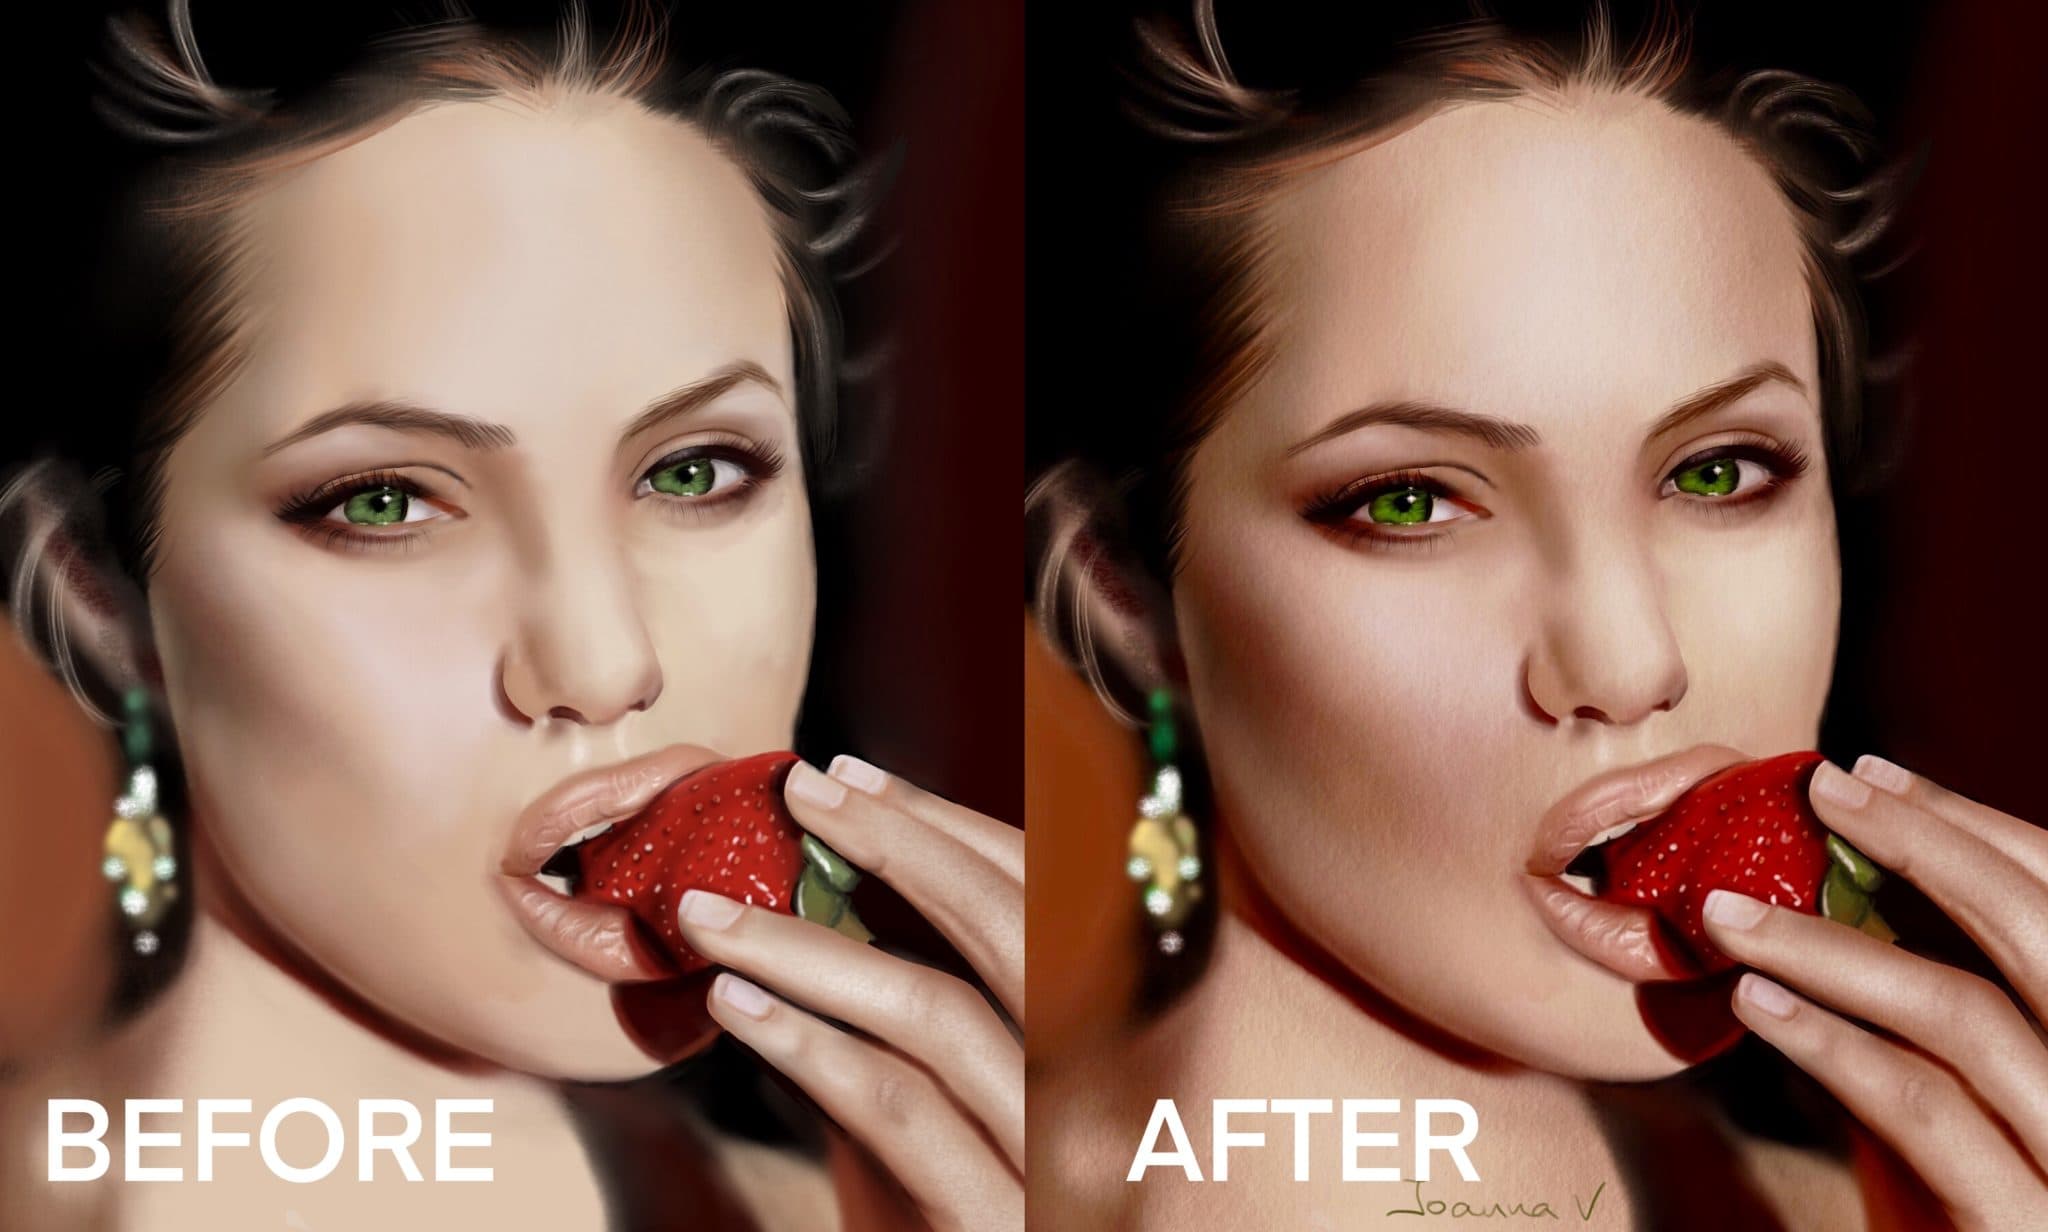
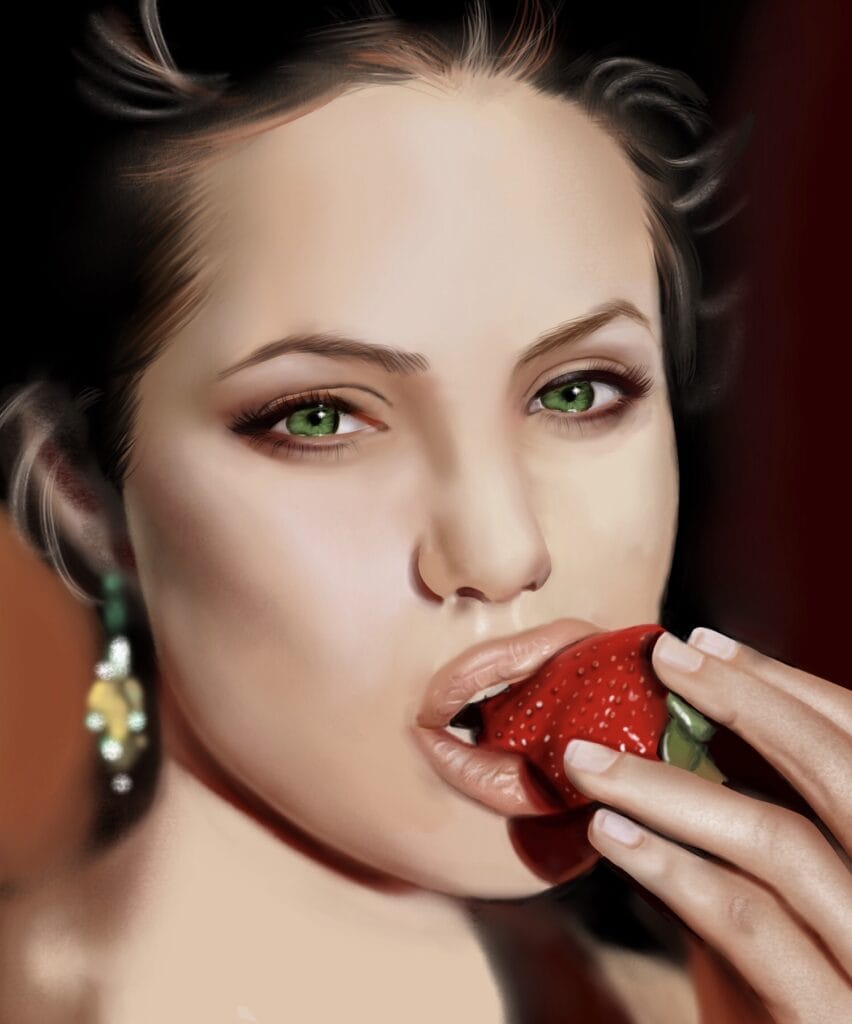
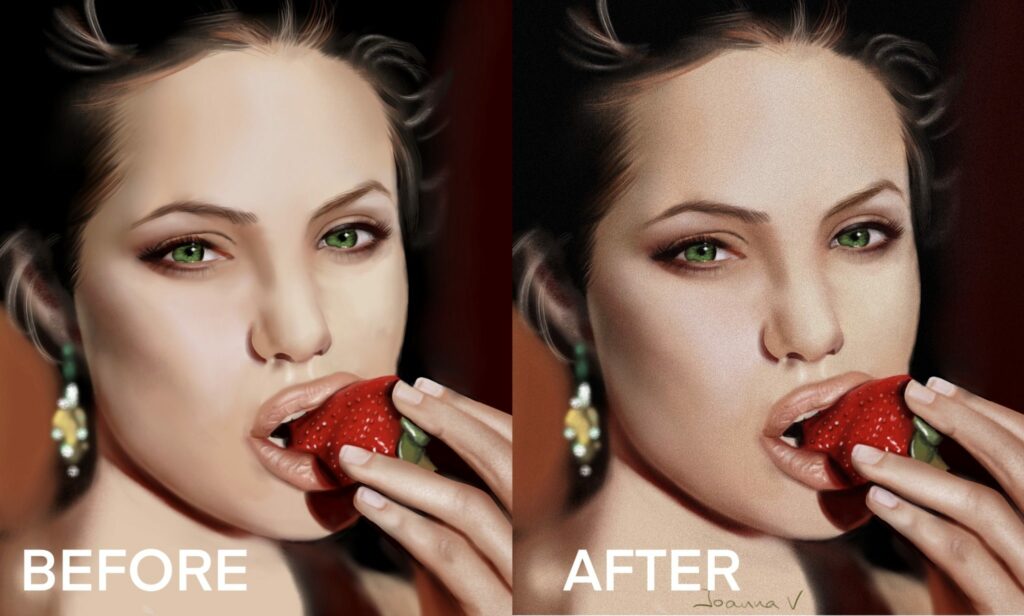
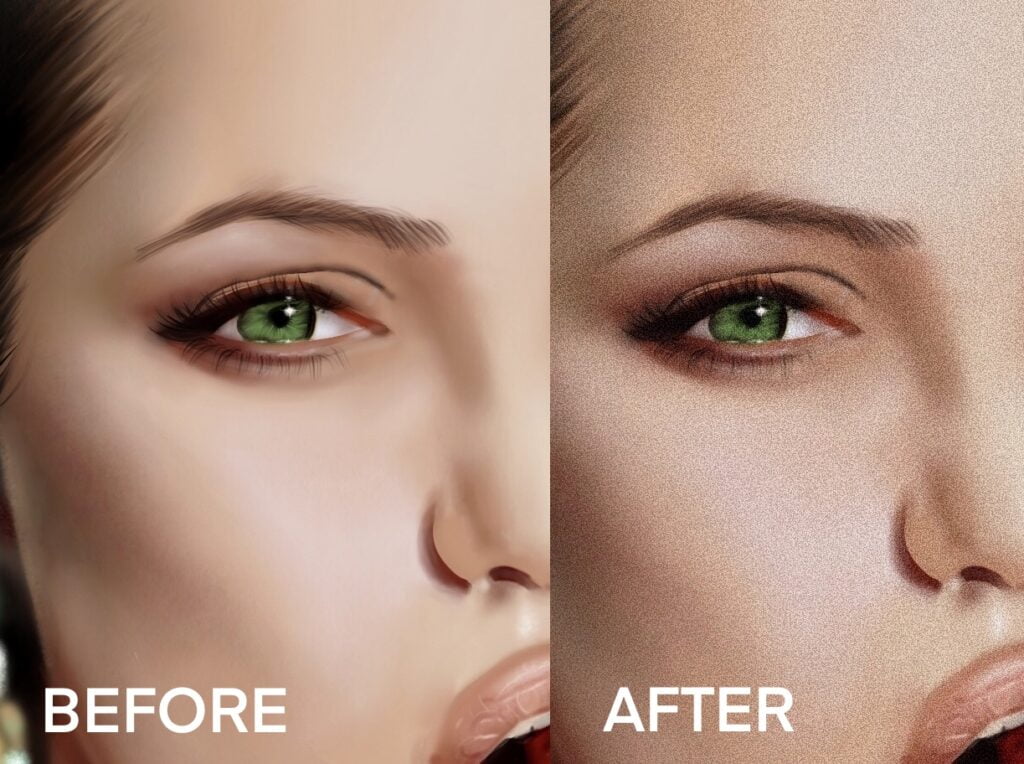
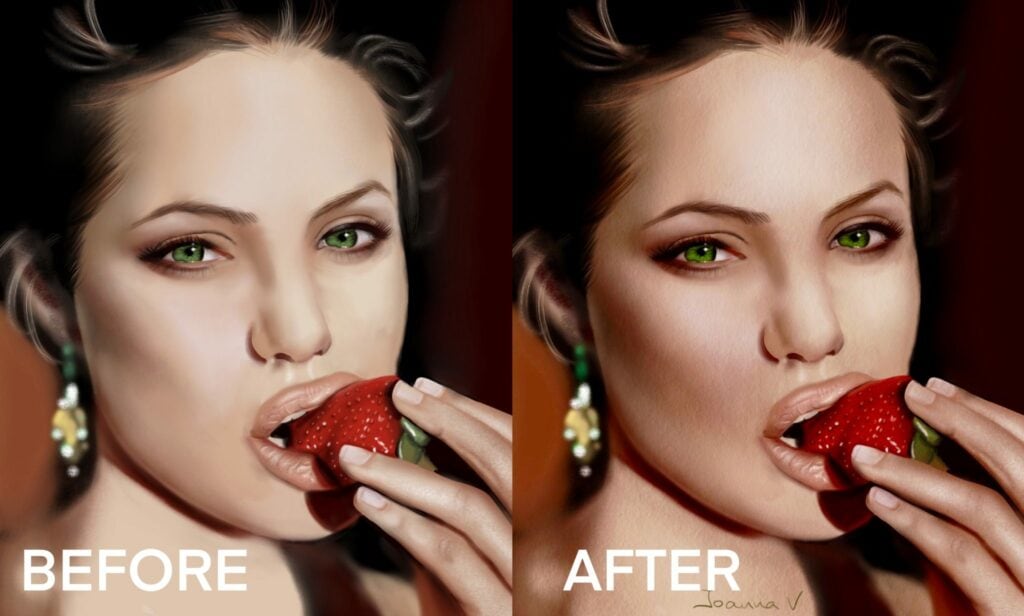
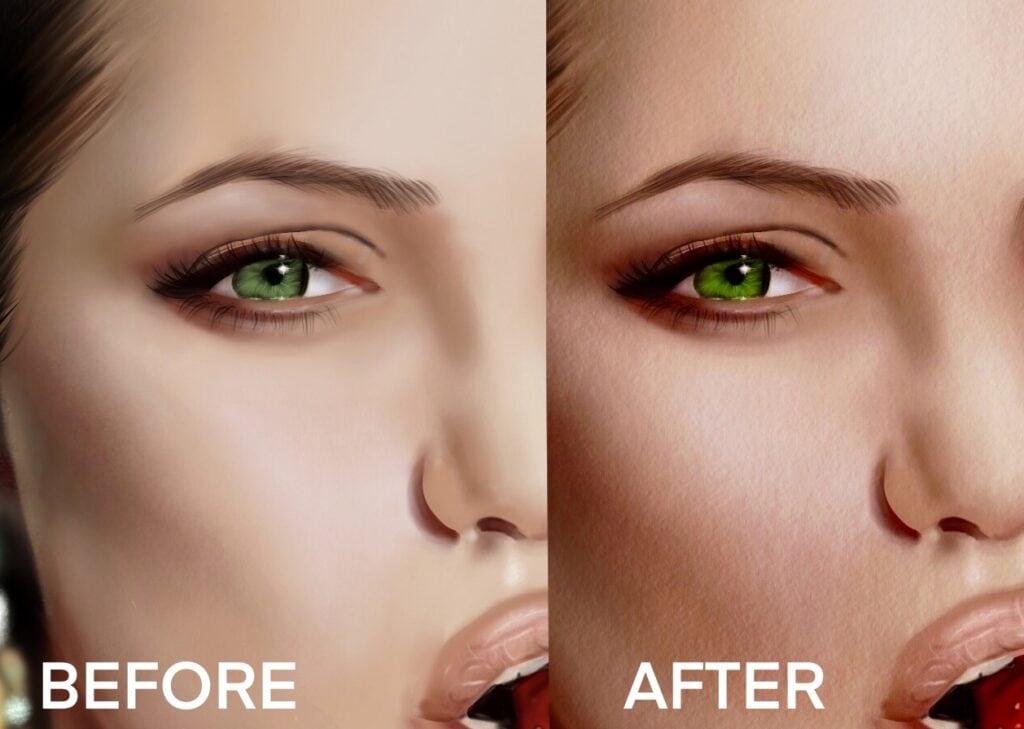
This is my initial image, which I painted on IPad Pro, in procreate app, using mostly standard brushes. Plastic skin, a little over blended, quite boring. Fortunately we can easily make an impact.
Add noise
This was my favorite way of creating minimal texture when I was working exclusively in photoshop, many years ago. Unfortunately when I switched to procreate, there wasn’t a noise option. Can you imagine my joy when noise was added in procreate in the last update?!
All you need is go to adjustments -> noise, and play with the settings until the effect is to your liking. It creates a slight texture, just enough to make a difference.
Paint with a texture brush
I love using texture brushes because they give you total control and the possibilities are endless. Simply select your favorite texture brush (I am using my own, but you can use any!), choose a color and start painting on a different layer. I normally play with different layer modes and set my style to either overlay, soft light or multiply, depending on the effect I aim at. I also play with different colors. The effect is natural and organic, almost like you painted the artwork traditionally on a canvas. The only drawback is that this is not exactly a one-click-fix, you need some practice to get it right.
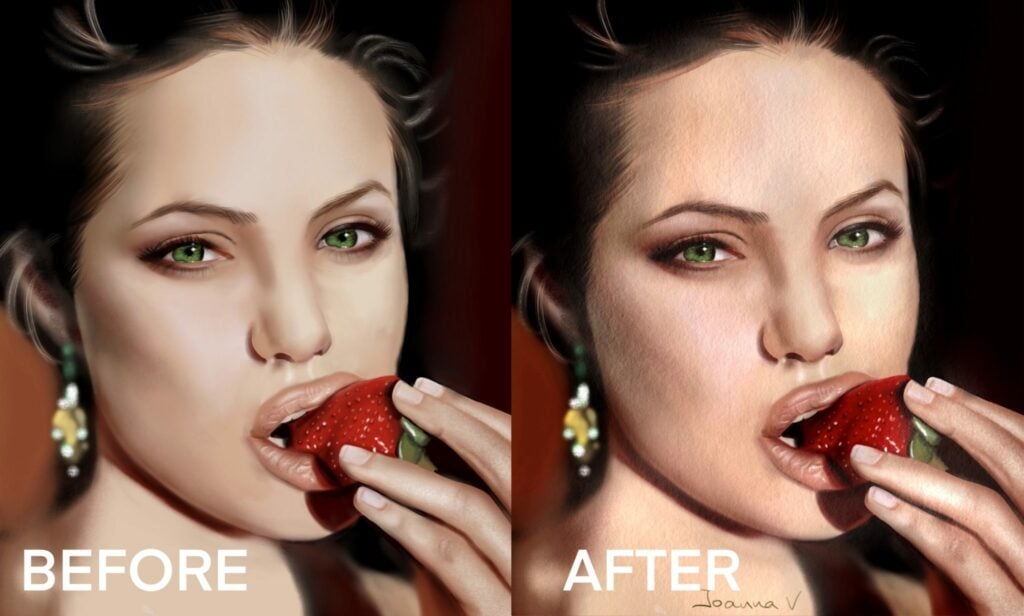
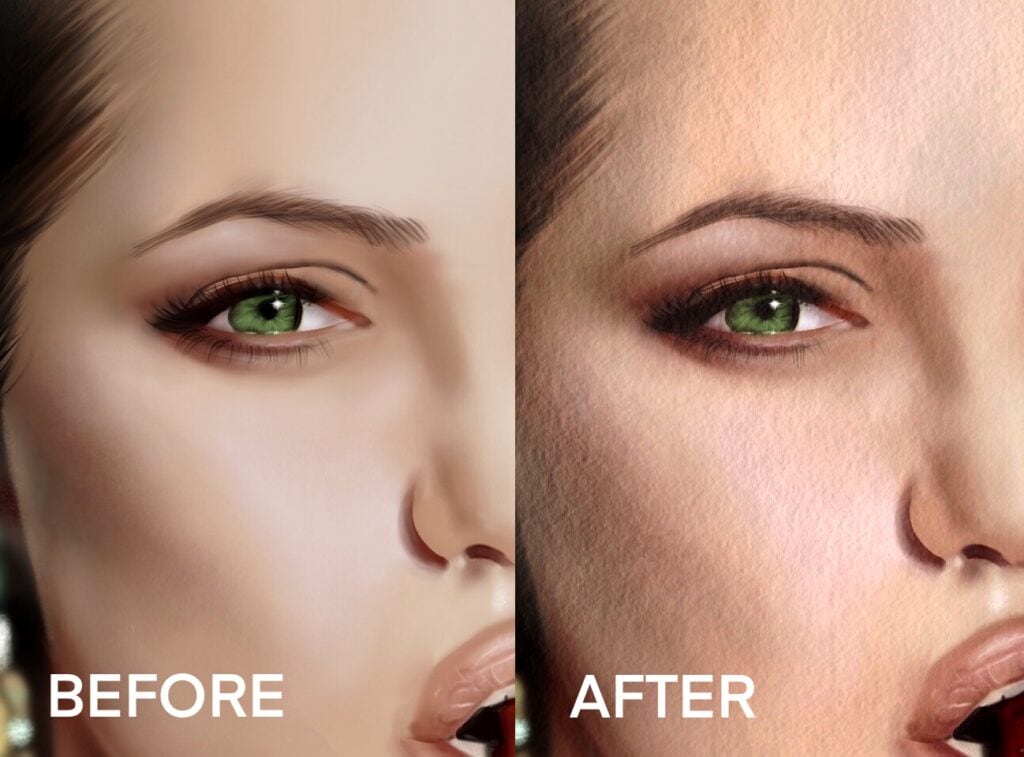
Add a texture image
Simply insert a texture photo on top of your image, set your layer mode to overlay (you can play with layer modes to find your personal favorite), edit the opacity and you are done! Depending on the texture photo you choose, you can go from a natural to a very dramatic effect. Here I used this image. There are countless textures resources on the internet, both free and paid ones. At the end of this post I am sharing my favorites.
That’s all! An (almost) one-click fix to add texture to your digital paintings and get rid of the horrible and fake plasticity!
And here’s a list of my favorite texture resources:
- https://unsplash.com (free)
- https://pexels.com (free)
- https://textures.org (free)
- https://pikwizard.com (free and it also comes with a free image editing tool, how cool is that!)
- https://elements.envato.com (not free, but my ultimate favorite place for resources, you can find from website templates to 3D)
EDIT: As of lately, elements is NOT my favorite place for resources any more. I always think twice before writing something negative online, but I want to be totally transparent with you. The quality of the assets has dropped tremendously and many files are corrupted or won’t open at all. And the worst is that you cannot leave a review and there is not anyone you can complain to. I still have a subscription which I might renew, but lately I am unhappy with the place.
 Art discussion
 The future of Art (or why AI won’t take over)
 Colored Pencils
 My 5 top High End Artist Grade Colored Pencils
 Acrylic Markers
 Ohuhu Acrylic Markers Review
 Colored Pencils
 Woomer Art Colored Pencils Review
 Graphite
 Staedtler Mars Lumograph Black Review
 Arrtx
Arrtx
One Response
Hi Ioanna,
I find great textures at modest prices on Etsy.com.
One warning is that some of these texture sellers specify that the textures are for private use only. If they don’t specify this, they may play dirty by listing in their shop a sale for “commercial” use for about $69 for one package of textures for a limited number of uses. So now, before I buy any textures there, I ensure I don’t have to worry about any seller of textures coming after me.
The one texture seller on Etsy who I treasure, who I assure you I have no personal connection with, is a woman called Britt, whose shop is named
rileyBgraphics. Her textures are unique. She also specifies that the textures in her listings allow private and commercial use. So, buying from her, I don’t ever feel guilty about my use of them.