
Another procreate tutorial for you today! Starting off with a small disclaimer: This post is about creating a grunge effect in digital painting. It does not fully cover how to apply a grunge effect in photography. (although the same philosophy applies there as well)
So, what is grunge?
Grunge is a texture style characterized by its organic, realistic and rugged look. Thus, it can look dirty, imperfect and sometimes “heavy”. Which is my all time favorite style actually. Even in my most “extreme” (or as-extreme-as-I-can) photorealistic drawings, I always strived for heavy textures and deliberate imperfections.
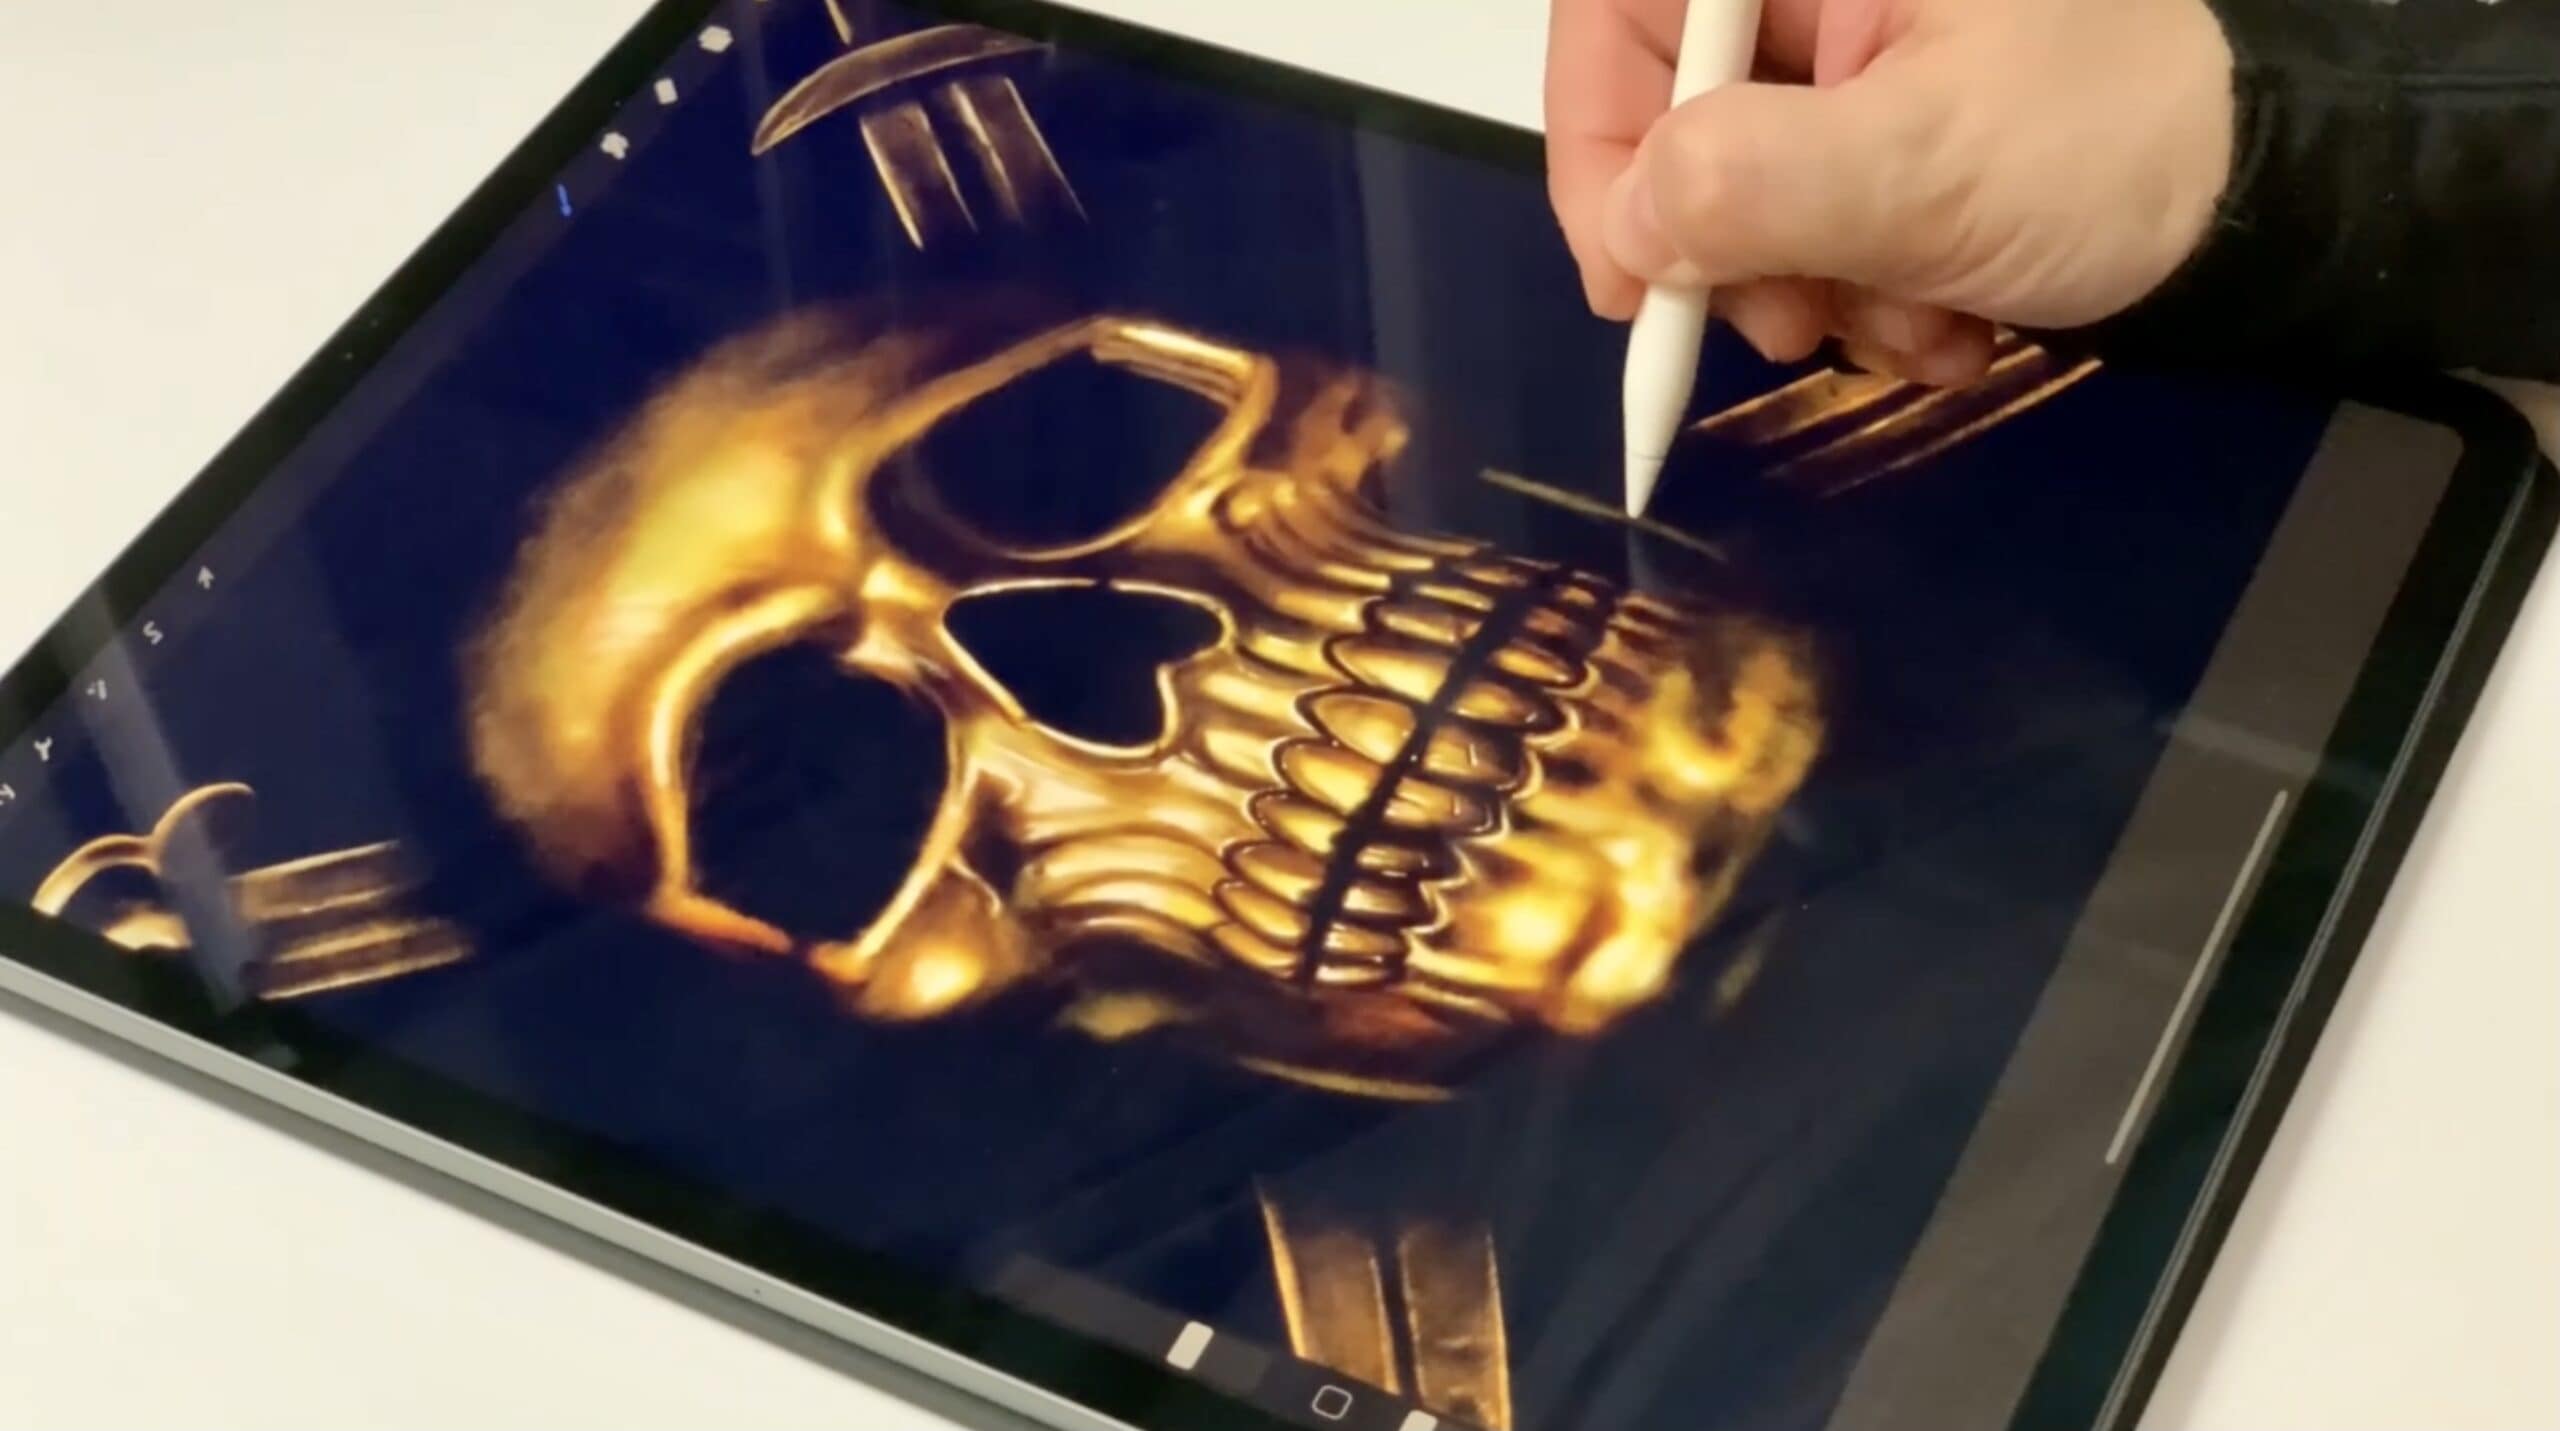
When I switched from traditional to digital, making my paintings look textured and organic was my first priority. Because if you know a couple of things about digital painting (and chances are you do, since you are reading this blog post) you also know that it normally comes with a weird “plasticity” which is hard to get rid of. So, I tried many techniques to avoid this overly blended look, but my favorite is using custom brushes. And even though some of you might not like grunge effects and prefer smooth, blended and polished artworks, there are certain cases where a dirty, rusty look is a must. Just like I felt about my last painting, where I wanted to create a dirty, gold effect.

For simplicity reasons, I will be only showing the making of the dagger here. But of course the same applies to the whole drawing. Also, I am using my free grunge brushes which you can download here.
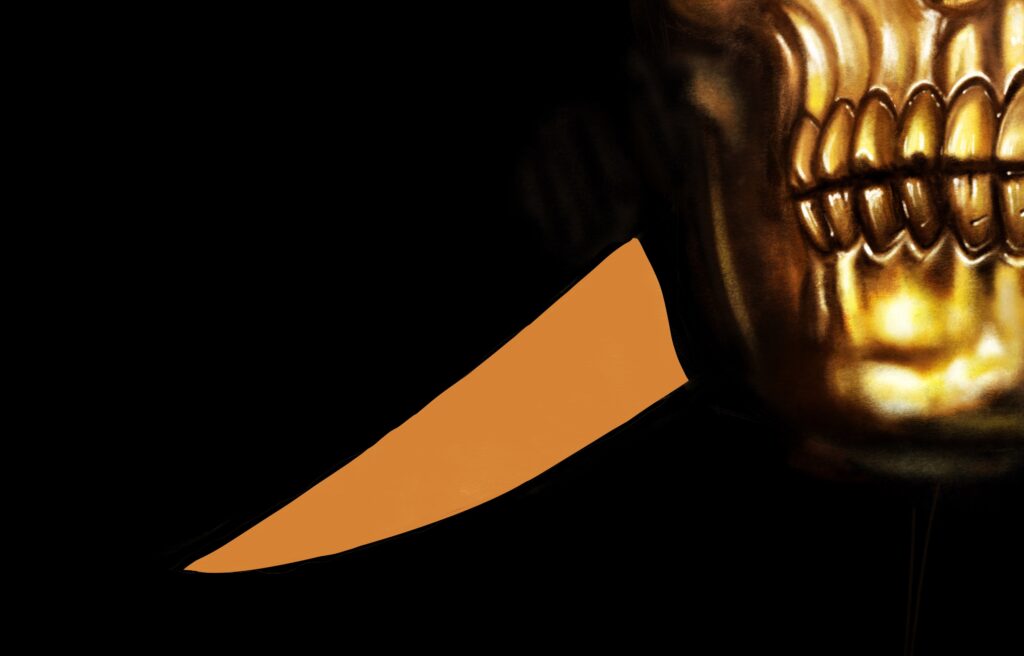
So, I’m starting off with a flat yellow-orange color.
Then I am taking the “Grunge4” brush from the brush set and with a dark brown color, I am shading the dagger all over, concentrating on the shadows, the areas that will eventually be darker. This way I create a good base to build upon.
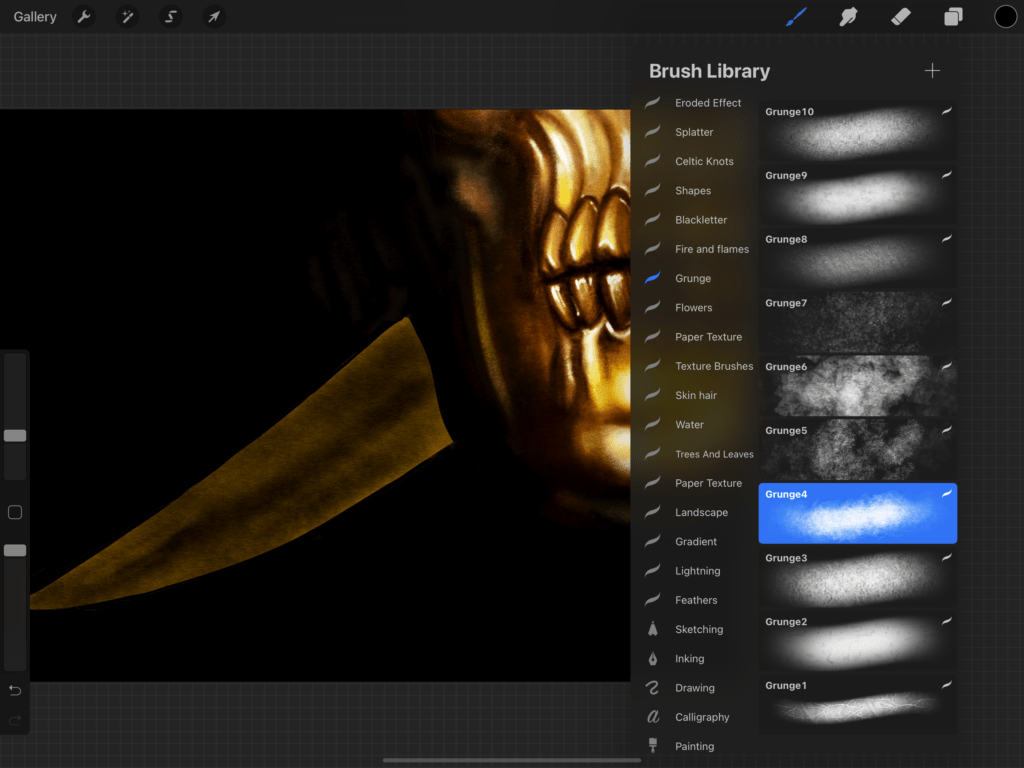
After that, I am taking a light yellow color and I basically outline the sharp edges of the dagger. (I am still using the “Grunge4” brush)
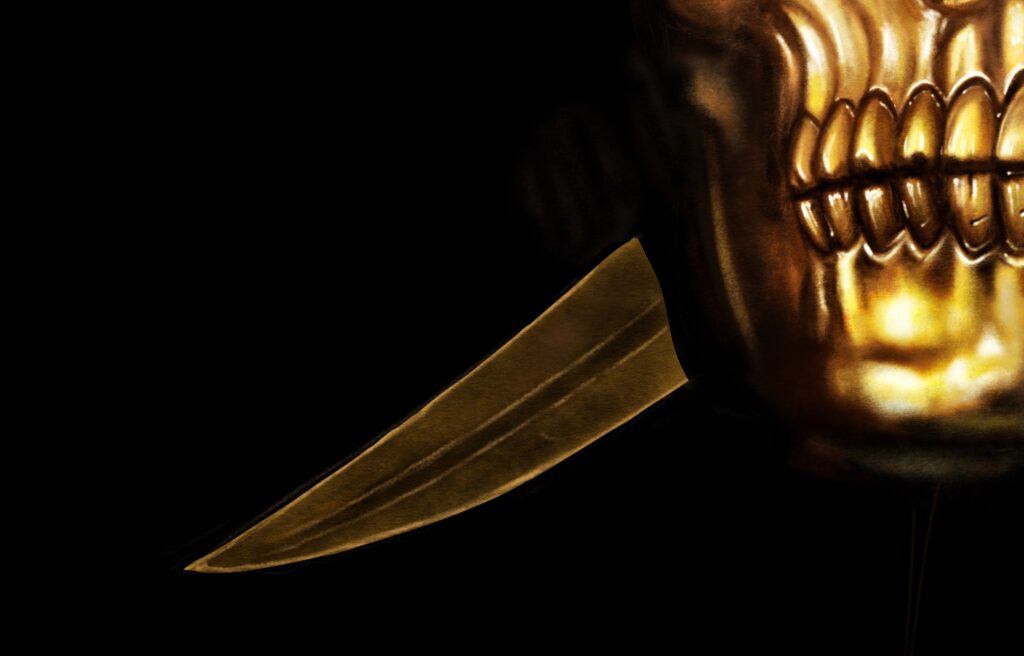
Finally I go for some additional texture. I take the “Grunge3” brush and I am accentuating the dark parts, as well as working on individual details.

That’s all!
PS: To be completely honest with you, my real process is not as simple as this one. I usually work with many many layers, in different layer modes and opacities. (You can check out my video to see what I mean) However, I believe the above process is enough, especially if you are a beginner. Simple and effective. Even though the grunge effect might not appeal to you, I believe it is a style worth trying! What do you think?
 Art discussion
 The future of Art (or why AI won’t take over)
 Colored Pencils
 My 5 top High End Artist Grade Colored Pencils
 Acrylic Markers
 Ohuhu Acrylic Markers Review
 Colored Pencils
 Woomer Art Colored Pencils Review
 Graphite
 Staedtler Mars Lumograph Black Review
 Arrtx
Arrtx