
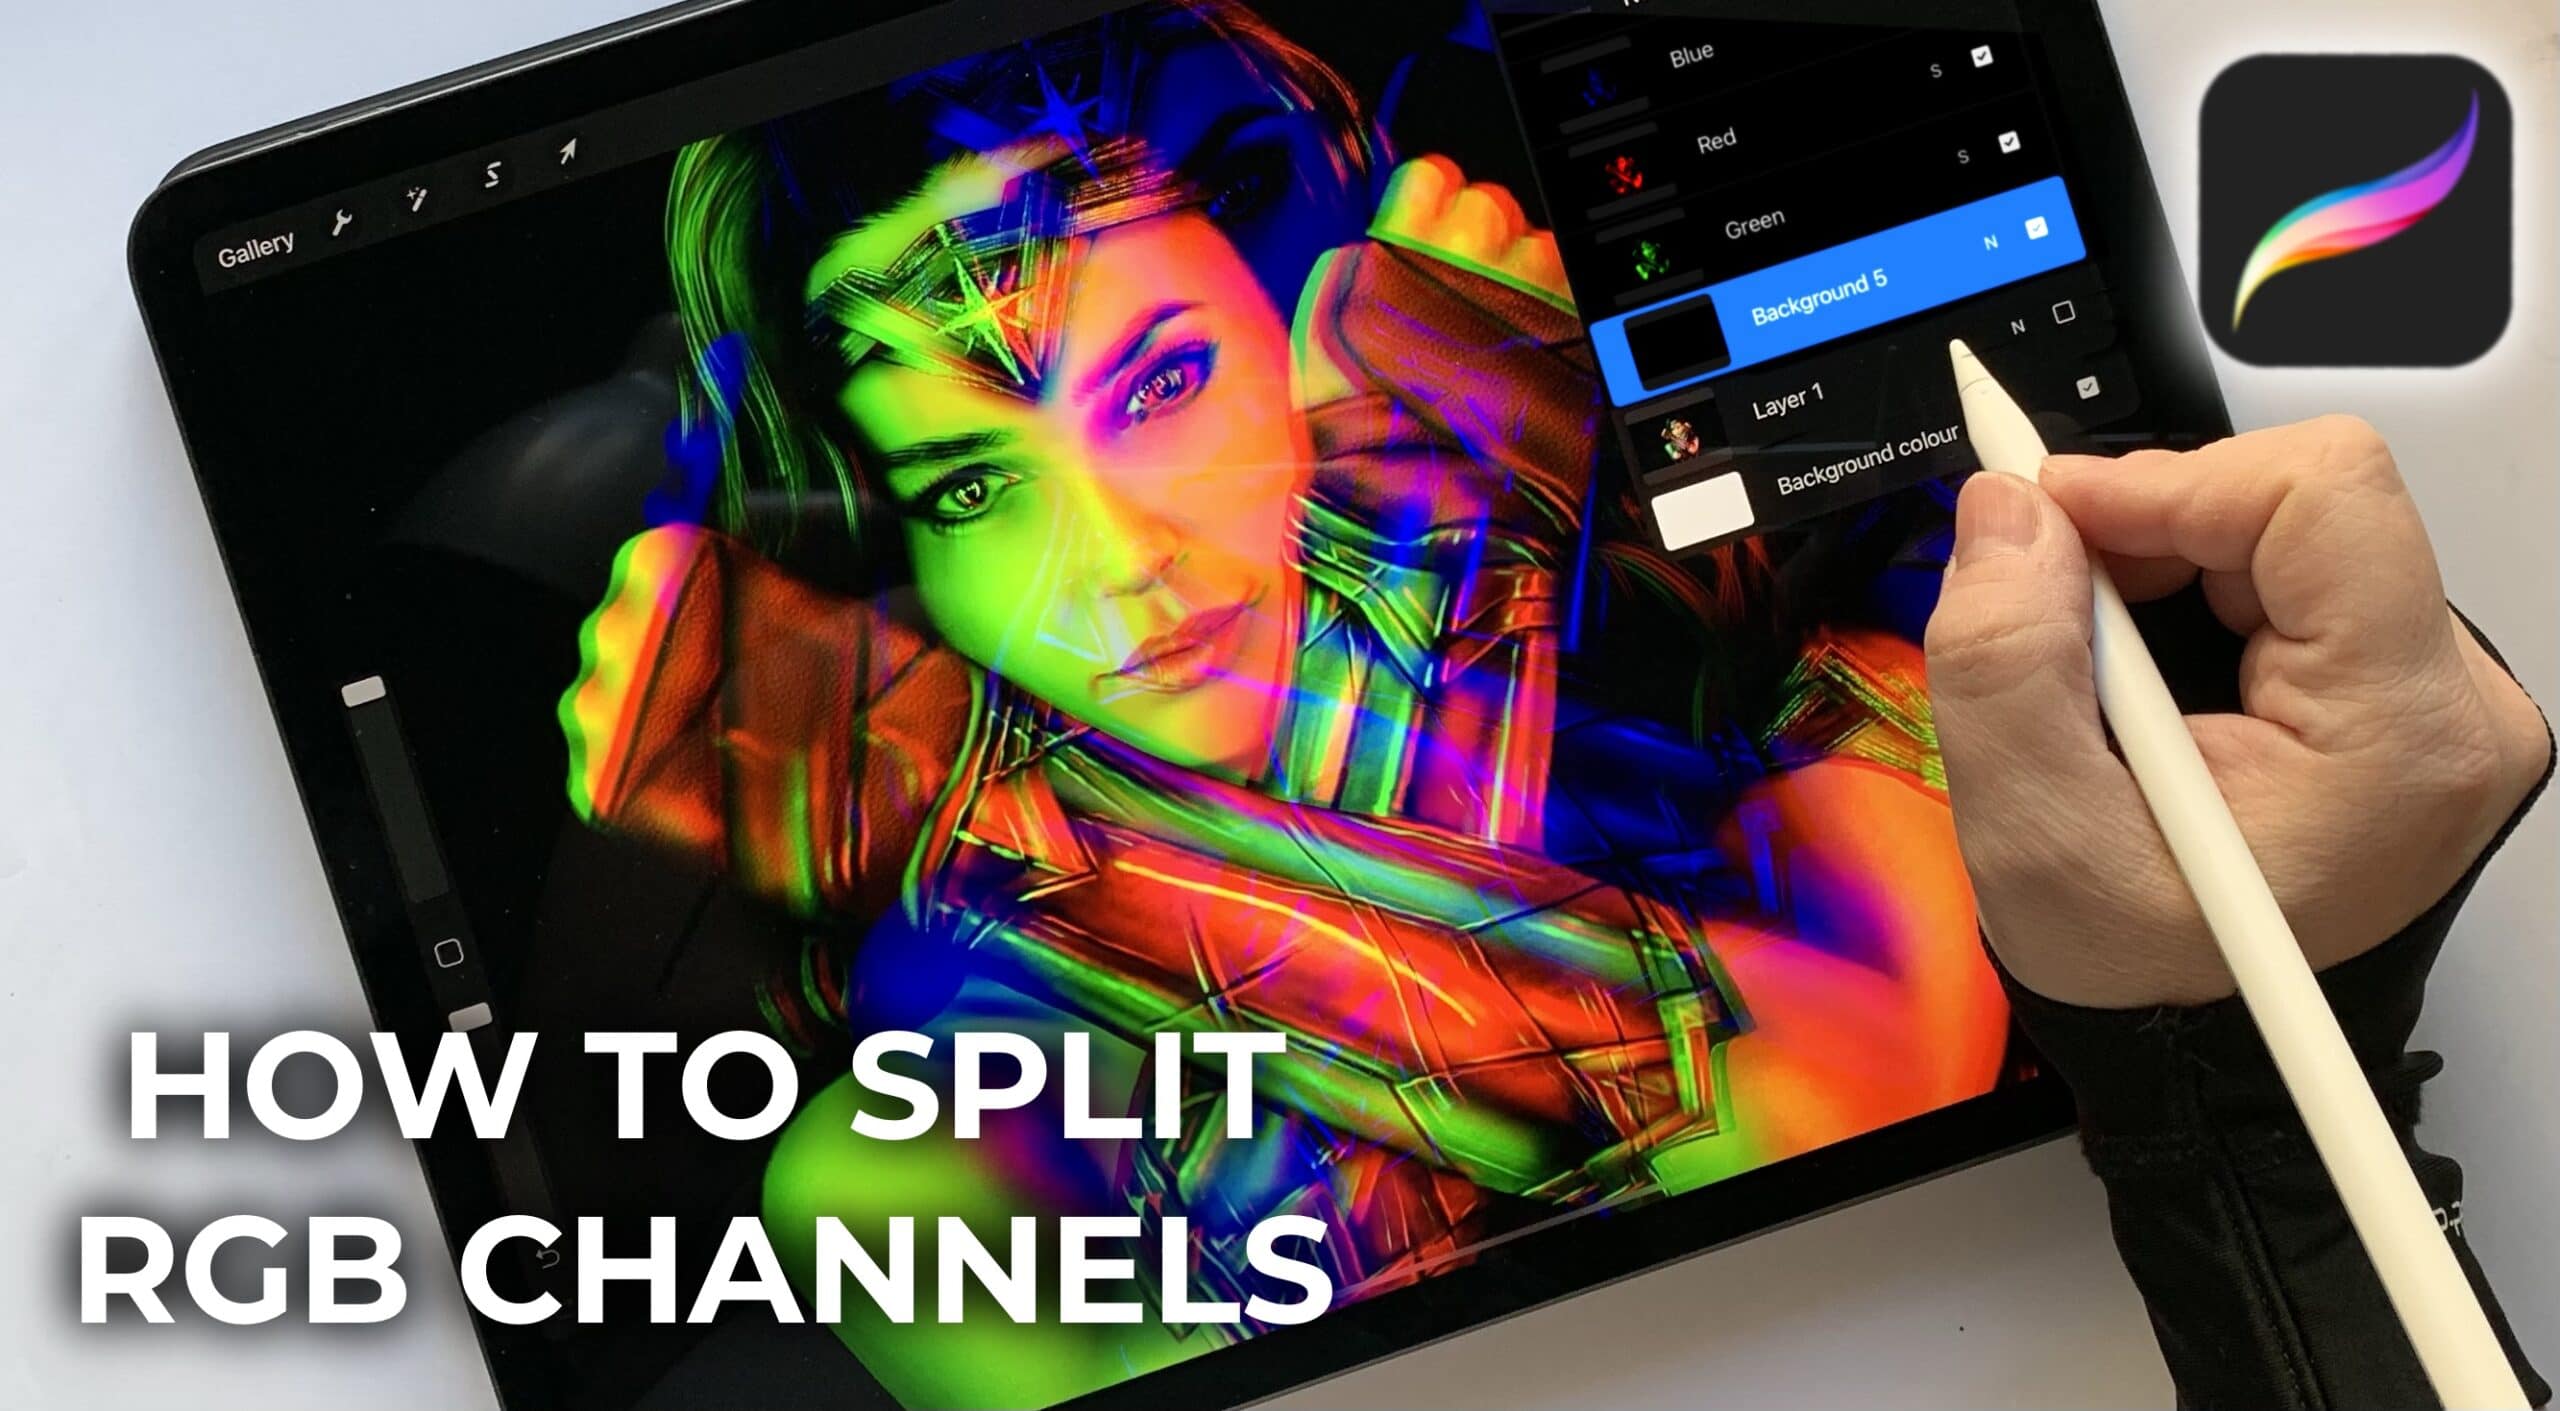
Hello everyone! In today’s tutorial, I will explain how you can split RGB channels in procreate. I love procreate and I love that they are constantly improving the app and adding more features (so much, that my older tutorials become worthless after a while!). Naturally, I was super excited with their latest feature: chromatic aberration, which is similar to RGB channels in photoshop. The only problem is that the effect is created on a single layer.
But you can easily split RGB channels on different layers manually, the old fashioned way. It just requires a few extra taps!
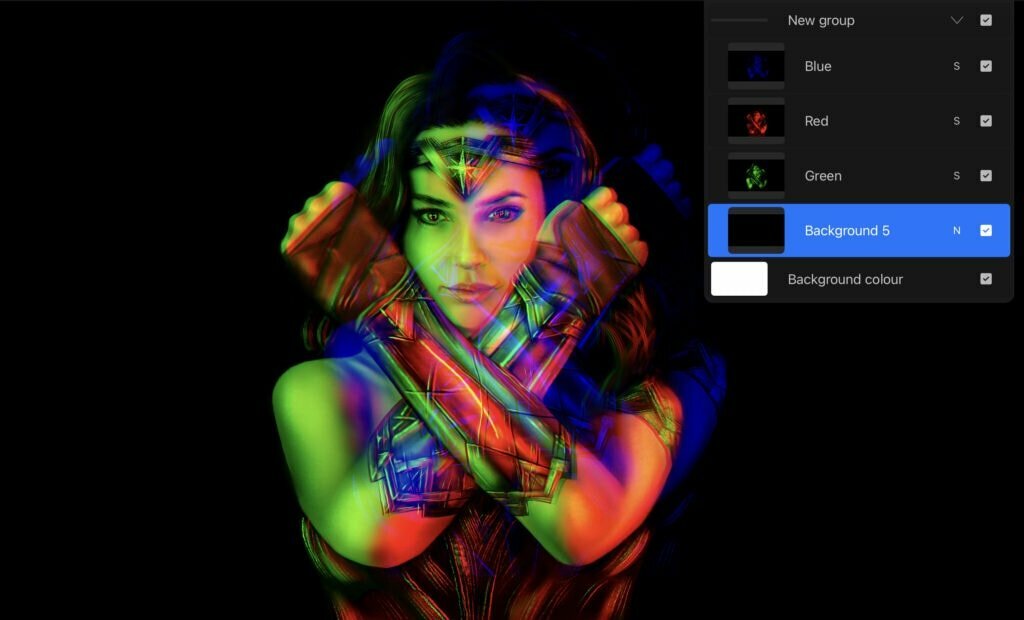
So, here’s what I do: Firstly I duplicate my image (the image I wish to edit) three times. The three layers will be for the RGB channels, and I’m keeping a copy for backup.

I then select the first layer, go to “adjustments” -> “curves” and I flatten the Green and the Red curves. This basically creates the blue channel.
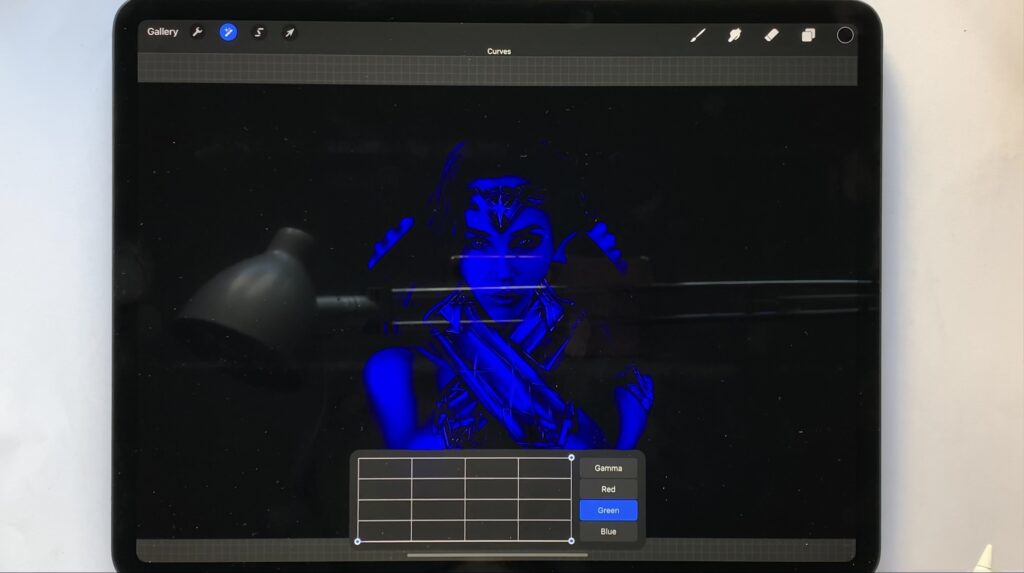
I do the same with the other two layers. To create the red channel, I flatten the Green and the Blue curve, and to create the the green channel, I flatten the Red and the Blue curve.
Then I create a new layer below all three and I fill it with a solid black color.
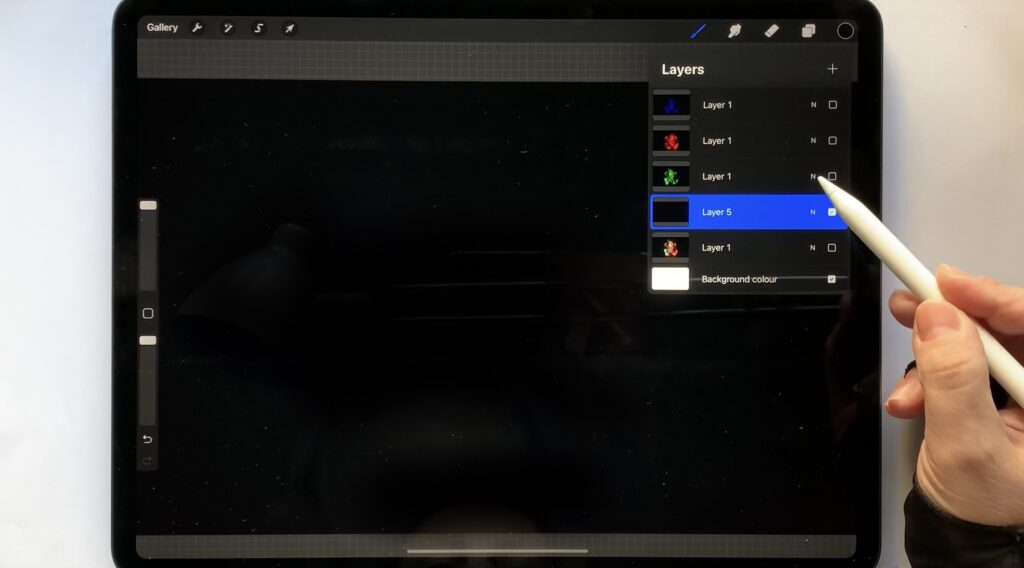
As fo the three channel layers, I set layer mode to “screen”.
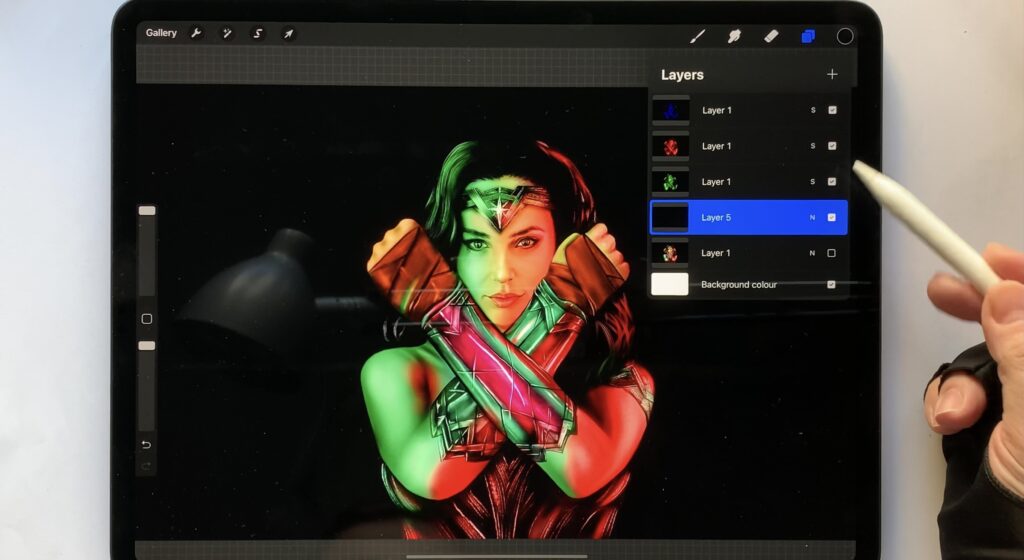
And that’s all! As you can see in the image above, the combination has produced our original photo. With the select tool you can manipulate the channels any way you like, you can displace, blur, distort them, all together, or each one individually.
Hope you enjoyed this tutorial! You can check it out in video format below. “See” you next time!
 Art discussion
 The future of Art (or why AI won’t take over)
 Colored Pencils
 My 5 top High End Artist Grade Colored Pencils
 Acrylic Markers
 Ohuhu Acrylic Markers Review
 Colored Pencils
 Woomer Art Colored Pencils Review
 Graphite
 Staedtler Mars Lumograph Black Review
 Arrtx
Arrtx