
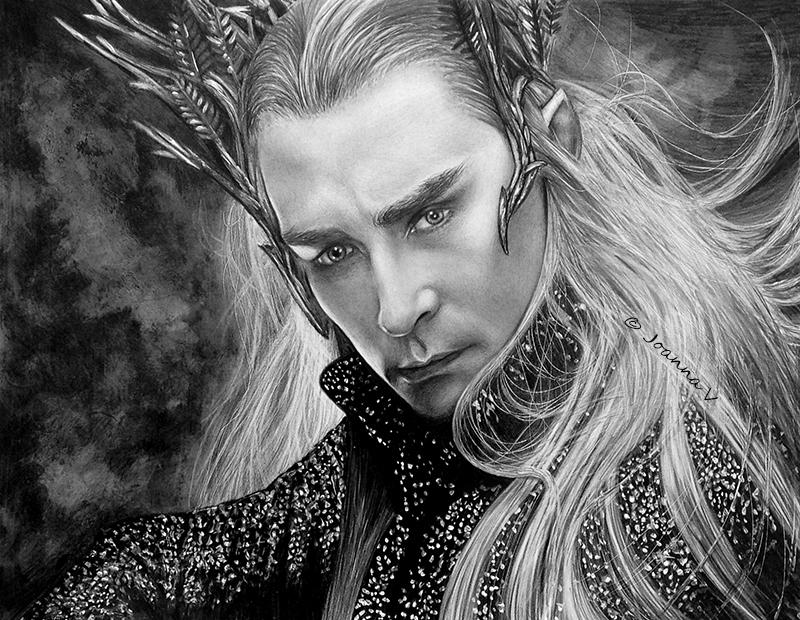
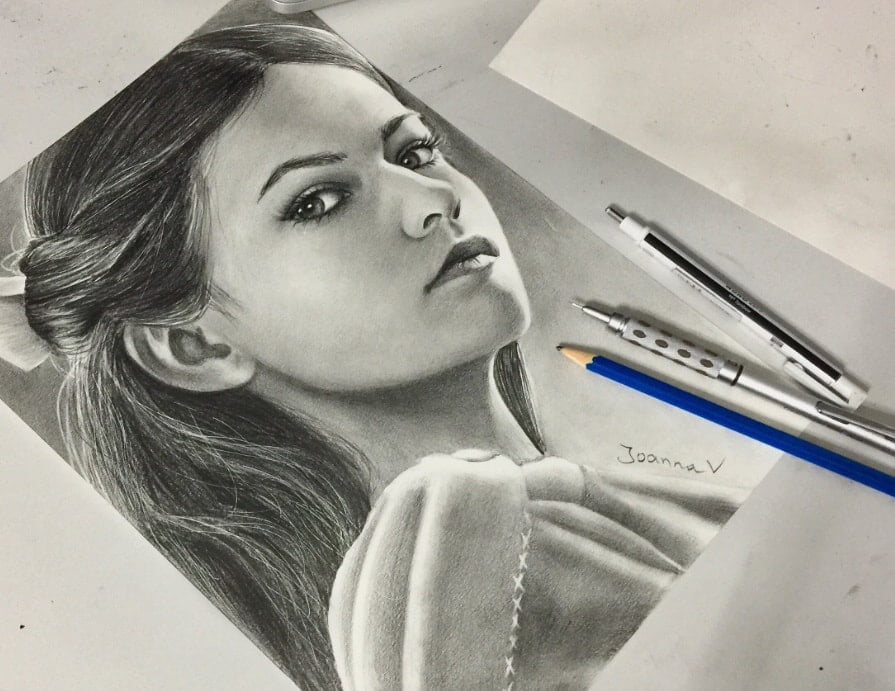
Like most pencil artists out there I was utterly intimidated by hair when i started drawing portraits. Not finding something that could actually help me, I started developing my own technique. After so many years, this initial way of drawing hair is still my favorite because it is the easiest, fastest and most accurate way compared to anything else I have found!
My technique is relying on creating stray white hairs. I once made a tutorial about this, which you can download here. However this was many years ago and I now do a few things differently. So, yes, I am sharing my big secrets today!
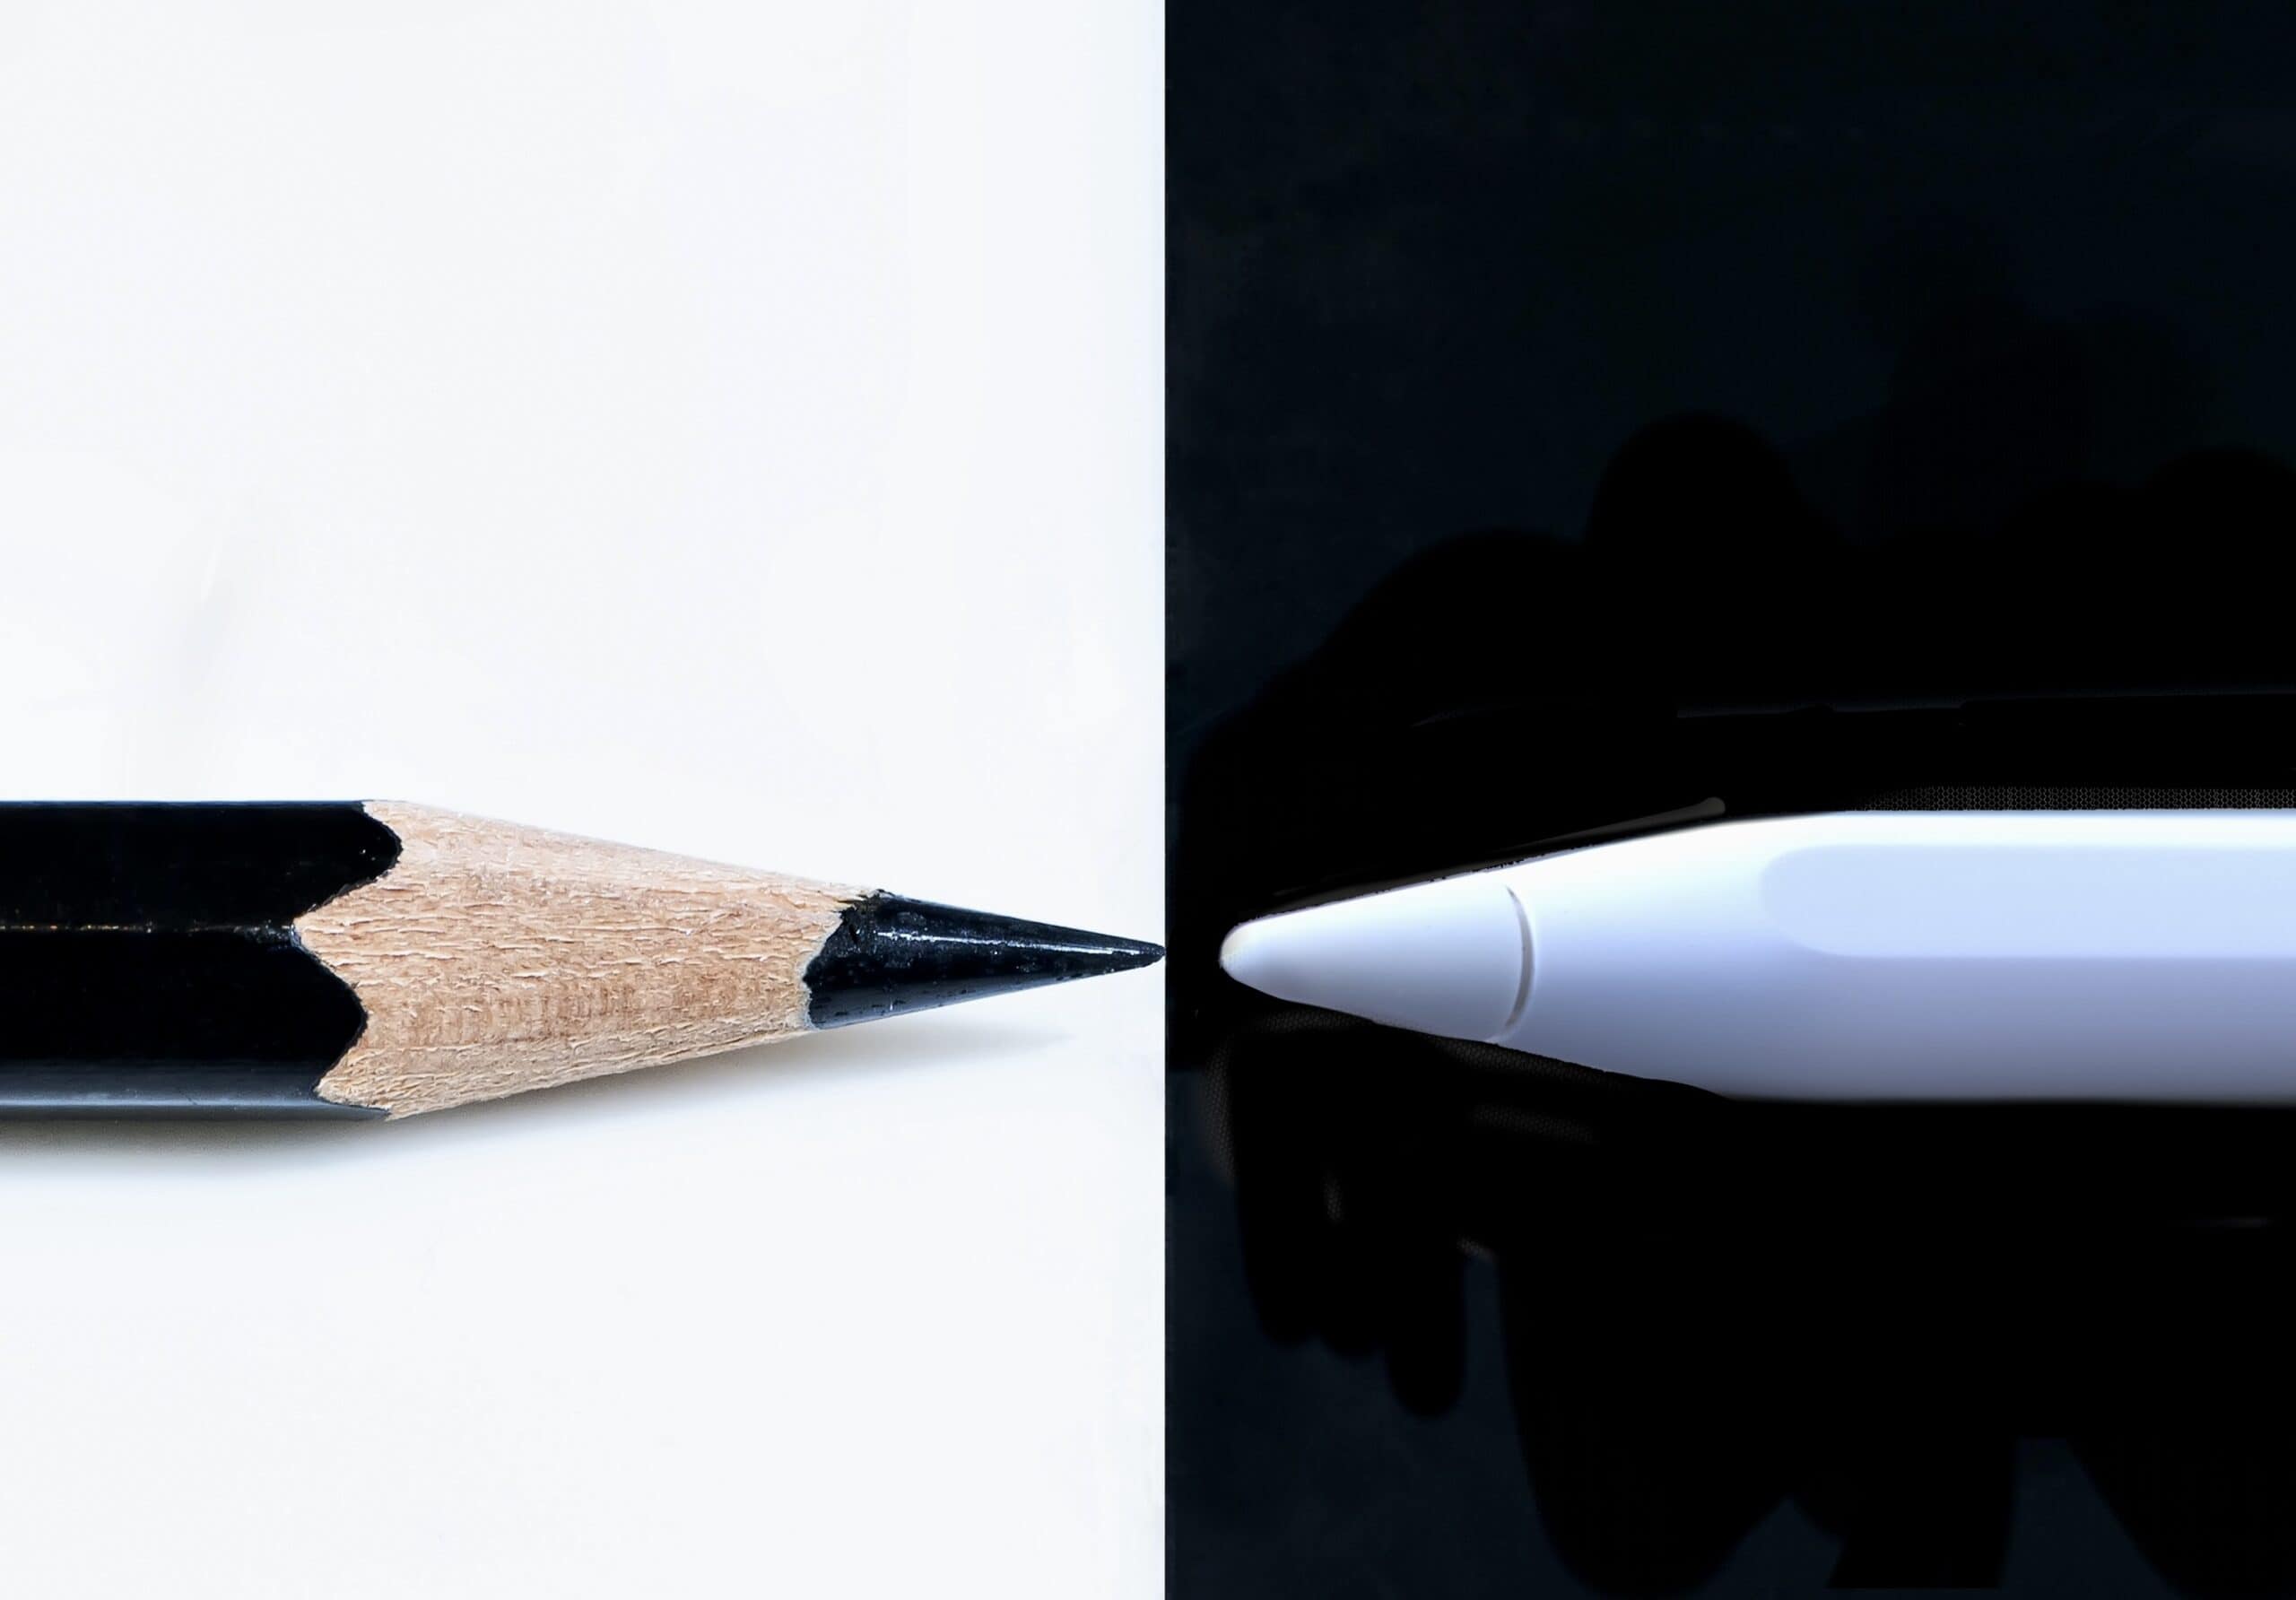
All the tools I use are shown in the following picture:
1. A 0.3 mechanical pencil without any leads in it (!!?) I’ll explain later.
2. A pencil eraser.
3. A blunt, quite soft, normal pencil. I use a 4B or 6B normally. The softer the pencil, the darker the hair.
The process is very straight forward, just requires control and practice. Once you’ve mastered it however, you won’t be able to live without it!
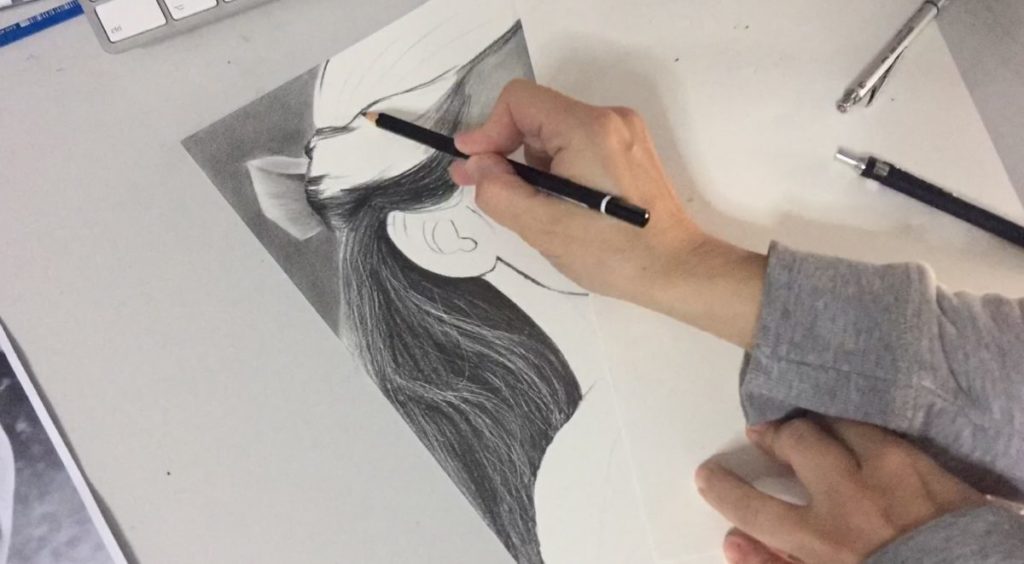
Firstly, I create the stray hairs. Using the mechanical pencil (without leads), I “draw” lines on the paper. Actually pressing the pencil quite hard, I make indentations on the paper. (I cannot draw since there is no graphite in the pencil) These indentations are “below” the surface of the paper, so they will stay white even when the area is filled with graphite. Under some conditions, which I will explain later.
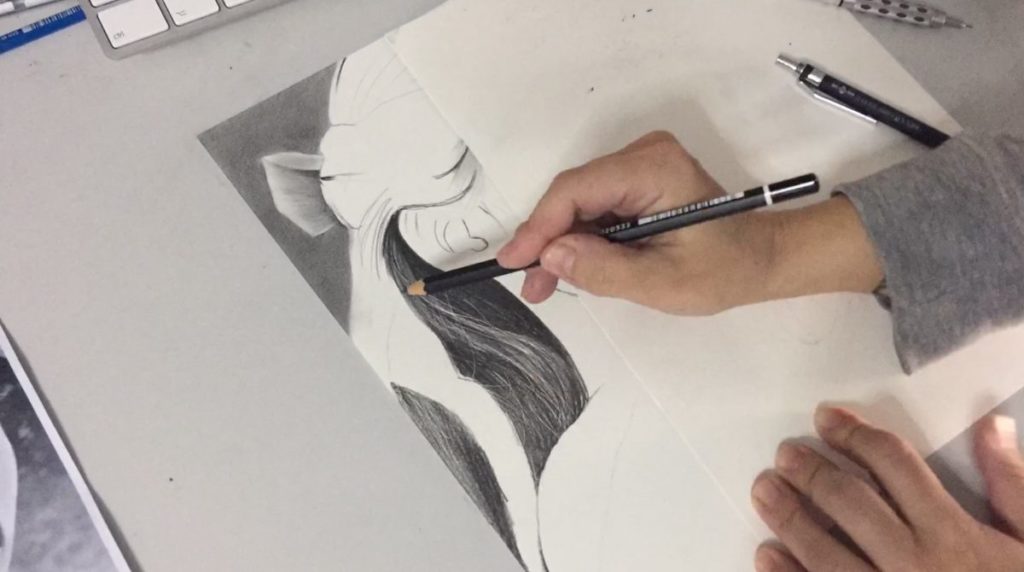
After that, the only thing I do is filling the area with graphite, using the blunt soft pencil. I use long strokes, following the flow of the hair.
And that’s all! Literally. Of course, I normally stylize my hair after that (not MY hair, oh well you get the point).That’s where the pencil eraser comes in. I use it to create additional hairs.
Simple but effective. The final result is normally super detailed and super realistic.
There are just a couple of points you should keep in mind. Oh yes there is a catch! But only a small one!
1. Make sure you use a smooth but “fluffy” paper. Meaning soft and thick. Think about pizzas. A pizza can be thin and crispy or soft and thick. We want the soft and thick one. Only this way indentations will be deep enough to stay white. Otherwise, graphite might glide in them, and the whole technique is pointless.
2. Use a BLUNT pencil to draw the hair. For the same reason as above. If you attempt to fill the area with a sharp pencil, it can easily fill the indentations and destroy your beautiful stray hairs.
3. Less is more. Do not attempt to create every single detail, you’ll go crazy. The beauty of this method is that it creates the illusion of details, when in fact all we pay attention to, is a bunch of stray hairs!
That’s all folks! Keep creating and please share YOUR way of creating Hair!
 Colored Pencils
 My 5 top High End Artist Grade Colored Pencils
 Acrylic Markers
 Ohuhu Acrylic Markers Review
 Colored Pencils
 Woomer Art Colored Pencils Review
 Graphite
 Staedtler Mars Lumograph Black Review
 Arrtx
Arrtx Arrtx 60-piece Regular and Anime Acrylic Markers Review
 Art discussion
2 Responses
Hi
Love your pictures.
Which paper do you use for your pictures?
Regards
Pete
U.K.
Hello Pete,
My all time favorite paper is Winsor&Newton Smooth Surface Cartridge pad 260gsm. 🙂