
As a designer who works exclusively on an iPad Pro, I use Procreate app about 95% of the time. Naturally, some photoshop/illustrator features are missing. However, they did such an awesome job with the app, and they update in so frequently that my tutorials will be useless after a while!
In the meantime, however, let’s see how to create a simple bevel/emboss text effect with just a few clicks!
Starting off with a basic phrase, let’s break down the effect.
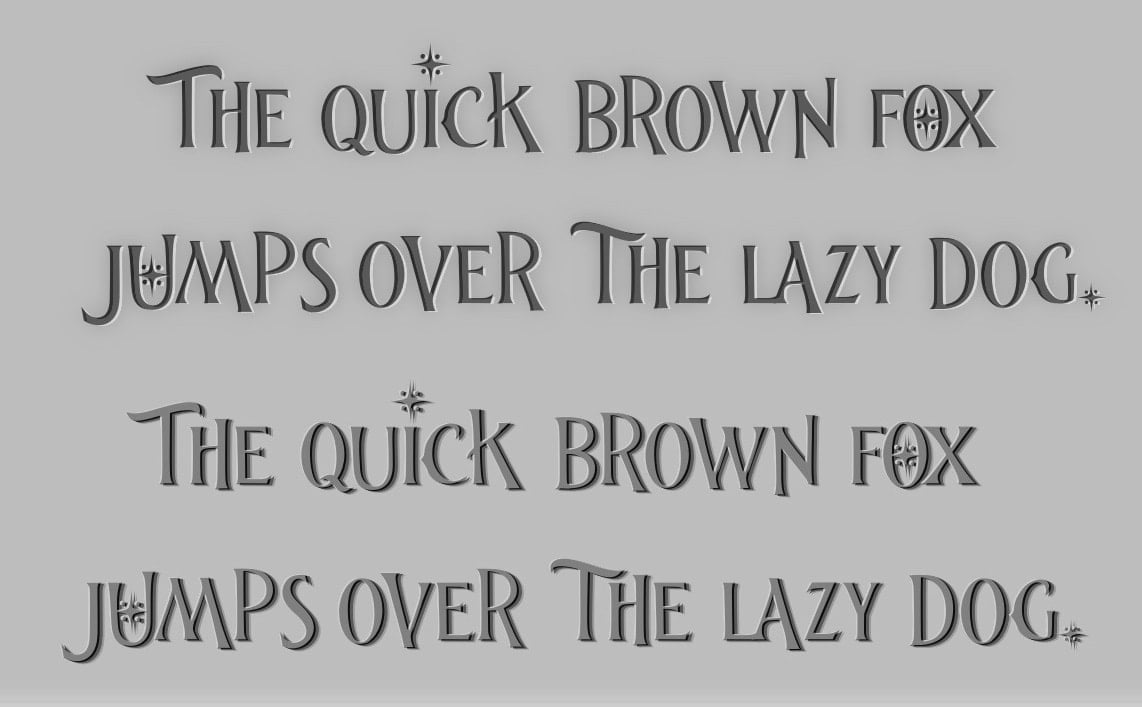
First of all bevel is the opposite of emboss. Beveled text seems like it is below the surface and embossed text seems above the surface. But what is it that tricks the eye to “see” the text as 3D? The answer lays in the … shadows! Literally. Let’s suppose that the light source is on the upper left corner. Then the first phrase is “below” the surface, as the light source casts first shadow and then the highlight. Consequently, the second phrase looks “above” the surface, as the light source seems to create the highlight first and then the shadow.
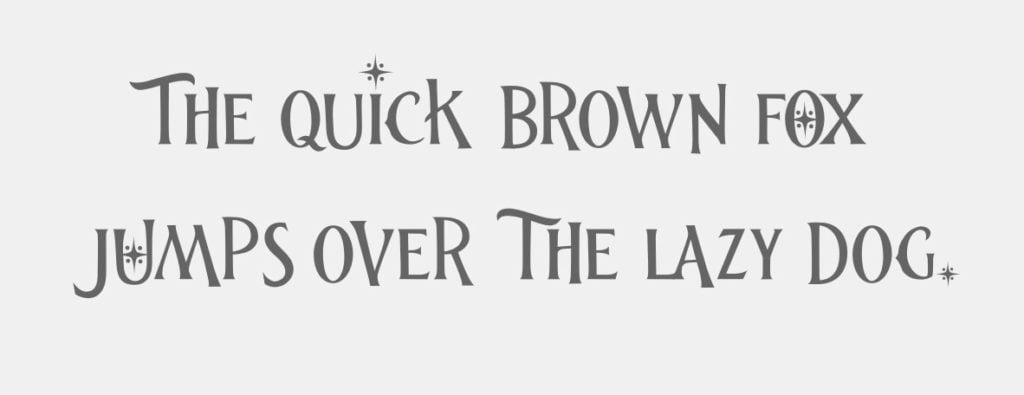
Now that everything is clear (hopefully) let’s jump into the effect itself. As just mentioned, all one needs is the original text (of course!), a shadow and a highlight placed correctly. We start off with the base text:
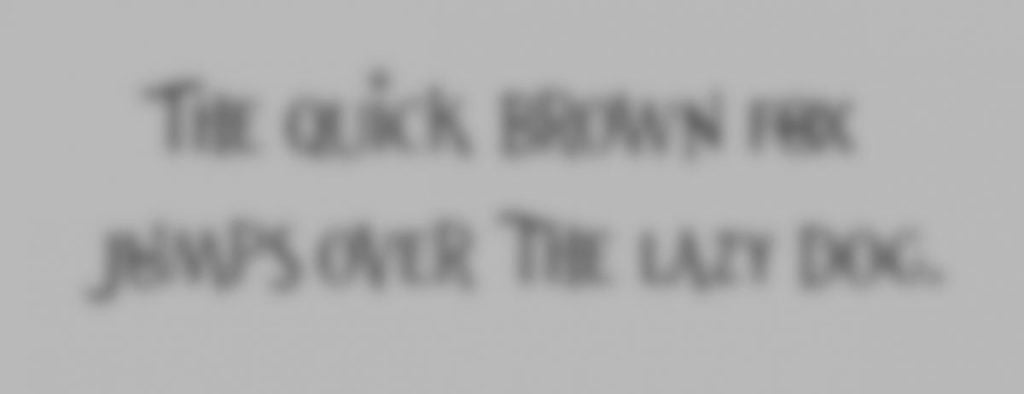
To create the shadow, you just need to duplicate the layer and move it slightly to the left for an emboss effect, or to the right for a bevel effect. I also love to blur this layer a bit (just go ->adjustments->Gaussian blur), I think it makes everything more natural.
This is how my blurry layer looks like:
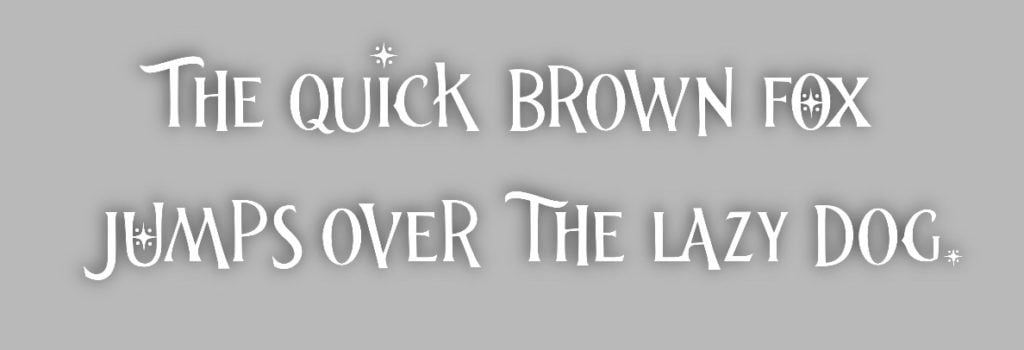
The highlight layer remains. Again I duplicate the first layer and move it slightly to the right (for an emboss effect) or to the left (for a bevel effect). Now is the trickiest part. We need to make the text white (well, it is the highlight after all!). If your initial picture is in .png format with a transparent background, all you need is to adjust the brightness of the layer. (Adjustments -> hue, saturation, brightness -> adjust the brightness slider) If however your text is in .jpg format with opaque background, you need the negative of the image. I add a white layer on top, set blending mode in “exclusion”, then merge these two layers together. Because the result is a layer with black background, I set the blending mode in “lighten”.
When I make all layers visible this is the final result:

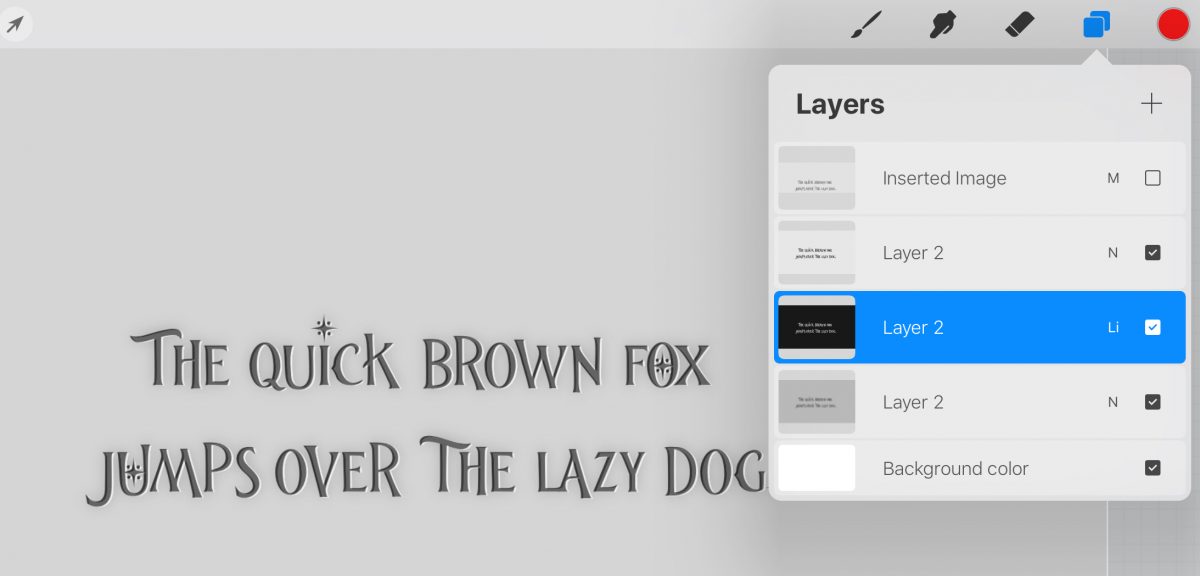
And these are my layers in procreate:
Of course this is just the basic part of “cheating” bevel and emboss photoshop effects in Procreate. You can play with blending modes, opacity, blur effects and eventually create super cool text designs!
And it is my own way, there are endless possibilities, imagination is the only limit! So what do you think guys? Which is your way of creating bevel/emboss Effects in Procreate?
EDIT: I no longer use procreate to create bevel/emboss effects on the iPad. I now use affinity photo (you can check out my review here) where bevel/emboss effects are created with one tap-just like in photoshop.
 Colored Pencils
 My 5 top High End Artist Grade Colored Pencils
 Acrylic Markers
 Ohuhu Acrylic Markers Review
 Colored Pencils
 Woomer Art Colored Pencils Review
 Graphite
 Staedtler Mars Lumograph Black Review
 Arrtx
Arrtx Arrtx 60-piece Regular and Anime Acrylic Markers Review
 Art discussion
One Response
Bevel is not the opposite of embossing. It’s a completely different effect. The opposite of embossing would be letterpress or also known as debossing. Hope this helps.