
Hello friends! A super simple tutorial today and by super simple, I mean super simple. The Medallion from Pirates of the Caribbean ”The Black Pearl”. I am a sucker for everything pirates, I’ve drawing Johnny Depp/Captain Jack Sparrow again and again and again, I’ve been creating pirate fonts, graphics, you name it. (Most of which are not even on this site, oh God, I need to revamp this place).
So, it was a matter of time before I tried something pirate-y on 3D. Nomad Sculpt has an amazing tool, the stamp tool. It basically allows you to ”stamp” intricate 2D designs on objects, translating them as 3D graphics. The way it works might seem counter intuitive at first, but once you get the grasp of it, you can sculpt intricate objects really easily.
The stamp tool uses the co-called ”alphas”. An alpha is a grayscale graphic that all black parts are translated as “flat” surface, and all whites are translated as the maximum depth (or height for that matter). Greys are in between. An in-depth alpha tutorial is coming soon. For now, let’s focus on the medallion.
I assume you are familiar with the notorious medallion. Unfortunately I cannot share any reference images, for copyright infringement reasons, but it kinda looks like this:
A golden skull design embossed on a circular surface. The first step is to create the ”alpha” in procreate (or the app of your choice). We know that flat surface should be black and maximum depth should be white, so the hand-drawn design looks something like this:
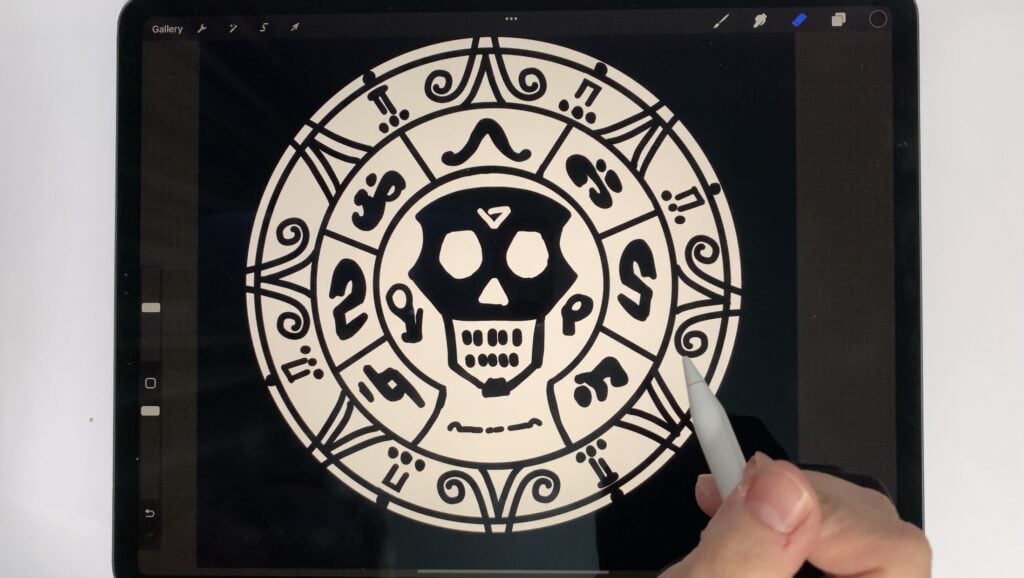
It is not perfect, in fact this is the most un-perfect design I have EVER made. 🤣 For three reasons. 1) Lately I have come to realize that perfection is not the point 2) Unlike 2D, 3D calls for imperfection, only then it looks natural 3) The stamp tool in Nomad Sculpt is imperfect anyways. Intricate designs require way too many polygons. So it’s best to keep them relatively low in number (the polygons) and go for imperfection! Anyways, here’s the finished image for you, to load to Nomad Sculpt , if you are following this tutorial.
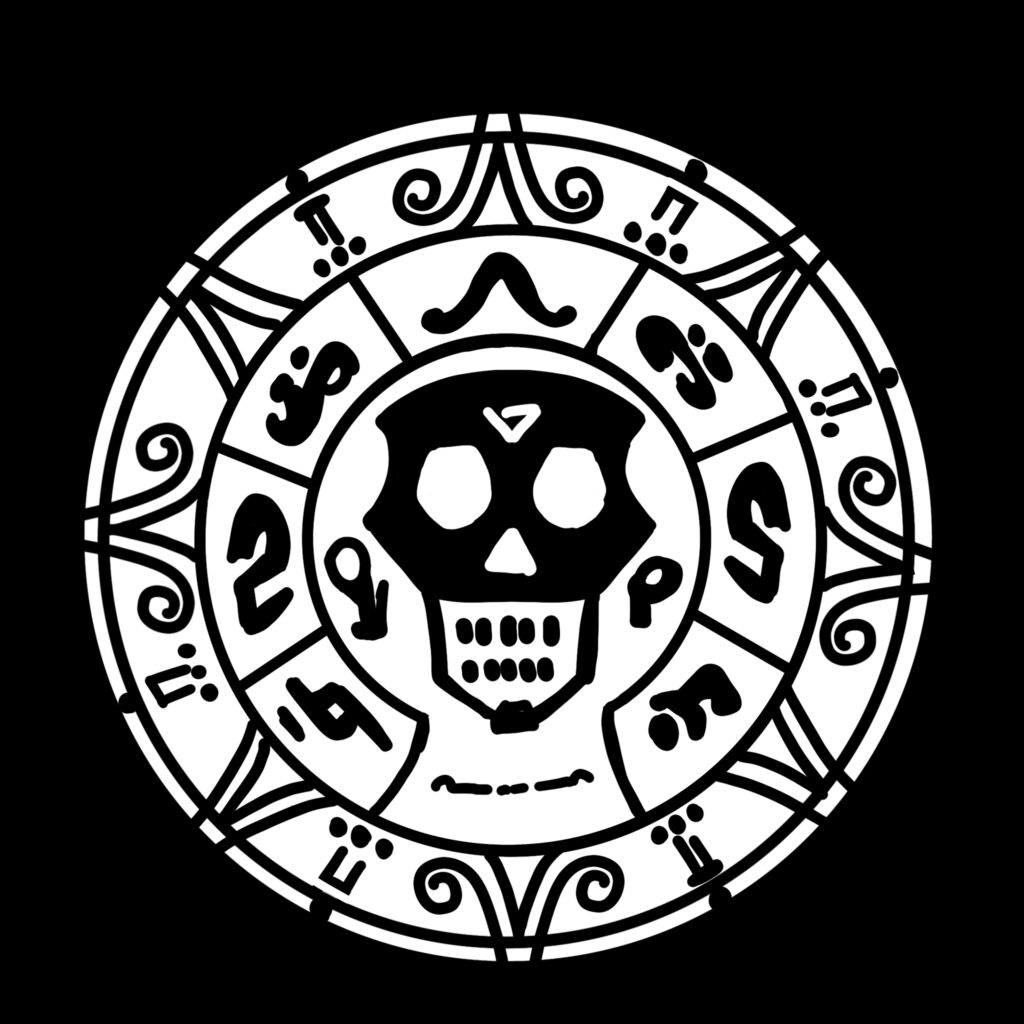
Anyways, after I draw the skull, I save the image in my photo album and go straight to Nomad Sculpt.
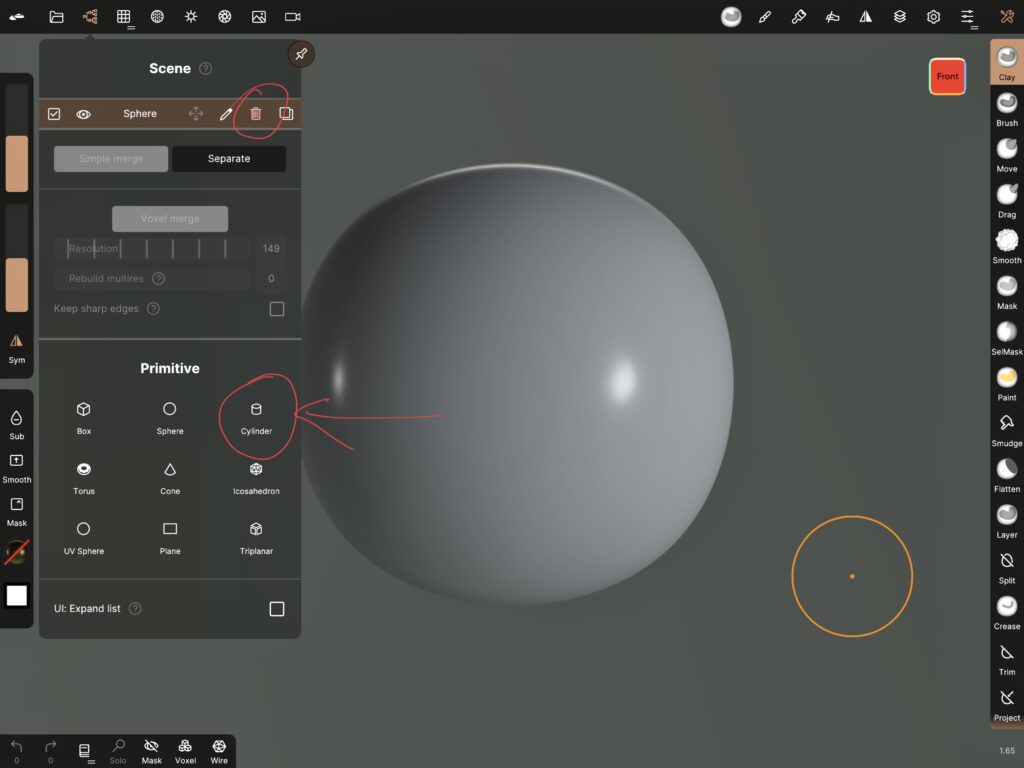
I am starting a new project and the first step is to delete the default sphere and add a cylinder.
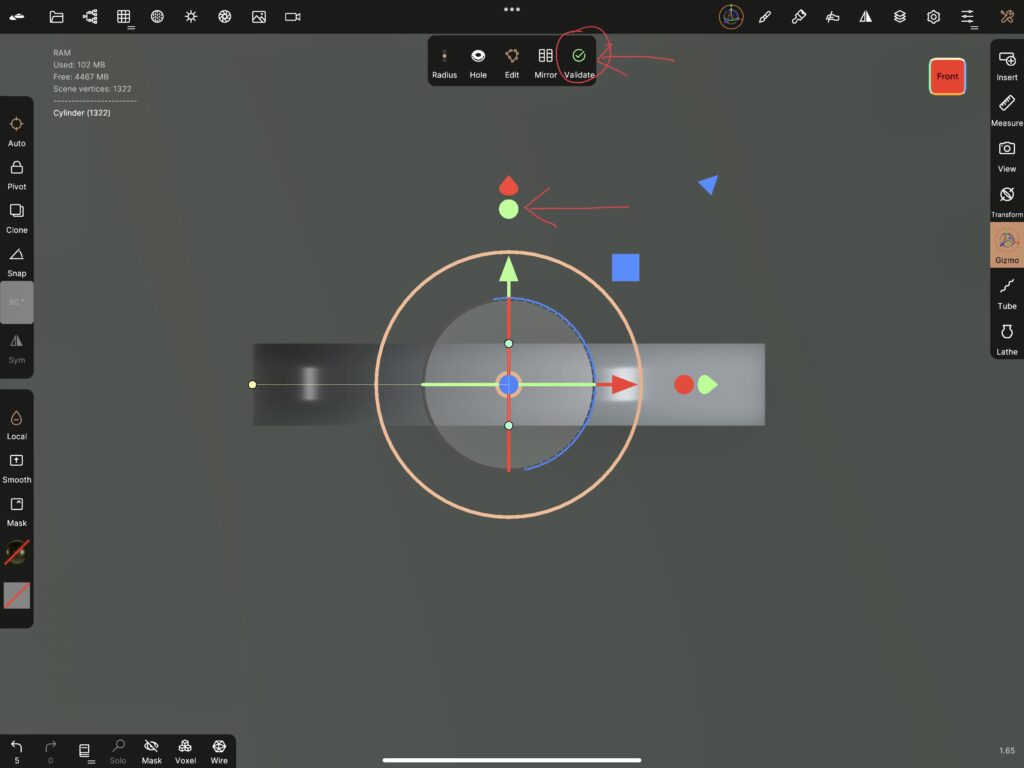
Using the anchor points, I manipulate the cylinder to my liking so that it is not a huge block but an almost flat soon-to-be-a-medallion circle. When I am done, I tap “Validate”.
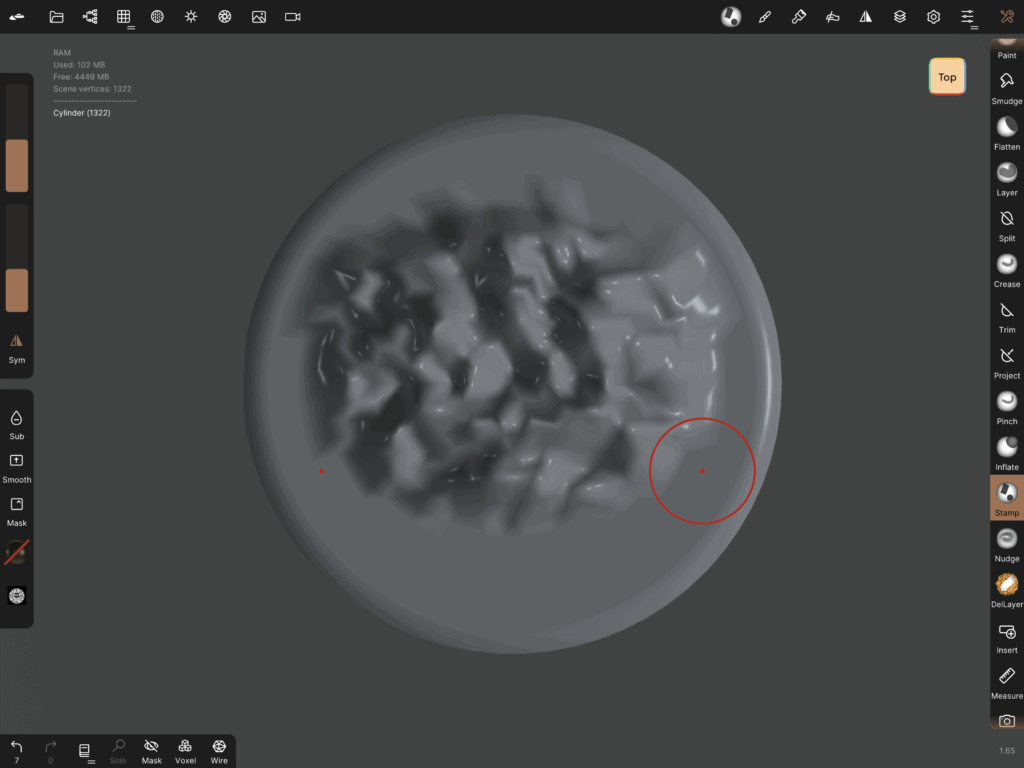
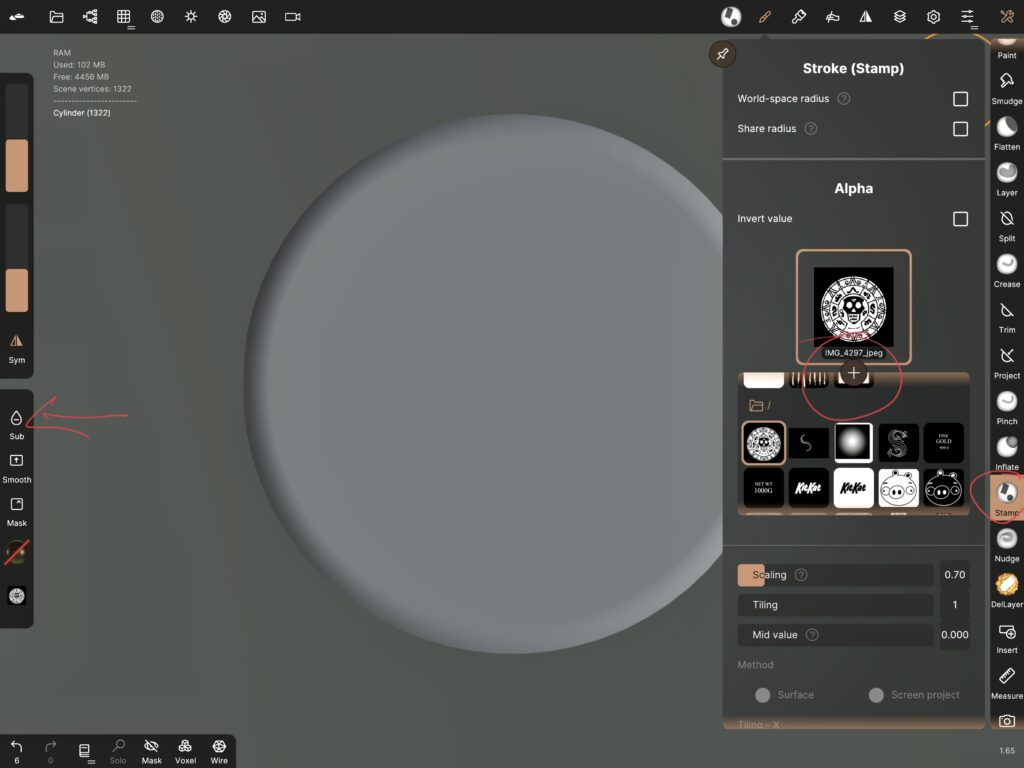
Now it is time for stamping. The stamp tool works better with high resolution objects, the higher the better. I have mentioned many times that high resolution causes many problems and ideally one should work with the minimum resolution that does the job. However, with the stamp tool one cannot escape high resolution. Because this is what happens when I try to stamp my image on a low-res cylinder.
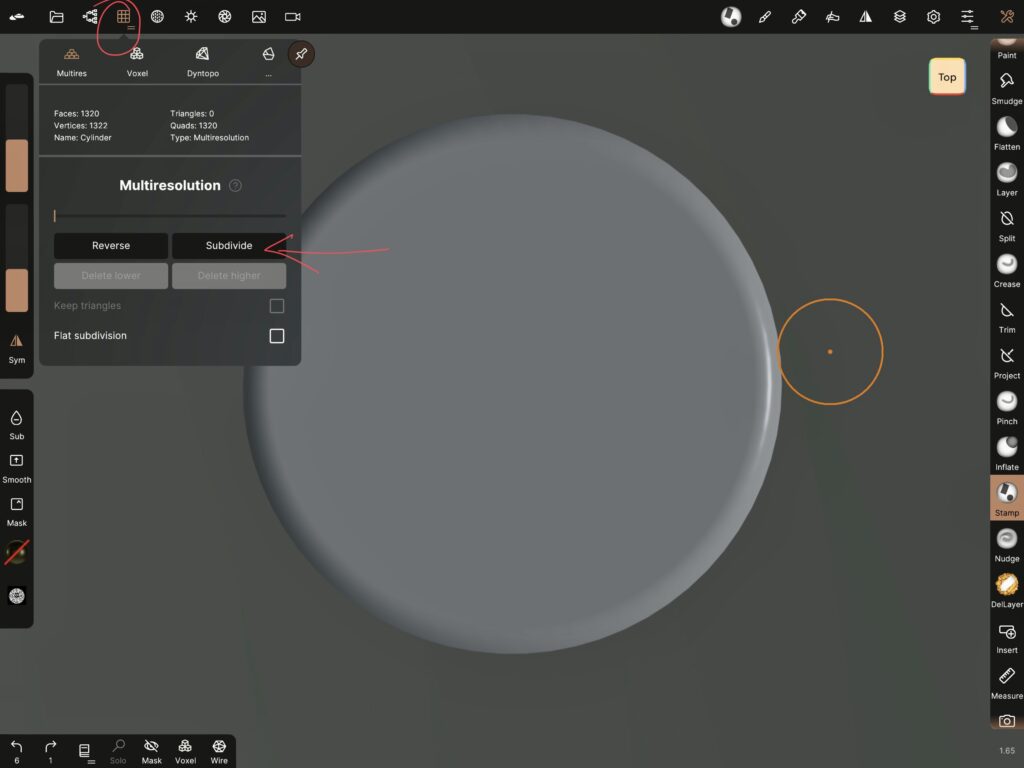
So, what I do is go to the multiresolution tab and tap ”subdivide” a few times.
I choose the stamp tool, then on the ”alpha” window, I load the image I just created. Depending whether you want to emboss or bevel, you can have ”sub” on or off.
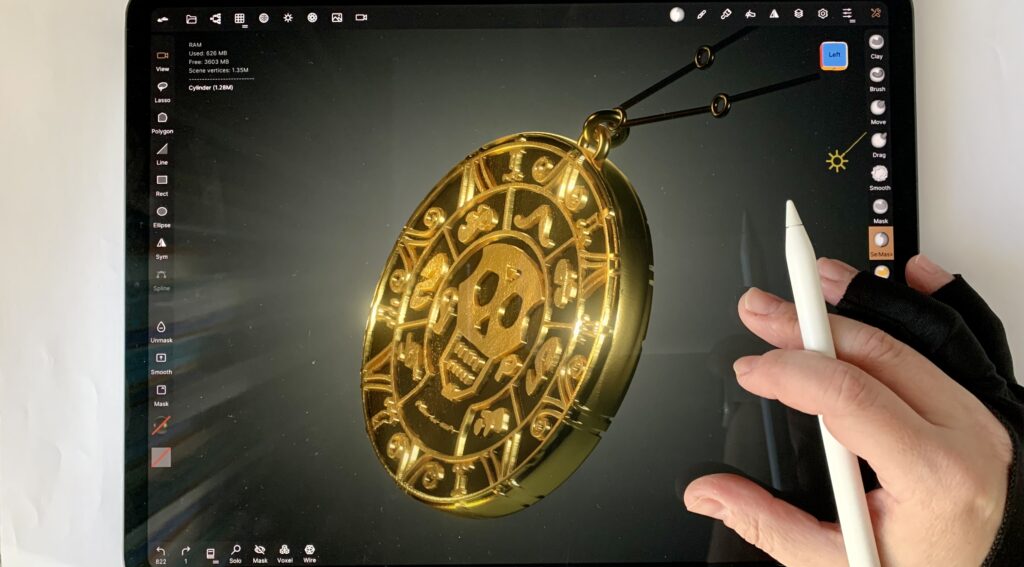
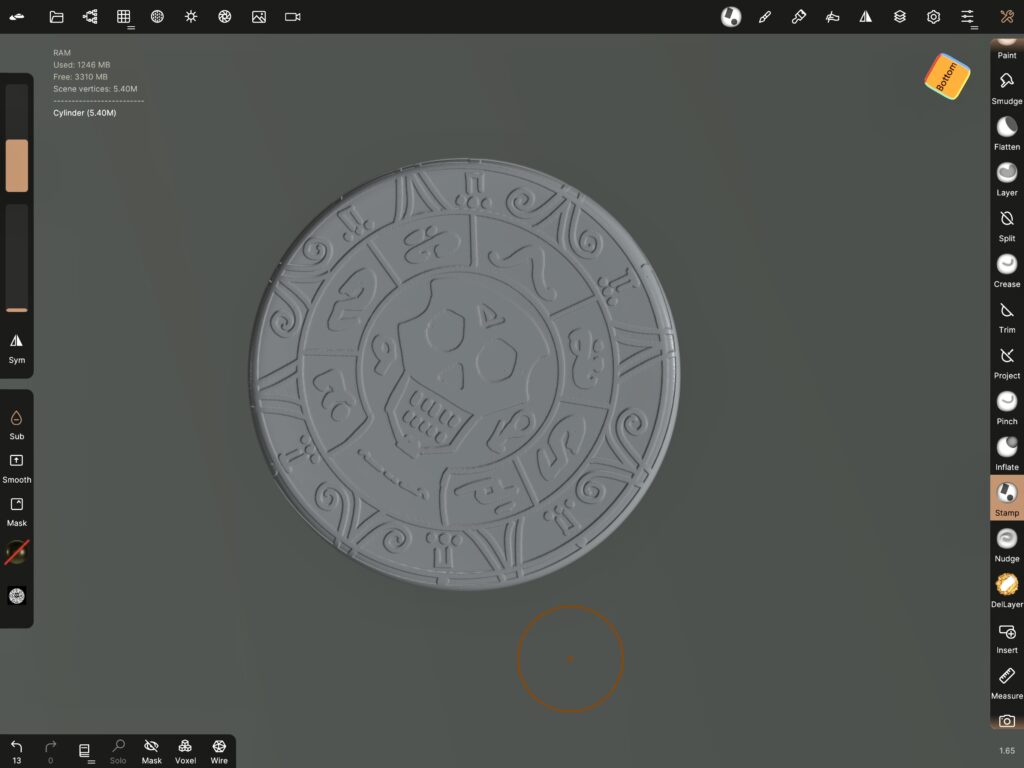
Then I tap and slide my apple pencil on the surface until it looks something like this.
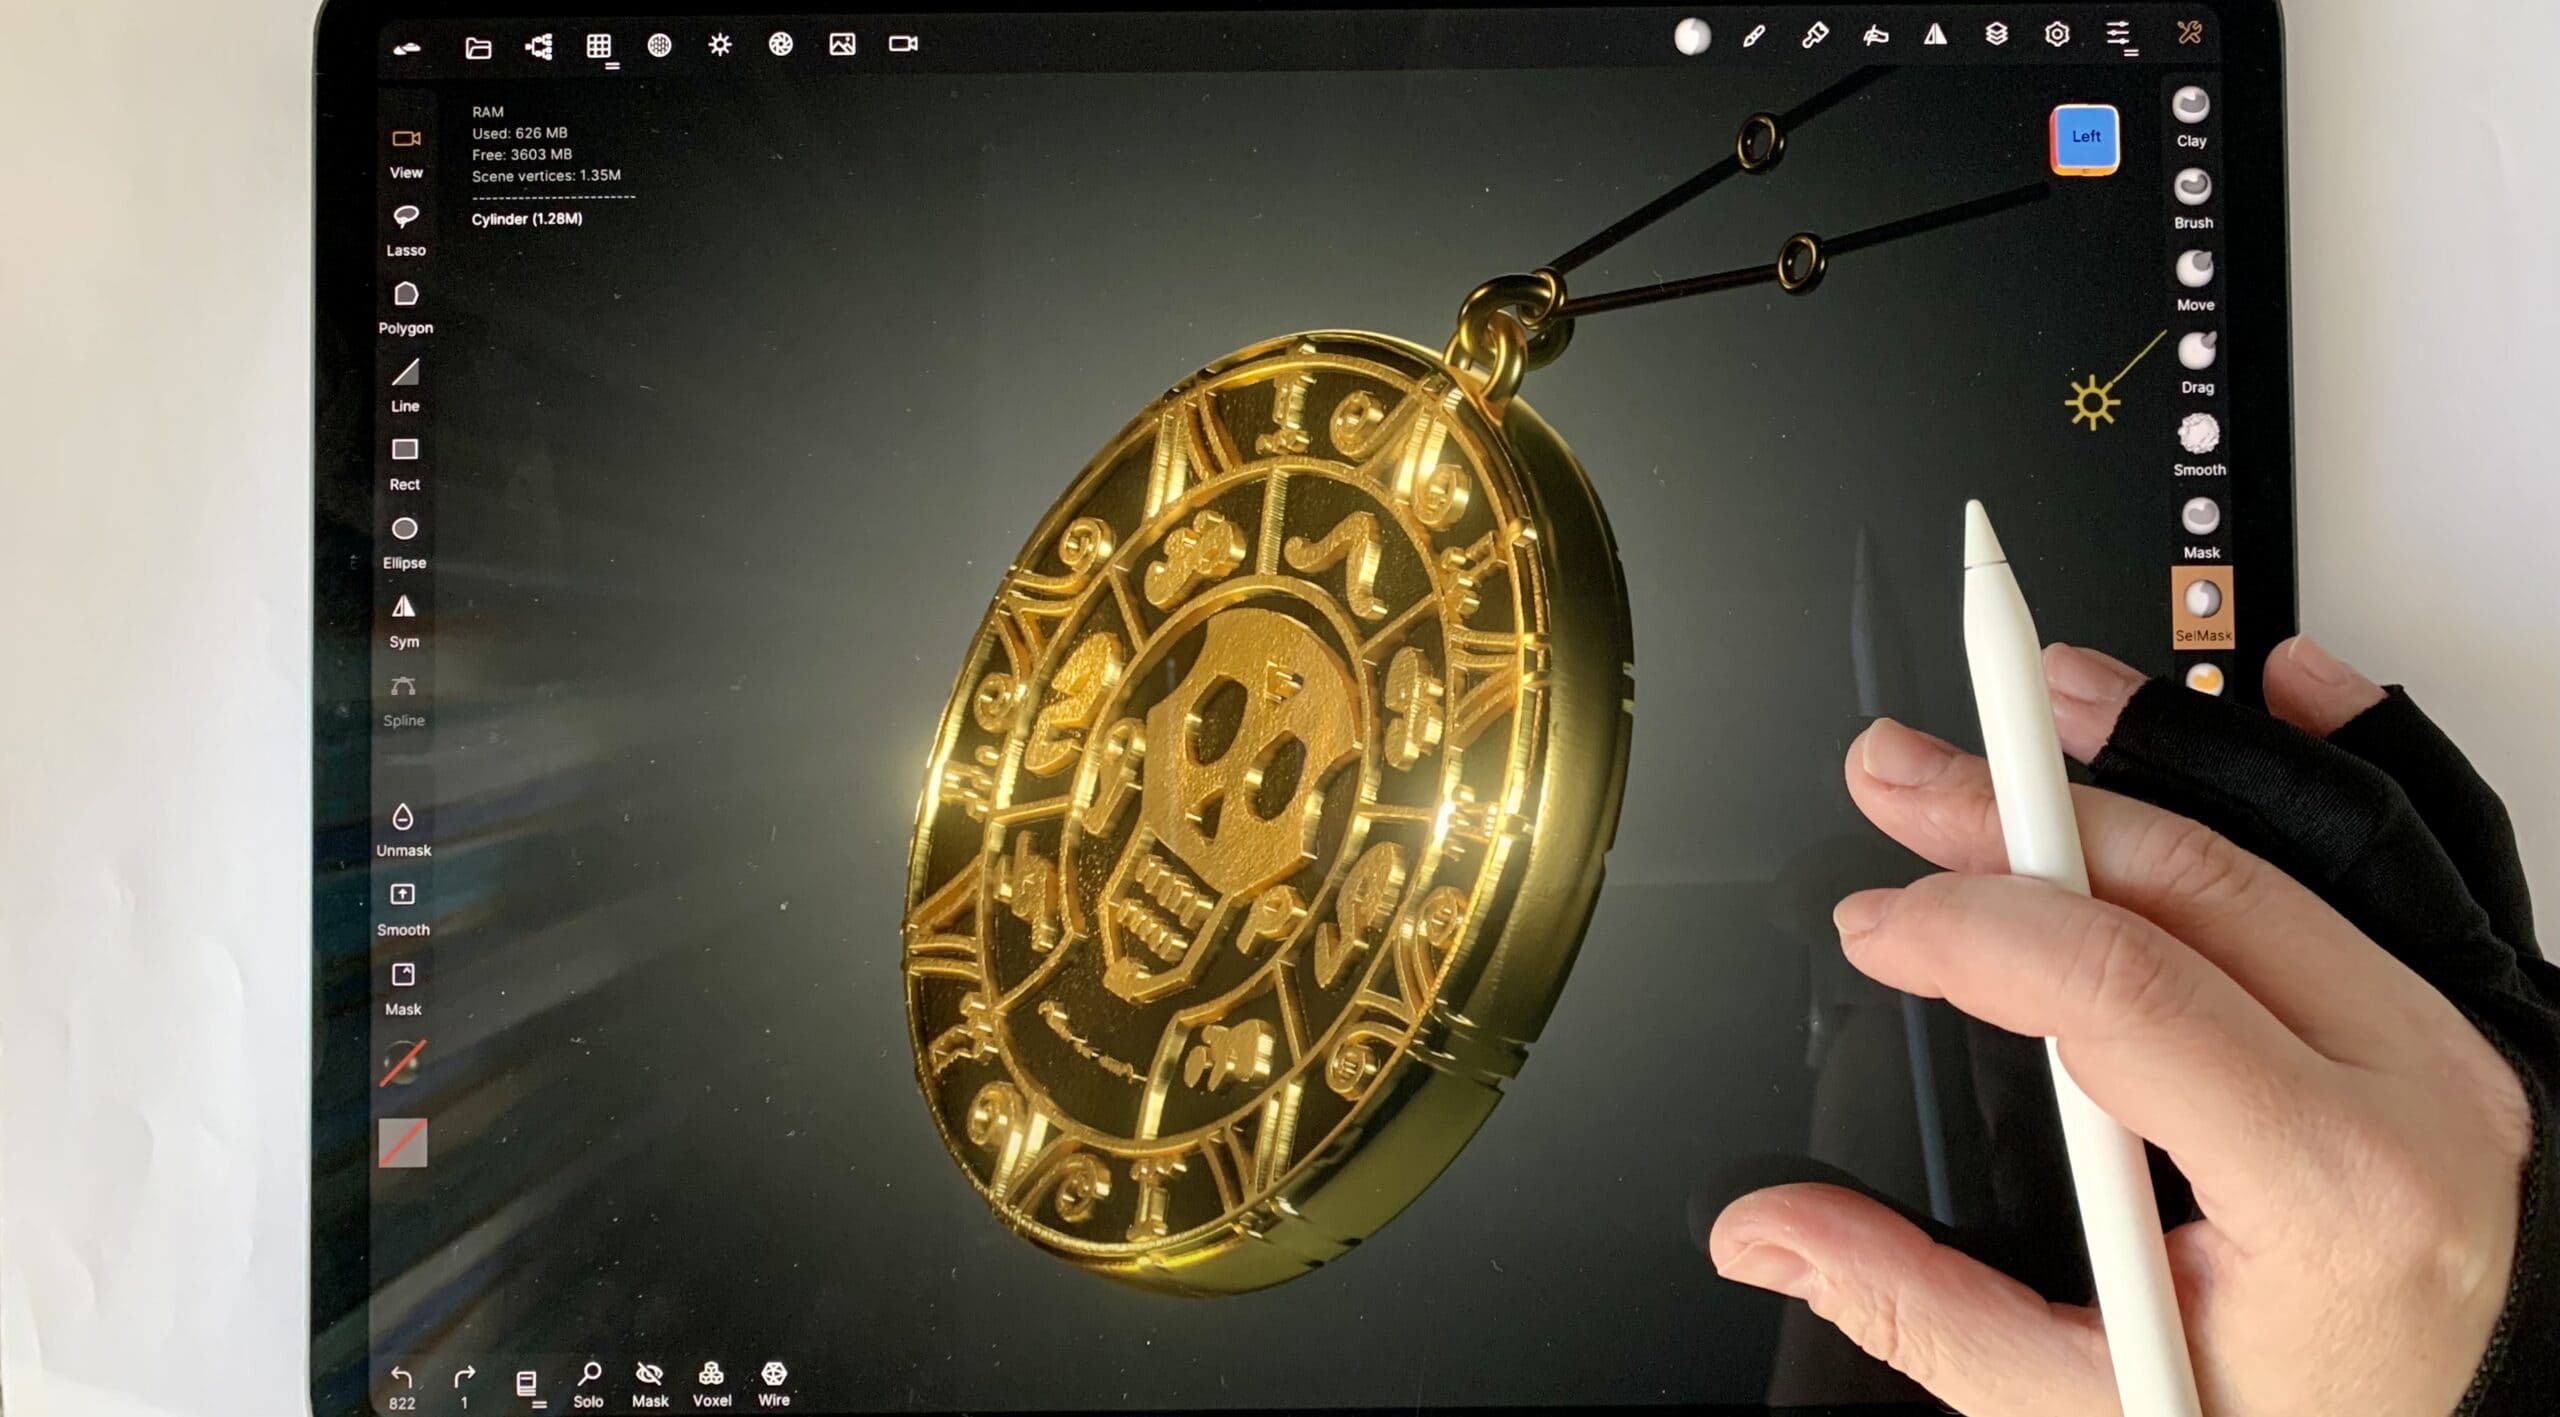
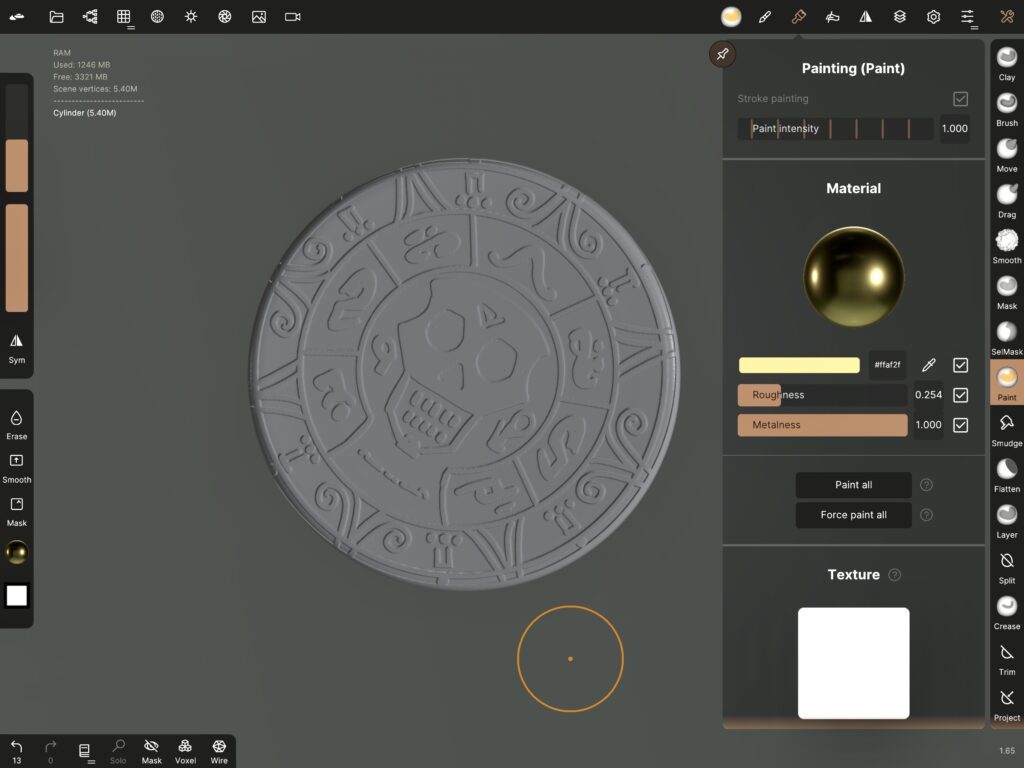
And basically that’s all. All I have to do now is paint the ”high” points with a light golden color, and the “low” points with a dark metallic color.
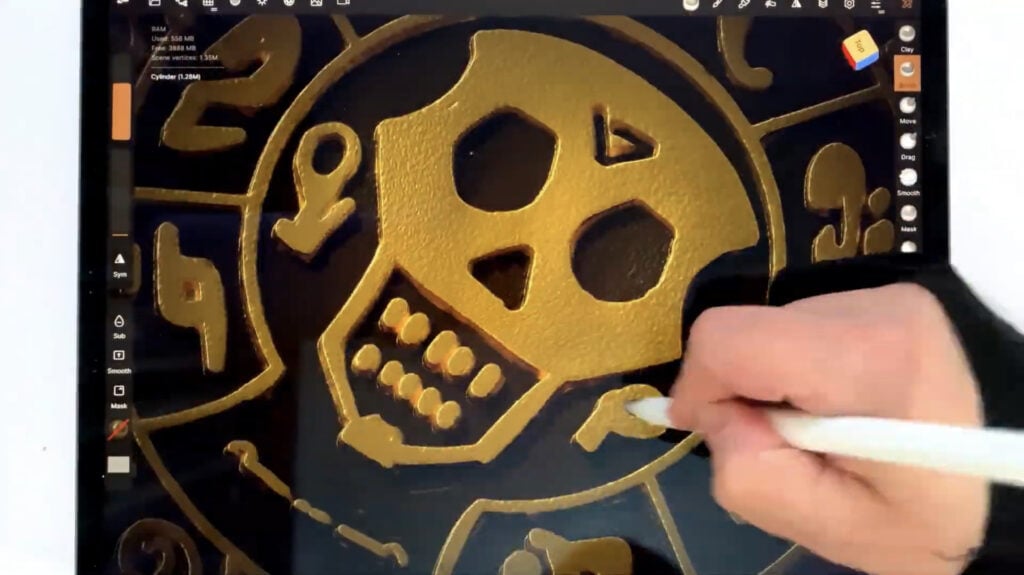
Truth to be told, I also add a couple more elements, the rings and the chain, and a lot of dramatic lighting. But these are optional and beyond the aims of this tutorial. However, let me know if you’d like to give them a go, and I will sure help out! Happy sculpting!
 Art discussion
 The future of Art (or why AI won’t take over)
 Colored Pencils
 My 5 top High End Artist Grade Colored Pencils
 Acrylic Markers
 Ohuhu Acrylic Markers Review
 Colored Pencils
 Woomer Art Colored Pencils Review
 Graphite
 Staedtler Mars Lumograph Black Review
 Arrtx
Arrtx
2 Responses
Hello! This tutorial was great thanks heaps. I am wondering if there would be a way to add notches on the outside of the medallion? Like on a coin.
Thank you William! Yes, you can add notches. You can watch this video: https://youtu.be/ZZgc2k9EQ2M?si=aTcumxysVZgIm3k- at 5:22 I show how to add indentations on the outside. I use a standard nomad brush. If there’s something you don’t quite understand, please don’t hesitate to ask!